Wednesday, April 26, 2017

Celestial Lions Kill Team (Part 6)

This model was the very first model that I ever tried this paint scheme on. And now he's finally finished!

Another Celestial Lion battle brother is done.

He joins his battle brothers as seen in Part 5 of this series.

He is the oldest miniature in this Kill Team, being from the late 1st edition era of the plastic/metal hybrid series. Therefore for durability's sake it's wise to pin those plastic arms into place.

First pin added.

After using the old pin-vice to drill some holes, I then inserted the brass rods, cut them down to size, and finally superglued on the arms.

Both arms pinned and glued.

Next came the pauldrons followed finally by the backpack. After some scrutiny I then set about touching up the paint job in a few spots.

The finished model.

And with that he's done... sans flocking and final protective coating, but the main model is done.

In the next part we'll get back to the Specialists that I started to work on in Part 5..

Sunday, April 23, 2017

Celestial Lions Kill Team (Part 5)

The majority of the team is now finished:

Group shot.

The 3rd ed starter set guys.

The Vedros chaps from part 2

But the work is far from done.

I still need to model up a Special Weapons trooper. I decided to magnetize the options so I could customize the load outs if I wanted to. After much cutting,hacking and scrapping I had a hole large enough to insert the rare earth magnet that I wanted to use into the arm connection on the torso.

Hole for the magnet setting. 

I did likewise with the arms however I used smaller magnets for these. After a few tries with getting the polarity aligned properly I was successful with getting all three arms fully magnetized.

Magnet arms for Grav, Melta and Plasma guns. 

I made an exception with the gun options as I wanted to use a different style flamer. I found this classic miniature on ebay. He has the classic 2nd edition style flamer that I kind of prefer over the 3rd edition (and still current) version which I thinks looks more like a pressure washer.

As delivered from ebay.
I decided not to use the base extenders on this model, and I really didn't want to remove tab, so I had to custom cut a slot into a 32mm round base. This was a tougher than one would think it would be but my persistence paid off!

Custom slot! 
Next I glued grit to the base, as is my usual preference, so as to help it adhere better after the primer coat is sprayed on. The metal flamer was thinly painted in that tan color and it was so thin that I had no desire to strip that layer off. And as you'll see the gold paint had no problem at all coating over this.

Bases are prepped.
Miniatures primed gold.
And the models are prepped for full painting after priming them both with Krylon 18k Gold Plate spray paint. We'll see their continuing progress in a future installment of this series.


Wednesday, April 19, 2017

Celestial Lions Kill Team (Part 4)

Work continues, albeit slowly, on these models.

I still say they look cool without the shoulder pads.
The biggest challenge has been hand painting the Chapter Icon onto their shoulder pad. My first attempts had dreadful results. Ultimately I decided the best step at artistic redemption would be to resort to the utilization of stencils. It's easy enough to find blank stencil material, I found this brand at Walmart but it's available  at most places that have a craft department.

Blank stencil film. 
With that material in hand I referred to my Original sketches and began freehand sketching the icon I wanted in my sketchbook. I did this with a Micron and sketched until I created the image I was pleased with and at the right proportion.

Sketch madness.
After that I stenciled over the areas I had already attempted to paint free-hand. After touching them up I was fairly satisfied with the results.

My first stencil results

Each one is unique, though they are quite similar. I like to think that maybe each marine, as a form of devotion, hand painted their icon onto their armor. Or maybe we can say that they have had to touch up their armor after being on a lengthy campaign?

With Teeth.
I am mostly happy with these results. Adding the lion teeth to the icon really brought the whole thing together and I was glad to have decided not to go the mono-color route.

Assigning of the paldrons.

Next I applied the 'up arrow' Tactical symbol to their shoulder pads. I then painted over these using Folk Art English Mustard. The white was just way too intense and the one piece of art I could find showed that their squad badges conformed to the color of their chapter symbol on the opposite shoulder paildron.

The final assembly begins...

Some of these guys are all but done, and I look forward to showing you the completed Celestial Lion Kill Team soon!


Sunday, April 16, 2017

Kill Team 4-Way


Death Watch Ambush the Eldar.
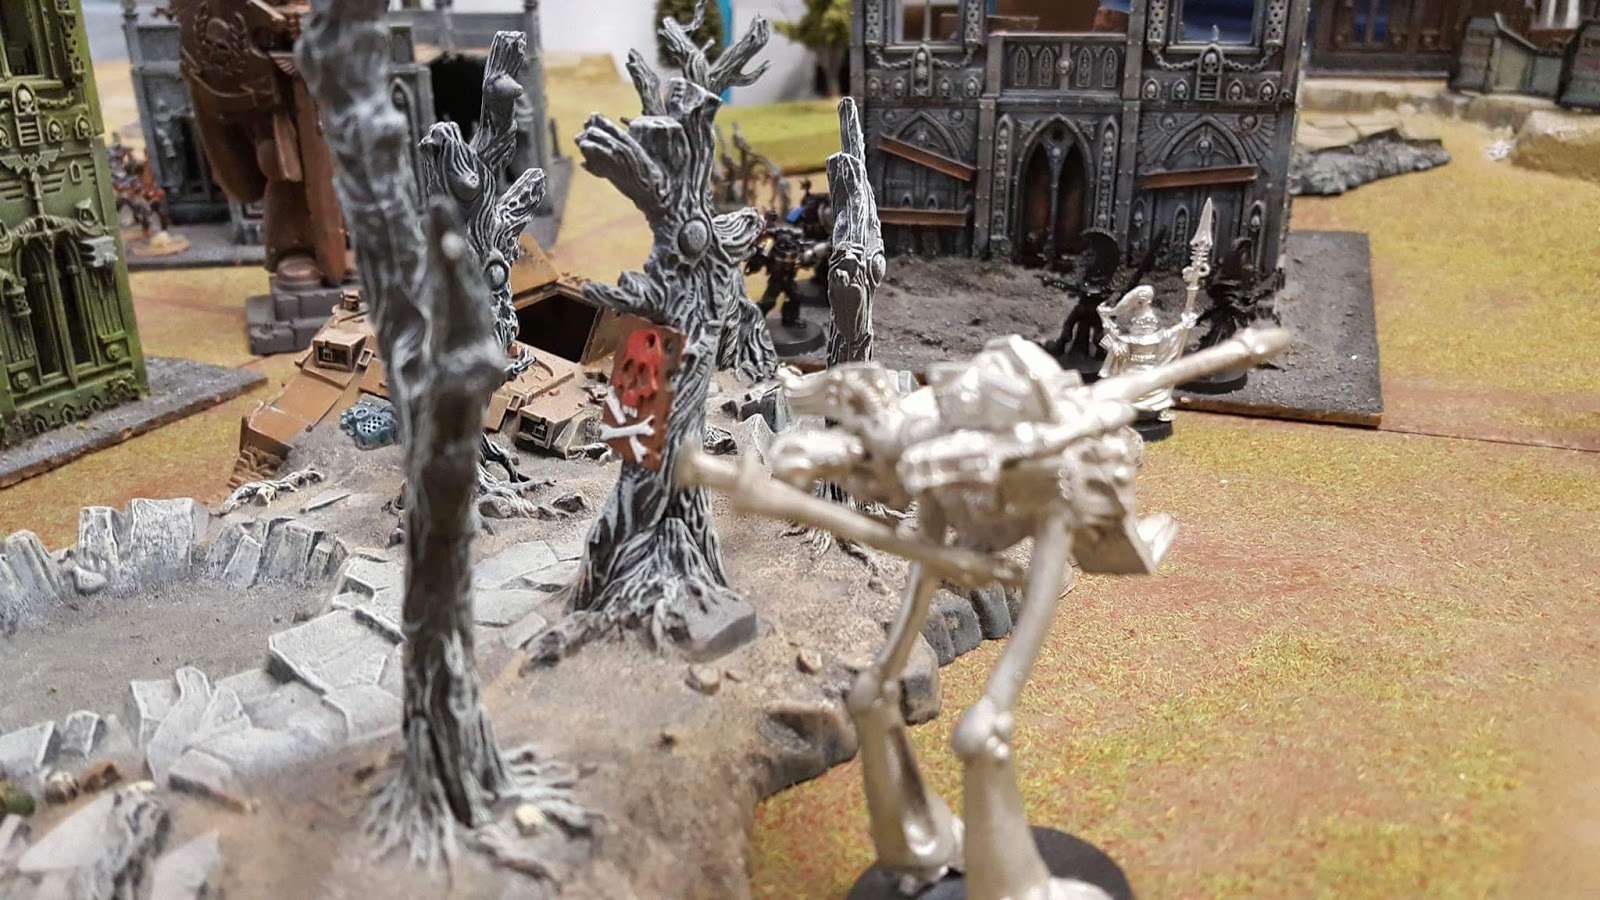
 Greetings.
On April 1st of this year I managed to get another Saturday night free to go play at the local Hobbytown USA where The Bob, Screech and I began organizing a Kill Team game. A new guy, Daniel, appeared and, although he originally wanted to just watch a game being played, we convinced him to join in and play. Bob let him use his Death Watch Kill Team, while Bob played Craftworld Eldar, Screech fielded Imperial Guard and I played my Dark Eldar Kabalites . The goal was to have many people within 2" of the big space marine statue in the center of the board.

Once again my camera was down until the end of Turn 2 and with this much action going on this will mostly be a highlights style of report:

Hunter of walkers
The Most Epic First Blood Award (and that I have ever seen in a Kill Team game) must go to Bob's warwalker. He fired a Bright lance into one of Screech's IG Sentinels and it exploded quite brilliantly and with a huge explosion radius. With this one shot half of Screech's force had been incinerated.

Purge'n xenos

After an ineffective 1st turn for my Dark Eldar, the Death Watch shot back. Apparently a reaping volley at the two marines in the above pic got their attention and they killed the Splinter Cannon carrying Kabalite for her attempted murder.


The desolation of Screech.
Screech tried to recover, and he did so by sniping my Leader out of the game! Turn 2 started with Bob's Warwalker blowing away the other IG Sentinel. With a few more models removed by Bob's Eldar, the IG were the first team to be Broken!

"I thought we were fast?"
My Turn was an exercise in frustration as my rolls for moving through Rougb Terrain were hilariously bad. Followed by my really low Run rolls (even with the Fleet rerolls).

By end of Turn 2 the Death Watch had encountered the Eldar for the first time as the Kill Teams all began to converge upon the Imperial statue.

The fight for the prize begins.
With all the shooting back and forth between these Kill Teams it was the Death Watch that had the best Turn 3 as they managed to put the Ceaftworlders into Broken status.

"Break'n the xenos, break'n the xenos!"
By the end of Turn 3 the IG were down to just 2 guys:  The Sergeant and a Trooper. The Sgt was hiding in the ruins nearest to the statue. My Dark Eldar were about to reach it when,  from the ruins, a single frag grenade appeared and landed at their feet and killed them! The Dark Eldar vowed to torture this Monkeigh fool!

 When Turn 4 arrived it would be the Eldar showing the Death Watch what True Ultimate Power really is (cue sweet guitar solo) when they slew the Death Watch Leader! This was paricularly important as he had the best chances of bringing down that accursed War Walker with his grenades.

The War Walker collecting more tears...


With all their efforts to move closer to the objective, my Dark Eldar would forget to shoot at that IG Sgt. This act would come back to haunt them...

The Dark Kin. 
Meanwhile the fight between the Death Watch and the Craftworld Eldar was getting more and more bloody...

A duel to the death.

Ultimately the Eldar would prevail and dive into the cover of the blown out Rhino and craters. On my turn I had the Blaster carrying Warrior shoit at the War Walker. Ir was a glorious shot and it woild have penetrated it's armor if not the powerfield absorbing ans disipating it's energy.

The Dark Eldar blaster geta the War Walker's attention.

That annoying IG Sgt (that I had -somehow- forgotten about) jumps out of cover and charges one of the Kabalite Warriors and defeats her in close combat! His other lonely guardsman snipped and killed the Eldar leader.

"Touche!"
Final Turn, and it's all about that statue. The IG Sgt attempted to kill more Dark Eldar only to be killed for his efforts. The Blaster Warrior struck the war walker only to again have his penetrating hit nullified by it's power field.


The Dark Eldar and Death Watch attempts to rid the battlefield of the War Walker were all in vain, as it stomped ever closer to the middle to support the survivors of the Eldar Kill Team.


Screech's lone guardsman took a shot at the only target he could see, a Death Watch marine, but he failed to make the kill. He crept back into the shadows, alone with his sinful treachery....

The IG sole survivor, takes a treacherous shot at the Death Watch!

At the end of Turn 6 the game ended abruptly.

Here's how everything tallied out:

The Craftworld Eldar earned 4 VPs by achieving the First Blood, Slay Leader (Death Watch ), Breaking the Imperial Guard and the Death Watch Kill Teams and 1 point for having one model on the objective statue by the end if the game.

The Imperial Guard, in spite of their fiery first turn casualties, wracked up 3 VPs. 1 point for Breaking the Dark Eldar and 2 more points for kill the Dark Eldar and Craftworld Eldar Leaders.

The Death Watch only earned 1 VP for breaking the Craftworld Eldar. For his first game Daniel did surprisingly good and came with a head full of knowledge from reading and studying these rules. Heck, there was a few tines when he was correcting OUR mistakes! So well done, and we hope to play again with him soon!

And the Dark Eldar tallyed up 3 VPs. All 3 where acquired by having 3 models on the objective.

So the Craftworld Eldar rule the day! But regardless of the outcome all of us had a blast and it was a very fun game!


Wednesday, April 12, 2017

The Fem Fa'Tau Anniversary model

Greetings!


"Anniversary model" probably got many of you wondering what I mean by that, but quite simply it is Da Masta Cheef and Wolfy's 1st wedding Anniversary and I painted up a model for them to mark the occasion.

Packaging with the parts.

This particular model I stumbled upon while scouring ebay. I had never heard of Grim Skull Miniatures before, although I have seen their Coven Limos I didn't know who produced them. They have a number of alternate 40K characters and archetypes, the bulk of which are female. Some, like this piece, are totally cheesecake and are ment more for fun than play.

Prepping. 

First off, let me state that the quality of this model is amazing. Very, very little flash had to be removed. Absolutely no mold lines. All the pieces fit perfectly and there was no need at all to fill any gaps. There was no warping either. I promise you if this thing had been produced in Finecast the gun would have been as straight as a Frito. If I graded miniatures this would get a solid A+.

Once I got the miniature prepped I primed it black using Chaos Black.

Primed.

After exploring Da Cheef's blog (always a fun thing to do) this image was the best example of a Fem Fa'Tau color scheme:

Cheef's Fem FaTau paint scheme. 
I had to let Cheef in on the secret so after a few text messages I had the necessary paints gathered up. Xerxes Purple probably being the most crucial.


I followed Warhammer TV's 'painting Tau flesh' tutorial (there are actually 2 on YouTube) as I had never painted Tau flesh before. Amazingly I had all the recommended colors.

The Fang basecoat.
It started with a basecoat of The Fang, followedby a wash of Agrax Earthshade, then a layer of Fenrisian Grey and I highlighted this with Russ Grey.

Progess on the flesh
It was all coming together surprisingly fast. I decided to treat her legging like stockings or pantyhose. To achieve this look I left the basecoat color but applied a few layers of Nuln Black until I liked the look of it.

Progress shot of all the bits.
After further correspondence with Da Cheef regarding the appropriate colors for the drone, I was able to get a close enough match.

The finished base.
The purple armor was done by painting all the purple bitz with Xerxes Purple but I wanted a bit more depth so I applied Beaten Purple by Formula P3 into the grooves. I was quite happy with this result.


After I finished the hair, and a few other minor parts, the models was done!


So when they returned from their late honeymoon Son of Neverness and I made a stop by their place and presented this miniature and I am happy to report that Wolfy was pleasantly surprised! Special thanks to the Da Cheef for playing along with keeping the secret and assisting me with the paint selection. (I think he was surprised at my turn-around time on painting this thing).


Hopefully we'll see more painted Fem Fa'Tau in the future, right Cheef?  ;)

Saturday, April 08, 2017

Kill Team Genestealers (Part 2)

When Kill Team was released in the Fall of 2016 the first Kill Team that I attempted to assemble was a Genestealers themed one using Codex Tyranids. However, I decided that the two styles of models didn't work well together after all and chose to work just with the older models. Only I have been unable to locate my old running Patriarch model. Just can't seem to locate him. Been searching for that damned fiend for months and have uncovered all kinds of nearly forgotten minis in the Neverness Archives in the meanwhile, yet that Patriarch model elludes me.

Not only was I frustrated by that event (or lack thereof), but Codex Genestealer Cult came out shortly after that and I wanted to wait until I owned that book before proceeding any further. And now I finally have that tome and I am confronted by all the tastey options within it!

But that's not the point of this post. Instead I am going to show my attempt at reviving a very old paint scheme.

The Genestealers I painted back in the '90s were painted with just a handful of paints. Most of which were out of the Space Marine Paint Set that was available at the time. I did not prime these early models so the paint went straight onto the blue plastic. I used the darker base color for the Ultramarines for the main body and Terracotta, the Blood Angel base, for the ribby bits. On the blue I painted Shadow Grey (the Space Wolves base color) and on top of that with Space Wolf Grey highlights. On the Terracotta I used a Purple Ink to make it a deep purple with a Worm Purple highlight. Fairly quick, fairly simple.

Base Coat.
First thing that's different is that I primed the model with Chaos Black. Then as I got into the basecoating stage I discovered that the Terracotta was dried up. I used the closest analog I had on hand and that is Apple Barrel Indian Red. It's a bit more red that the Terracotta, but should work. Next, I discovered that my Purple Ink is gone as well. I tried Druchii Violet, but it's too thin to pull off the transformative effect that I got with the Purple Ink.

Mid coats.
The midcoat was done with Shadow Grey over the blue. The newer versions of this color aren't quite as blue as the original from the early '90's and is a bit greyer. I painted Worm Purple, another color that I bought around '92 just to paint Genestealers,  over the Indian Red.

Highlights. 
Next came the highlights. I still have some of the original Space Wolf Grey and it still works well? I applied a thin layer of it first and used a thicker portion on the higher edges. For the purple I added a dab of White Scar to the Worm Purple and dry brushed this over the purple.

Claws and spots painted up to white.
Mixed up some brown with Bleached Bone to get a good coat over the dark brown on the claws. I worked Bleached Bone with White Scar in layers until I added the final highlight of White Scar.

Rear view showing the back side details. 
Here is it next to it's older cousin. Not a perfect match, but pretty darn close. And no, I will not be adding the yellow 'hive fleet' markings on the head of my newer painted Genestealers.

Comparing the old with the new.
It's close but I think I prefer the "bluer" look on the older mini. So I will attempt this again on another model...

Ultramarine Blue  basecoat.

This time I switched out the dark blue with Ultramarine Blue. Everything else started off the same as before, but when I got to the midcoat on the purple areas I finally had recalled that back in '90s I used to put Worm Purple over the Terracotta prior to applying the Purple Ink.  In this case it's going over Indian Red and this is what that looks like prior to the inks:

Worm Purple over Indian Red.
Everything else was like the previous example and here we have the finished model:

Finished! 
And there we have it, I matched the original model's "blue" carapace. Still I'm pleased with the first example and I may just do a few more like that just to break up the monotony.

Rear.
I decided while painting the second model that I wanted the base to be dark "industrial" color that would look OK on a Space Hulk board or a cityscape table. I am pleased with how this had turned out and I hope to do more with these xenos fiends. Hopefully I will find that Patriarch mini soon!

Friends share the bio-mass.