Sunday, May 31, 2015

Chasing Cypher


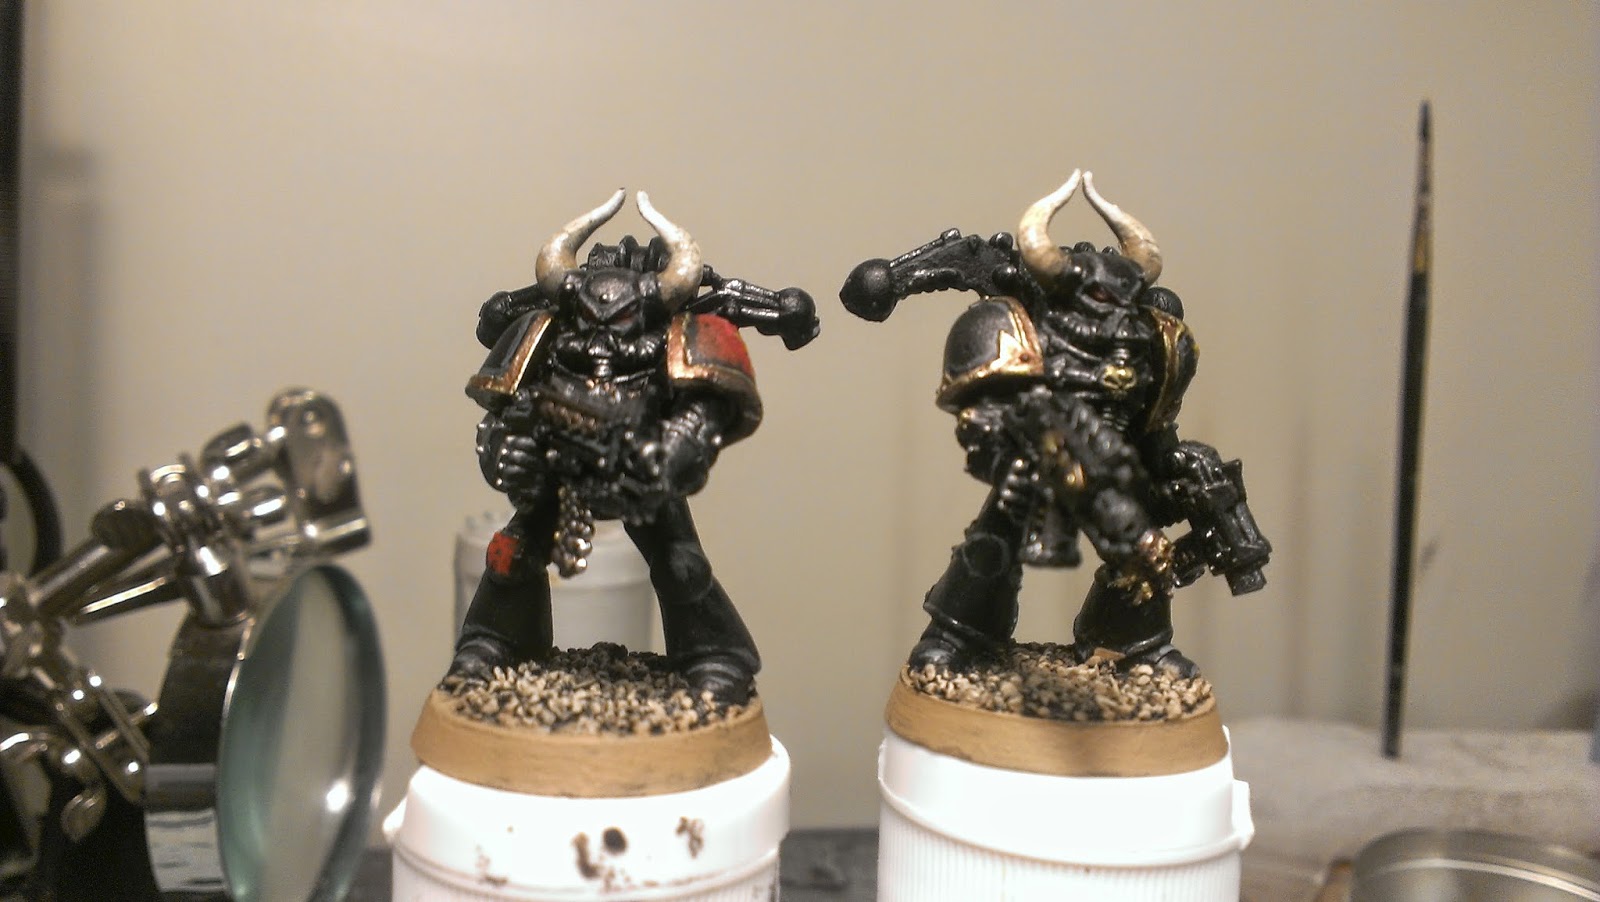
When Bob and I agreed to finally play a game together, we decided to play 40K as his Dark Angels haven't hit a gaming table in many moons. I was going to play the same list that I used against Bryan's khorne Daemonkin but after some consideration, I thought it might be a lot of fun to finally play a game with Cypher. I painted Cypher way back in '99 and even entered him the Golden Daemon painting competition that year (none of my models made the first cut, but it was still very fun!). So he was over-due to see action. After reviewing the Dataslate, and making the adjustments to my list, I was ready to give Bob a game we would both remember.


The field is set, the zones divided.
When I told Bob that he was going to be facing Cypher, he was very excited! It would be a game his Dark Angels were destined to play! So we set up the table and then rolled on the Cypher Dataslate's Alter of War table. We got the mission A Hidden Presence. In this mission Cypher begins the game hidden in one of my Troops units. There are three Primary Objective markers, one in the middle, one in the two opposing zones opposite of our deployment areas. My mission is to get Cypher off of the enemy board edge. After we rolled off, Bob chose the zone with the trench line, which Cypher would have to cross to escape. 

This was not going to be easy! 

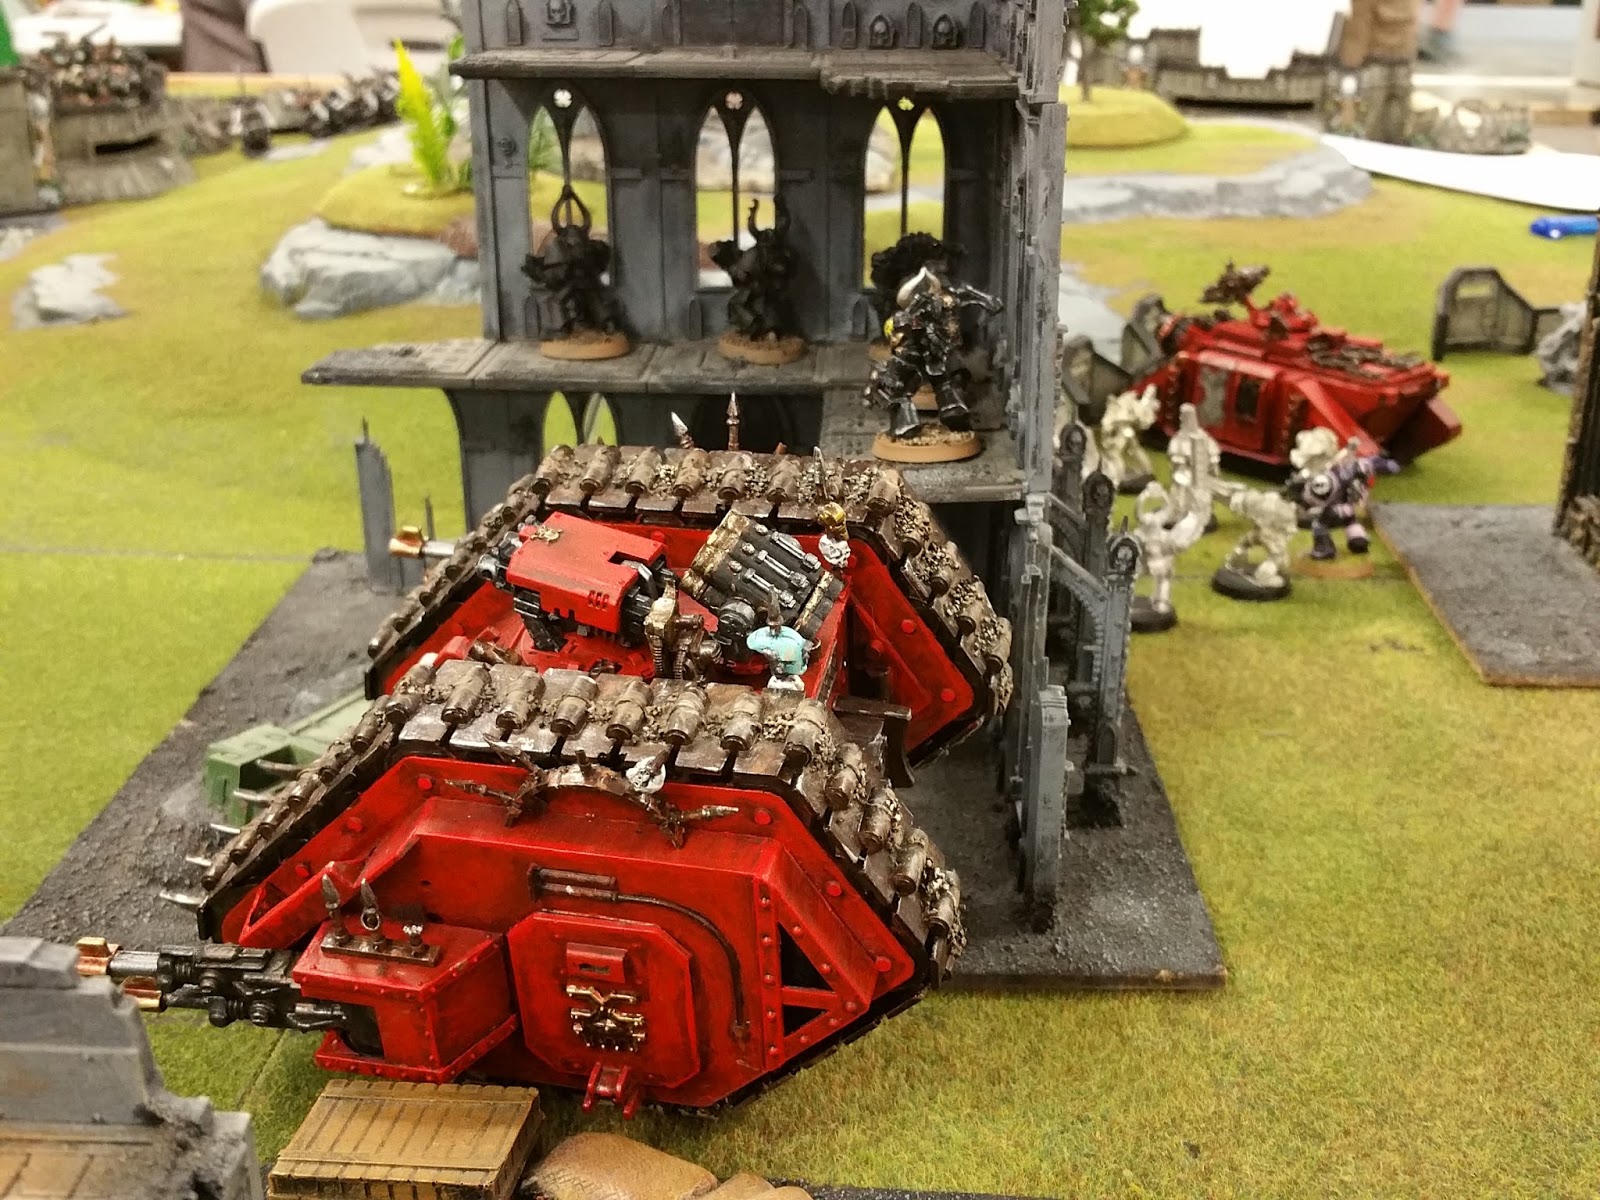
I deployed Cypher (secretly) in with the Black Legion unit that I placed in the ruins (behind the Land Raider in the pic below).

While the rest of my army will be focused on taking the other two objectives and meeting the Dark Angels head-on. That's how it was going to work in my head anyway...

Chaos Deployment
 Bob's deployment appeared very focused with equal part defense and offence.


Dark Angels deploy, Deathwing wait in Reserve.


Eye-balling each other through 'No-man's land'. 

Getting the first turn, Bob rushed the Ravenwing straight at his closest objective.
"Objective secure!"

However his first turn shooting didn't net any casualties. This was good for the Chaos ego as my first turn began. I moved the Landraider out and took some shots at the squad on top of the bunker killing at least one of them. I rushed the chaos bikes at the Ravenwing, unloading everything I had, however that effort failed to kill anything. My vindicator on the other hand pasted one of them. They were too far for me to declare any charges.

Turn 2 begins, and woe, the Deathwing arrived! The DW Knights, thankfully, scattered and landed on the bunker, one squad had a mishap and went back into reserve while another squad landed on an objective on my side of the board.

After all the fire-power they sent at me, I managed to only lose one Black Legionnaire, but my Warlord in terminator armor, who was striding out in front, took a wound.

"We have arrived!"
My bikers entered into a duel with the Ravenwing, who killed off half of my squad with shooting!


 However, after declaring a charge, they rolled snake-eyes on their charge distance! Oops!


On my Turn 2, I closed the gap with my bikers and whittled the Ravenwing down a bit more, before charging into the fray.

...however they used Hit and Run to back up and set up another round of shooting and assault against my unit, which was now down to just two models, having just lost the champion!


Meanwhile, on the other front, I was making a series of critical errors that would cost me the game. I moved the Land Raider up to be within Dirge Caster range of the Deathwing. Only that I chose to keep the Khorne Berserkers at bay within the Land Raider. I knew another Deathwing Squad was due to show up next round and those DW Knights (the Sgt of whom, along with another knight, I just killed with a well placed Vindicator shot!) all had the fire power to cut down my Berserkers from afar. So I moved the Black Legion up to shoot up the Deathwing. I also revealed Cypher so that I could use his firepower. The mistake here wasn't the reveal of Cypher, or leaving him in the unit, it was using Rapid Fire on a unit I had intended to charge! I didn't realize my mistake until the assault phase, and by then it was just too late!


Turn 3, and the Ravenwing, which I had done a great job chewing down, finally vanquished the Chaos Bikers, and they were now looking down the field at my Vindicator's rear side!

Time to die...
 Speaking of vanquishing, if you haven't seen what Deathwing Knights can do to a Landraider yet, then behold what just three of them can do:

The 2nd DW squad arrives, the knights set up their charge...
"It's like cracking open an egg!"
 The Landraider didn't have a hope! Amazingly, I only lost a single Berserker in that explosion!

You might also be able to tell that my Black Legion unit, featuring Cypher, was shot up really good by the other Deathwing squad, who was also joined by the 2nd Deathwing squad. The Deathwing have the Fallen in their sights, and it was now a very determined battle to catch Cypher!

On my Turn 3, I decided the biggest threat were those Deathwing Knights. Ignoring the Ravenwing bikers I fired the Vindicator at them, as well as had the Mark of Slaanesh Chaos Space Marines fire on them,

Cypher, making his escape, also fired into the unit as did the Berserkers. So by the time my whole freaking army pretty much opened up on those three knights, my Berserkers only had two that they had to kill in close combat! 

And killing is what they did!
 It was sick to see just how much dice this unit could throw down! Normally by the time my Berserkers can get into combat they have been whittled down quite a bit, so this was the first time I could see the full fury they can produce.

The other close combat involved my Warlord and the remaining Black Legion. In the previous assault my Warlord killed the Deathwing Sgt with the Murdersword and received the Chaos Gift that makes him poisonous. That last DW terminator just wasn't going down easily however, and this combat would last for a few player turns.


Turn 4, and Cypher was now quite exposed. The Dark Angels all left their cover and made their move towards him, with one unit working their way towards the Chaos Marines in the middle of the board.

As predicted the Ravenwing shot the Vindicator in the ass, blowing it up like a fireworks display.

"And it was good!" -The Bob
Having witnessed the murder of the DW Knights at the bloody hands of the Khorne Berskers, the Deathwing charged them to deny them their extra charge bonus. The Berserkers had lost a hand full of models to shooting and where now quite a bit vulnerable, but I knew this would happen, I just needed them to stand in the way of the Deathwing to allow Cypher to escape.

 On my turn, the Chaos Marines shot and charged the marines in the ruins. I managed to kill a few, but the Dark Angels held firm, and wiped out the Chaos Marines.

Meanwhile the Warlord and Khorne Apsiring Champion tried to support the Khorne berserkers but it was a fruitless effort. The Berkserkers were smashed by the fury of the DW powerfists.


On turn Five, the Dark Angels on the hill took the objective, and the other unit sought to gun down Cypher. Combined with the Ravenwing, they actually managed to knock 2 wounds off of him! I had to get Cypher to that trenchline as soon as possible!

The noose tightens...
 Luckily the Dark Angels botched a charge attempt on Cypher, losing another man to an Overwatch shot. On my turn, Cypher took out their plasma gunner with a plasma pistol shot before jumping into the safety of the trench.

The Chaos Warlord, now standing alone against a Deathwing Sgt and Deathwing Terminator, unfortunately had his luck run out and was defeated.


If you're keeping count, you'll notice that I am effectively tabled at this point. I only have Cypher left!


Only the Ravenwing and those 2 Deathwing Terminators could shoot at Cypher, and they did, and he was fine. They then charged. The Deathwing Shrugged off the Overwatch shots, but the DW Sgt was brought down by Cypher's plasma pistol in combat. The Ravenwing didn't take him out, but the surviving Deathwing Terminator did, and with a zealous fury, caught the accursed Fallen!!!

No where to run!
++++++++++++++++++++++++++++++++++++++++++++++++++++++++++++++++

Aftermath:

Yeah, I was tabled, but I had so much fun with this game that I didn't care about whether I won or lost. Just trying to get Cypher off the table was the trick, and it was a tough trick to pull off. Even if I had escaped that close combat, there was a squad of Dark Angels now in the way...

I like how the Dark Angels get 'Zealot' when they face Cypher, and it really does make them a vastly superior fighting force than when you face them under normal circumstances. 

Cypher looks great on paper, but in practice, not having an invulnerable save make him easy to catch. Despite what he can dish out in combat, it's best to keep him away from an assault. Yeah, he's Shrouded from shooting, and that helps.

What might have helped me would be if I had remembered that my vehicles have Warpflame Gargoyles! Yes, my face-palm could be heard in three States when I realized this earlier as I was typing all this up! LOL -All well, it didn't matter at all in the last game I had them anyway. Perhaps it's time for me to invest in some of those cool flame counters that I see people using?

So again, we both had a blast, and with Bob heading overseas for a few months this game should serve as a grand send-off for him. I hope when he returns we can find time to play another Cypher scenario! 

Check out Bob's take on this event here: 


Friday, May 29, 2015

Bolt Action: British Infantry (part one)

Progressing along nicely, but slowly, my British Infantry for Bolt Action are finally getting some color on them! I used Tamiya Acrylic spray paint as a primer for these models. Turns out that this was a brilliant idea, as it made for a fantastic base with which to build up my color pallet on. Great for the uniform colors, the guns, gear and flesh.


As with the PIAT Team, which by the way, I am painting at the same time as the rest of these blighters, I started with the Tamiya brown base and then I went back and applied a dark brown to the areas where the Tamiya spray just didn't catch. I then paint the bases so as not to have to do any touch-ups when I mess up the actual model on the final steps.


But before I get rolling with the initial paint job, it is essential for me to get the eyes right when I paint humans (or humanoids). Now, some people really agonize over this step and they do it far more painfully and passionately than I do. Yeah, it's great to add a bit of color to the irises, and kudos to you it you manage to do so, but rarely do I see results that look "right" to me.

Typically I just white the whole, sometimes over black to get an "eye-liner" type effect, and put in a dot of black for the iris. I used to do this with a brush, but I often failed to get both eyes consistent with each other on the first go and often had to redo the whole thing, so in later years I have found success with using a micron.


A magnifying glass can be your friend here, and really, if you're painting models at this scale you should seriously own one. So once I am satisfied with the eyes I then get to work on the rest of the face.

Now, these models are a lot further along then these pics show, I just wanted this first post to focus on these beginning steps as both a reminder for myself and as a possible guide for others. The next post in this series I will show you where these guys are at right now. And who knows, as far behind as I am on posts, there may even be a Bolt Action Battle Report in the next few weeks ('ey, it could happen!).

Monday, May 25, 2015

Pods to drop...part 13

Damn! It has been a year and half since I last touched this thread. The last post on the matter was sort of near the start of a transitional period in my life (job changes, moves, matters of the heart, etc.) During this period I focused very little on the Space Wolves in 40K,  but instead focused on a strange variety of models and armies. The Space Wolves have been, sadly, neglected. However, as I type this I am in the middle of another transitional period: I have started a new job. This new job had me go off and train in another city for two weeks. I wanted to take the Portable Neverness Kit out on the road with me again and with it, an easy to work on model. Looking through my options I found my 2nd Drop Pod which has been untouched since part-11 of this thread.

I didn't get much done, but in this model's case, a little equals a lot!

Not pictured, I finished painting the mid-tones and top layer colors on the outside hull of the drop pod. The only thing left to do is the highlights.

Next, with a pencil, I drew out the lines for the interior door strips. I have been very please with how this turned out on my 1st drop pod, and I think it looks very dynamic on the battlefield when it is deployed. So I will repeat this on my my drop pods.

The Fiery Orange stripes.
After I filled in the lines, I painted in the stripes with Fiery Orange 1st, before solidifying my line work with the next stripe which was done using Chaos Black.

The 1st yellow coat.
 I added additional layers of yellow until I was happy with it, and then I went back and really tightened up my line work. Oddly, I don't have a picture of their current state, but I can say that they look better that what you see in the above pics.

After finishing it, I decided to tinker with the door assembly and found that I needed to work on the doors or else I would be a victim of 'Problem #3'. According to an article on Bell of Lost Souls called drop-pod construction essentials, (which BTW, I highly recommend you at least read though it prior to attempting to properly build this kit) if you have too much flash or mold lines on the door bottoms, they will not shut right.

Removing the flash and mold lines. 

Here's a quote from that handy article:
The third most common error is not cleaning the mold lines off of the bottom of the doors. If you don't scrape these flat then the doors will not close all the way. You might want to shave these down a little more than seems necessary because when you add paint to the door bottoms and the base of the model, the added thickness may also prevent the doors from closing or rub the paint off due to friction. This model is very carefully engineered and the clearance on the doors is extremely close.

Now that that issue is resolved, I can move on to the rest of the kit. I am at a place with it now that I think I will focus on it again once I complete the current round of Chaos models. I want to play with my Space Wolves again soon and it would be really nice to run two Drop Pods instead of just one and a bunch of Rhinos...


Saturday, May 16, 2015

Black Legion

As I stated in the chaos-bikers post, I intend to do most of my generic CSMs as the Black Legion. So I decided that before I paint up the bikers, I should probably do a few test models to see how well I like them and to settle on a paint scheme for them. You can see the results over to the left. I acquired these two models, along with the rest of their unit, from my younger brother, who in his teenage years, thought it would be cool to mix up the two basic boxed sets of Space Marines and Chaos Space Marines that were available at the time.

Back in the mid '90s GW kept a range of "cheap" smaller boxed sets on the market for each army. Some of them required assembly, and some were "push and play.snapfit" style. Regardless, they were a great way to fill out units or to get get people started with an army, especially at a price point between $9.99-$12.50.
Ah, the red...
So figuring that not all Chaos Space Marines are from the 31st Millennium, that newer traitors would have joined their ranks to fill those lost to attrition, or even that the older marines might have used newer equipment to replace the stuff that might breakdown, such as bolters or backpacks for power armor. It made sense to me, and still does. Here is what he cobbled together:

Mished and mashed.
Now, in hindsight, I think I might undo some of these conversions as I simply don't like the Imperium style backpacks on the chaos marines. They just look wimpy to me. So while I ponder what their fate will be, I picked out the two models that looked the most "chaosy" to me, and proceeded with the paint job.

There are no work in progress shots, as they were SO simple to paint that I was done with them prior to even considering it.

Before decals.
 I also got to finally put decals on something! But don't be fooled by my apparent joy on the matter, I really get frustrated with putting decals on Space Marine shoulder pads, they are just not receptive to having them applied and I find myself doing a lot of trimming and painting to touch them up.

But I like these results:

The chap on the left is a member of the "Hounds of Abbadon". I think that's what they're called, I don't have my Black Legion Codex handy to confirm it. Anyway, this sub-faction are Black Legionnaires who worship Khorne, and with my Chaos kick currently revolving around Khorne, it made sense to try out the scheme. Again, I like it. The chap on the right is just a standard Black Legionnaire. I actually think he's my favorite of the two models.


I am pleased with this test and plan to do more Black Legion models. More standard Chaos Marines, Havos, some Terminators and maybe a few odd-ball vehicles. Therefore I decided to make this another series, so stay tuned to the eventual, part two!

Monday, May 04, 2015

KHARN!!! (Feeling Khorney Part 5)

Hello again!
Since the last time I was feeling Khorney I have made quite a bit of progress on my Chaos Space Marines. In particular, I finished painting Kharn the Betrayer!

"Now I am whole!!!"
Note that I used a very simple technique on his protruding arm-vein: all I did was thin down a blue color with water and lightly applied it so that it worked in a transparent fashion over the flesh tone. I am pleased with how it turned out.
From the rear.
From the side
From the other side.
 The last thing I will do is flock his base which I will do along with the rest of the Berskers.

Progress on his friend, the standard bearer was sort of happening as well, but not too much...

Blood Red added.
...as I was distracted by this project:


That's the parts to a WH40K 2nd ed Juggernaught. After the game with Bryan's daemonkin I was really eager to get my own Warlord on Juggernaught built and battle-ready.

Note that I am trying out a different red color for the Jugger so that the rider will contrast a bit with it.  This next pic was taken as I was experimenting with a few new washes to see what I liked best.


And of course, here is my progress on the rider, who is painted in the same colors as the rest of my Khorne loonies.

Red for the red god

That's if for now, until next time!