Showing posts with label Master Of Executions. Show all posts

Monday, March 20, 2023

Worldeaters Master of Executions (Part 3)


The finished model.

And here is the finished Master of Executions. But first let's finish the WIP steps:


After some deliberation I settled on making the helm on the trophy rack a Dark Angel. My usual method of painting DAs was confounded when I discovered that my old Rotting Flesh paint has become a solid lump of plastic. Major bummer. But the lid was cracked and I guess it was a critical breach that allowed the paint to prematurely dry up. So I found a close analog in ) which I supposed will work for now. 

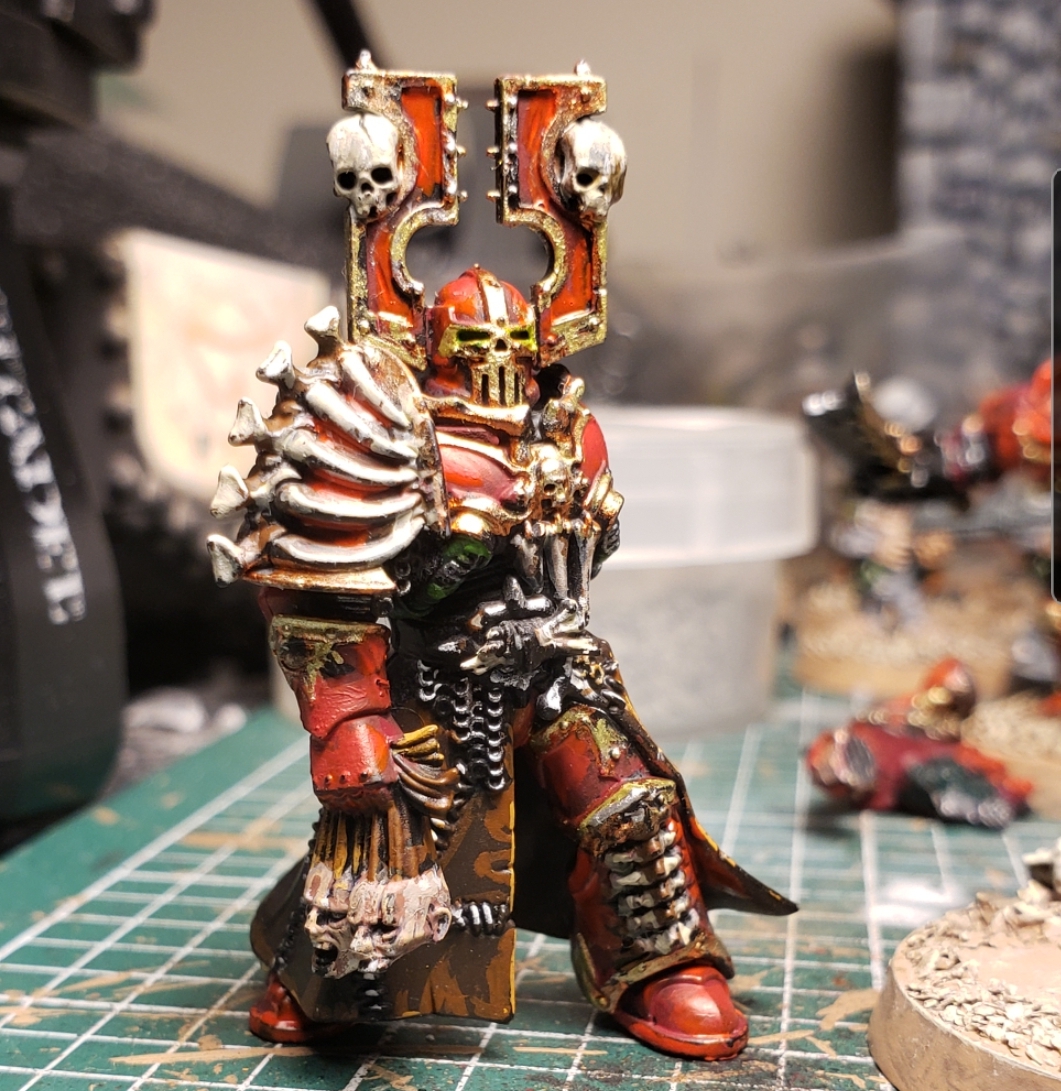
Although the packaging shows the trophy racks on the backpack are supposed to be bones, I decided to paint them as a metallic bronze would look better. And I do think I like it better that way. 

Chaos on Chaos violence is such a lamentable thing.

The two decapitated fellows were a joy to paint. I based the flesh with Cadian Flesh, a thinned wash of Nightshade was put over this followed by a thin layer of Kislev Flesh. Rakarth Flesh was lightly applied next with the slightest highlight of Palid Flesh. Blood For The Blood God was added to the stumps of their necks. 


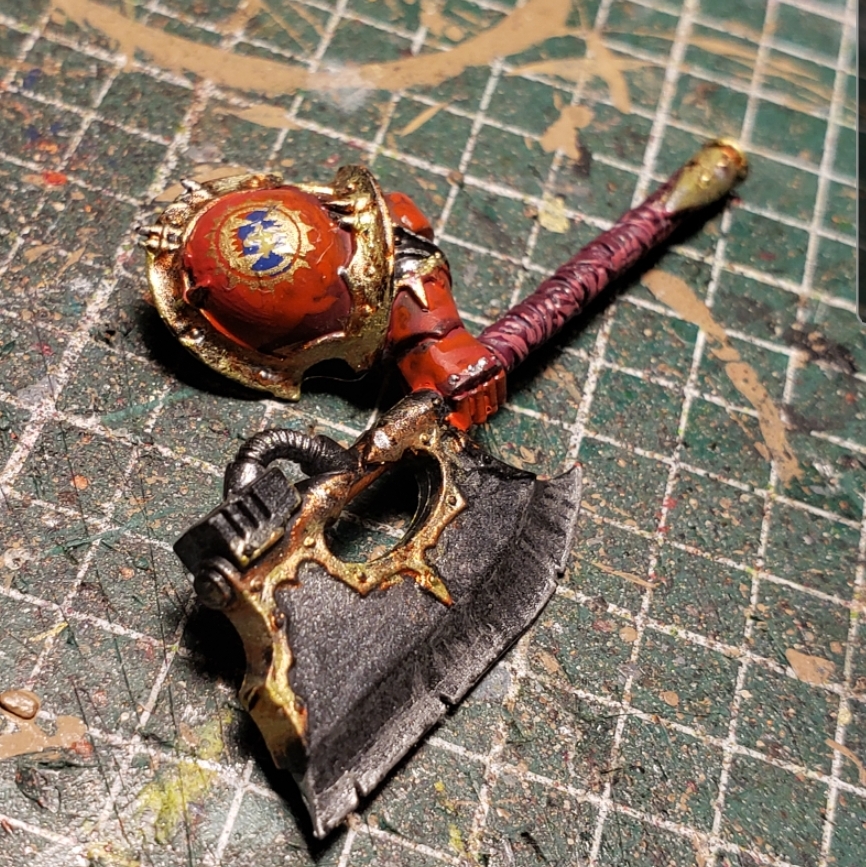
I absolutely adore the new Worldeaters decals. However I wanted a bit more continuity with my some of the other Worldeaters units in my force. Particularly I always like that icon was showing a world being plundered. With this model I size up the icon using a circle template and colored that circle in blue.


I added a continent and some isles using Dust and a light green. Once dried I applied the transfer with the help of Microset to complete the icon. I think this turned out quite well. 


After a few touch-ups here and there, I put the whole guy together. I added some grass tufts for the final touch and he was done. 

Complete and ready to execute. 

I forgot to mention the final steps on his leathery half-cloak thing; The last highlight is Tau Orange and the stitches were done using a craft paint called Raw Linen by Delta Ceramcoat. 


The decal has a glare to it making it a challenge to photograph but I think you get the drift. 


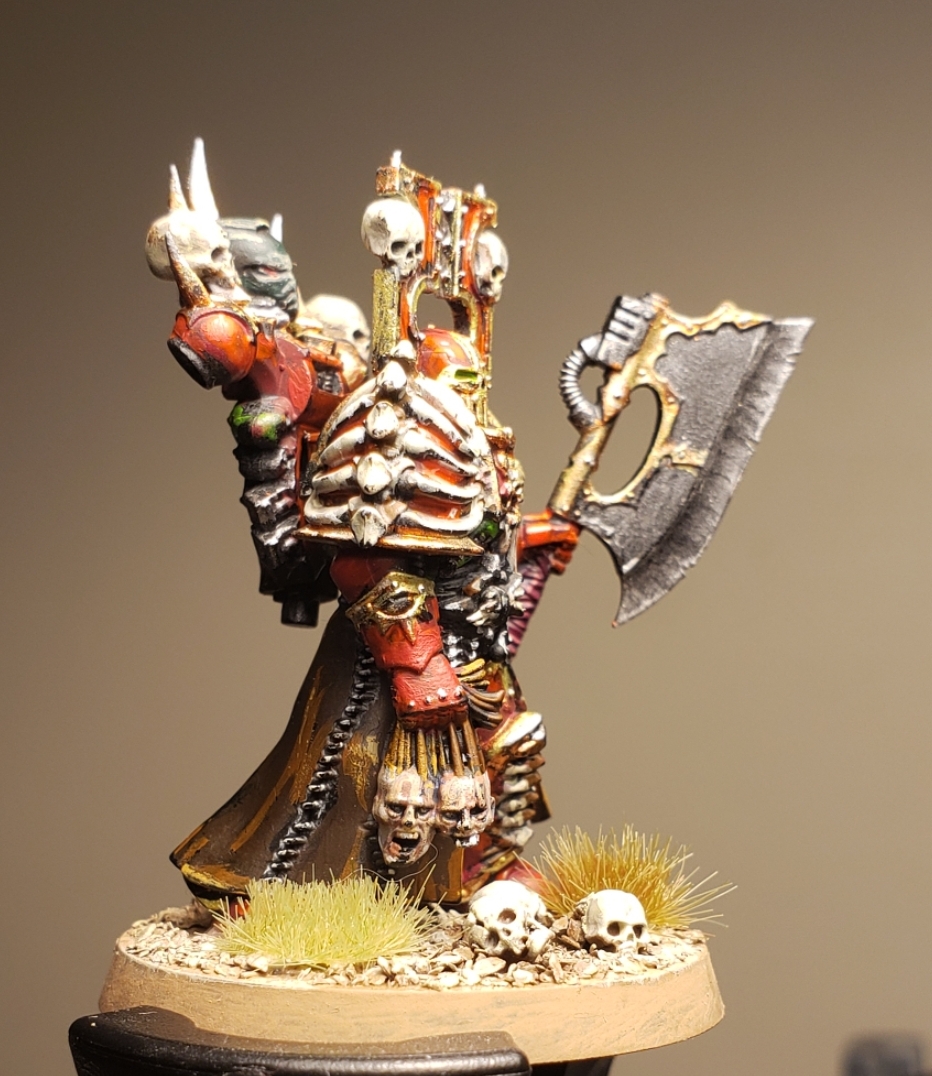
I am pleased with how the model turned out, I just need to find the time to get this guy into action....

Sunday, March 12, 2023

World Eaters Master of Executions (Part 2)

I'm back with some work-in-progress updates on our friend, the World Eaters Master of Executions. 

After priming him in Chaos Black, I added Khorne Red to the armored areas. I mean, would anything else make sense?


Next, Mournfang Brown was used to base coat the bones. Because you're not a bad-ass of chaos if you're not wearing someone's bones.

Rhinox Hide was used on the cloak. I like the look of this on the example model pictured on the blister card and think I'm going to attempt to replicate it. 

I used my tried and true old Ral Partha Copper Metallic paint on the filigree and trim. It's an old paint but it does the trick. Another old tried and true paint that I always use is Delta Ceramcoat Gleams Metallic Pewter. I used this on all the silver Metallic areas such as grills and the holstered bolt pistol. But it's most prominent application on this model is on the axe head. 


The classic and old Blood Red was applied to the armor. I had to be particularly careful on the bunny ears to avoid messing up the filigree. 


It was time to create the base. I outlined his feet with a red paint so to know where he was going to stand and to avoid gluing stuff in that area. 


The "stuff" being skulls and grit.  Seriously, can a Khornate model ever have enough skulls on it's base? 


Skipping ahead (I'm sure I have shown these steps ad nauseum) to the finished base. All it needs is some grass and it's done. Note on the skulls, I painted them using Ushanti Bone, Screaming Skull and a highlight of Wraithbone


Along his sides, just under the breast plate, are pair of worn tubes. Their protective layers are wearing out and you can see the metal tubing within. There are similar hoses on a lot of the newer Chaos Space Marine miniatures. I think the first place I saw this was on the Hellbrute models that came out in the Dark Vengeance boxed set at the onset of 6th edition. I decided to paint the ones on this model the same green color that appears on the rest of my World Eaters models. 

We're halfway there! 

There he is, about half done at this stage. Shining gold was added to the brass bits and Mournfang Brown was painted onto the... what do we call that, a skirt?  Hopefully the next update we will see this guy completed.  


Note: what do you all think about my italicizing the paint names? Did it help or hamper your reading of this post?

Thursday, February 02, 2023

Worldeaters Master of Executions (Part 1)

 This model has always interested me but I put off buying it mainly due to it's goofy head. Or heads, as it has two options and both seem kind of goofy to me. But when it was revealed a while back that the Master of Executions would be in the Worldeaters Codex I was intrigued by the notion; I liked what he could do for the regular Chaos Marines in the game and having him in with the Khorne berserkers seemed like a natural fit. Then the visual  idea of fitting a death-bunny khorne head on his shoulders really cemented the idea... so I finally got the model. 

In my clutches at last! 

While tinkering with the pieces it occurred to me that the metal Khorne warrior head I wanted to use (I haven't a clue where and when I got this!) wasn't going to work. The MoE heads are both flat on the bottom where most of the spare heads I have available to me have a ball for a neck. 

Rejected metal heads. 

So I found an alternative plastic head which I was able make fit by cutting the ball joint down to size with a hobby knife. I was really pleased with how this turned out, well, so far anyway.

A nice head for a not-so-nice head-taker. 

While assembling him it occurred to me that painting the legs inside the cloak was going to be a challenge once the legs were attached to the base. So I have decided to keep him in three pieces and attach him to his base after I have painted him. 

A base-eye view. 

I have to note how easy this model is to assemble. I was particularly impressed that the designer chose to have one of the joins be at the seam of his cloak with the stitches overlaying the real join. A natural place for it to go and quite an obvious choice really. The previous plastic production from 20+ years ago, and especially  the metal models, were just not able to pull this stunt off. 

Stitches for the snitches. 

I have to wait for some favorable weather to be able to prime this model, and that may be awhile. So that's all for now, hopefully I can make some more progress sooner than later...