Showing posts with label Dark Angels. Show all posts

Saturday, June 05, 2021

Objective Drop


Dark Angels vs. Orks!

Finally after waaay too long, The Bob and I were able to meet on the field of battle! We agreed to 1250 points for the battle size. I decided to break out my Orks, an army (for reasons that baffle me) that I have never deployed against him before now. And he brought his Dark Angels, who I have faced a few times now. Usually they were chasing my old Cypher model around.  I wanted to play my Orks in this new edition and use my current codex before it becomes invalidated (trying not to rant here is really... difficult!). Anyway, we agreed to use the Open War cards and what pulled was quite interesting indeed: 

This battle's Open War results. 

The mission is Objective Drop. This is one neither of us have pulled before. It's a weird one. Basically an object (The Object, going forward. It looks suspiciously like a grotbomb) is falling from orbit and both of our armies are there to catch it when it hits. The rules on the card could have been written better but we interpreted them to mean that the object won't land until Turn 3, giving us the first two turns to attempt to manipulate it's decent by rolling off against each other with the winner able to shift the object's landing point by 2d6 inches. It's starting point is the center of the board. 

The deployment zone was an odd one too but strangely appropriate for the mission. 

The Twist card is where this gets fun. He got to turn his Company Commander into a superhero and my ork warboss became the freaking hulk. Even more so when I stacked the Warlord Trait 'ard As Nails on top of it. My Warboss would be showing up with his stats modied to Str 7, T 7, W 8, and A 6. Finally, a Warboss worth a damn!  

Bob was able pull a Ruse card, which he kept hidden.

The gathering green.

I am astounded by how small a 1250 point Ork army is in this edtion. Granted, the Mega Nobz soaked up a lot of those points. 

I forgot to take a pic of the Dark Angel force. Oops. 

Ork Deployment 


Dark Angel deployment.

Here's an obligatory shot of Bob's Ravenwing because they are awesome, they scare me, and I am envious of them. 

The Ravenwing roll out. 

TUTN 1

We roll off to see who gets to shift the landing position of The Object, now breaking into the upper atmosphere in a fiery decsent. The Orks win the roll off and gleefully shift the target closer to their lines. The Dark Angels win the roll off and choose to go first. The Ravenwing dashes forward and the landspeeder takes a wound off of the Deff Dread. The marines in the middle of the Dark Angel line takes some long range shots at the grots in the he middle of my deployment zone and even with the cover save they were wiped from ten down to eight grots. The resulting morale check resulted in the Runtherd's squighound eating the last two grots, finishing off the unit*. The Tactical Squad in the ruins almost wiped out the Loots, leaving only a few left. 

On the Orks first turn the Mega Nobz were teleported by the Warphead to appear behind the Ravenwing. The Dakkajet and Deff Dread moved up to confront the Ravenwing. The Ork Shooting started off with the Kustom Megablaster knocking another Wound from the deff Dread, but it's scorcher managed to take a Wound from one of the bikers

The Ravenwing Landspeeder is eliminated.

The Ork shooting phase was a bit frustrating as the Ravenwing shrugged off a 'Law Of Averages' defying amount of wounds. Then the Dakkajet opened up on the land speeder, destroying it. 

Air superiority!

The Shoota Boyz opened up on the Dark Angels doing little more than scratching a guy, tearing up some parchment and putting a few holes in some robes. The Dark Angels would soon make them regret this insult.

"First rank fire. Second rank fire...um, you lot fire!"

The Deff Dread charged the Ravenwing. But the real risky long shot was the declaration of a charge from the Meganobz. I need to get over a 9 to pull this off and I made the roll with a 10! 

 Charge!!!

The Meganobz absolutely wrecked the Ravenwing Bikers, killing them all! Bob and I were both impressed (although his Commander now had a target priority lock on these guys now). I was thrilled to see them perform to spec, considering in their first outing they were wiped out in a very humble fashion.**  But the poor Deff Dread didn't get to go, and was sad that his power claws weren't able to snap any feathery banner poles, marine bones and bike parts...

The Ravenwing are destroyed.

TURN 2

The Object roll-off was again won by the Orks. It will now arrive deep in Ork territory on the 3rd turn. Also arriving this turn were both of the Deathwing Terminator squad, one in his deployment zone and one in mine.

Vengeance was declared in a hail of bolter fire. The Shoota Boyz leaving only a single Boyz and a Nob left standing and that boy would flee in the Morale Phase, leaving just the Nob. The Lootas were finished off, having been brutally targeted by the Tac Squad on the opposite building. The Deff Dread and the Meganobz were the subject of the concentrated fire from the rest of the Dark Angels. Two of the Meganobz were eliminated from these shooting attacks. The Shoota Bkyz behind the shattered acquilla were wiped down to just the Nob. 

The squad of Deathwing Knights that had teleported in 9 inches away from the Meganobz were unsheathing their blades, unfurling their flail and cracking their Terminator knuckles in eager anticipation for the coming fight. But when the charge phase came they didn't make their roll (or reroll) to get into engagement range***. 


The other Deathwing Squad arrived in the back of the Ork Deployment zone. The hope was to perform a decapitation strike against the Warboss and Warphead and claim The Object when it arrived. But it didn't do to plan as the dice defied the Deathwing in this instance. 

The Deathwing land in the Ork DZ.

ORKS TURN 2

I needed more orks. Thankfully I had enough CP to use Endless Greentide to bring back the Shoota Boyz, who had been whittled down to just the nob in the Dark Angel's turn. I wanted to pull the Dark Angels away from The Object, even if they only distracted a unit or two for a round or two, it would relieve some pressure from my forces that are trying to secure the in bound object. 

The Endless Green Tide floods the DA backfield.

The Dakkajet roared overhead, dumping fire into the Tactical Squad that killed off the Lootas, but their cover was worthy indeed and only a few wounds got through.

Waaagh!

The Slugga Boyz, Runtherd and Warboss charged the Deathwing Terminators and they actually killed killed a few!  The Warphead had cast Warpath on the Boyz and those extra attacks helped  a lot.. The Runtherd was surprisingly efficient in this melee! And the Warboss's Attack Squig was also deadly. On the other side of the field the Meganobz made their charge but the Deff Dread unfortunately did not. To add further insult the Meganobz attacks were not nearly as successful as they were against the Ravenwing.

End of Orks Turn 2.

TURN 3 

The Object arrived, but the Orks were not there to receive it as the Deathwing had successfully drawn the Boyz away from the landing point. The  Dark Angels hit back hard. The DW Knights charged the Deff Dread, and the Company Commander, now augmented by the Twist Card, also charged the Meganobz, slaughtering them. 

The Meganobz fall.

The Deathwing Knights smashed the Deff Dread apart. It really had no hope under the oppressive abuse dished out by them.

The Knights glorious  beat down. 

The Deathwing on the otherside of the field were about to fight back but the Warboss paid the CP to interrupt their attacks and destroyed them instead. 

Deathwing fall. 

On the Orks Turn 3 the Boyz moved back into position to claim The Object. But they would have to be holding it at the end of the next Command Phase to claim that VP.  The Dakkajet killed a few of the Tactical Squad before soaring towards the board edge. The Shoota Boyz split their fire killing the DA Librarian and trying to kill the DW Knights. If I recall I think they may have put a Wound or two on Deathwing Knights but no kills. It was one of those rounds where I starting to feel the futility of my efforts and I was having doubts that I could pull off a win...

Start of Turn 4.

TURN 4

At this point The Object has been on the board for a while round now and no one has managed to a score a point off of it. But my Boyz are now poised to claim it unless the Dark Angels can shoot the unit to death. Two squads of Marines, led by the DA Chapter Master were advancing toward The Object. All of them opened up on my slugga Boyz leaving only a few alive, but still enough lived to hold that objective.


" 'old da line ya gitz!"

A bit of a morale boast occurred when the Deathwing Knights declared a charged and two of them were killed by Overwatch! I was stunned that they were more effective than when they shoot at full Ballistic Skill! And, to add further shame on the Deathwing Knights, they failed their charge! 

Orks Turn 4, 

The Runtherd, whose Ballz Squigs are exceptionally large apparently, charged the DA Chapter Master and despite his bravado was gruesome defeated. The Dark Angel Chapter Master racking up heads for his MVP award, consolidated toward the remaining Green Skins.

The Runtherd tries...

The Dakkajet flew off the table with the intent to return next round. The other orks moved up to hold The Object.  The Warphead cast Smite and took two wounds from the DA ChapterMaster. .Not willing to leave themselves open to a charge I saw no choice but to have the Shootas charge the Deathwing Knights. They crashed into them with a furious roar but the Knights held strong and slaughtered many of them in turn, but not as many as I had feared...

The charge of the Shoota Boyz.

TURN 5

Do or die. And the Dark Angels had no intention of dying. The Dark Angel Commander lead his men forward. Some of his men put wounds on the Warboss, some of them killed the Warphead  but the rest turned their bolters onto the remaining Slugga Boys. 

Start of The Dark Angels Turn 5. 

The Dark Angel Tactical Squad and Company Commander charge the Orks at The Object. Most of them attempted to kill the warboss but the rest of the sluggas were ground down, leaving only the Nob left alive. I did not see how I was going to pull this off, even if I got the next VP , that nob wasn't going to survive against the Company Commander. With my Warboss locked in combat with the Tactical squad there was nothing he could do to assist the nob. But, hope was found in my Strategms: Get Stuck In Ladz!. The Warboss went again, destroying the Tactical Squad. And he was now set up to charge the Company Commander...

The Warboss Defeats the Tactical Squad. 

ORkS TURN 5

 The Nob was Obsec, which allowed him to claim the 2nd VP for holding The Object. Looking at what was happening at the start of the Ork turn, Bob decided to concede while I was moving the only unit I could move (the Dakkajet). My plan was to have the Dakkajet return and finish off the last Tactical squad while my Shoota Boyz were just going to continue to attempt to kill the Deathwing Knights. My warboss and nob would shoot the Company Commander with their pistols and then proceed to kill him with their power klaws. Regardless, Bob did not like his odds. 
 
The final moves that officially didn't happen.

So it was another victory for Warboss Ror-Ruk, but only barely! That well-played stratagem secured the win for me! Although it's possible the nob could have killed the Commander it's just not as likely he could have done so efficiently as the ubered-up Warboss would have. 

"Da Object is mine!"

On reflection, this was a far closer game than I thought it was going to be. The Dark Angels inn9th edition are nothing to casually dismiss. The Deathwing's ability that allows them to only be wounded on a 4+, greatly neuters the high Strength weapons anyone can bring against them. The Deathwing Knights greatly benefited from this as the Nob's Power Klaw hits failed to damage when normally they would have. 

The Twist cards that turned our leaders into superheroes was a fun one to pull. I was hoping to get them into combat with each other (it was close!) To see these titans clash. My Warboss and the Company Commander were both easily the MVPs of this game. In fact, Bob was so impressed that he decided to paint his model:

The greatest prize of all: a nice paint job!

Oh, by the way, did you forget about that Ruse card Bob was holding onto? That's OK, he did too. And it might have made a difference. Maybe? I can't recall what it was either. He found it while we were putting up our miniatures. 

Thanks for another awesome game Bob! Maybe we can finally get that follow-up WFB game played sometime soon? 


*This is the most recently painted unit in my army, so it's interesting to see 'newly painted model syndrome' (a subclass of 'New model syndrome') very much put to practice here.

**Another example of 'newly painted model syndrome'. 

***Teleportation lag, not unlike jet lag, can be a frustrating thing to experience.

Saturday, September 22, 2018

A Rain of Plasma


"Excuse me, Does this belong to one of you?"

This past weekend I made my way to Hobbytown for a game with the mighty Warfrog, but those plans fell through. So I picked up a game with Michael C, whom you may have seen in a recent battle report over on Da Long Wayz Dezert Groop, who was waiting for some hapless fool to challenge his Dark Angels. As luck would have it, I was now more than available to step up to the proverbial plate.

Hapless fools? Look no further! 

I was wanting to give my Chaos Daemons a go, however, despite my stated intentions earlier this year I have not given them the attention necessary to achieve those goals. So I decided to run them as an allied Detachment with a Chaos Space Marines Detachment. I used them in my first 8th Edition battle and wanted to give them another go. They didn't fair too well in that fight, however I was using the Index list and only the 3 core strategems vs. a proper codex army.

The DA staging ground.

Like some sort of ritual, Michael always sets his army up in this scenic display before every battle. And this beautifully painted army always looks briliant on it! This is what he brought to the battle and the next pic showcases his three HQ choices.
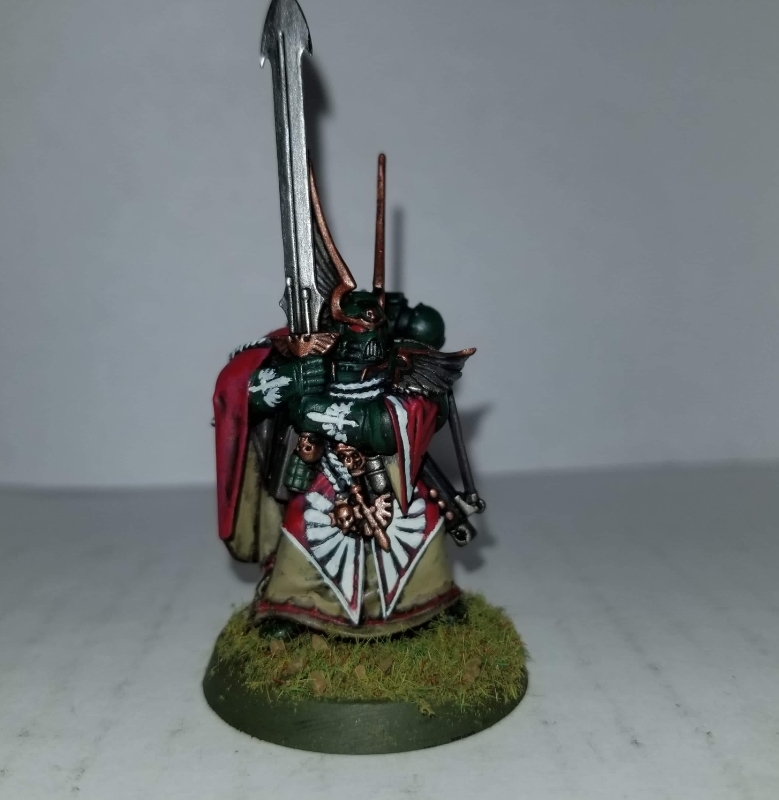
Bruisers. 

Here is Michael's discription of these guys: "The Battle Brothers Bruise. Librarian armed with force axe and storm shield. Warlord armed with thunderhammer and storm shield and wearing the Shroud of Heroes relic which always adds one to hit rolls against him. And the 3rd and final HQ choice is a Master armed with thunderhammer and storm shield and carrying the relic Eye of the Unseen which allows him to go first in every combat."

After selecting the mission, somehow I got to pick the deployment layout and I chose that we play short edge to short edge. Clearly I forgot what a disaster this was the last time I made this choice... I guess I like to challenge myself?
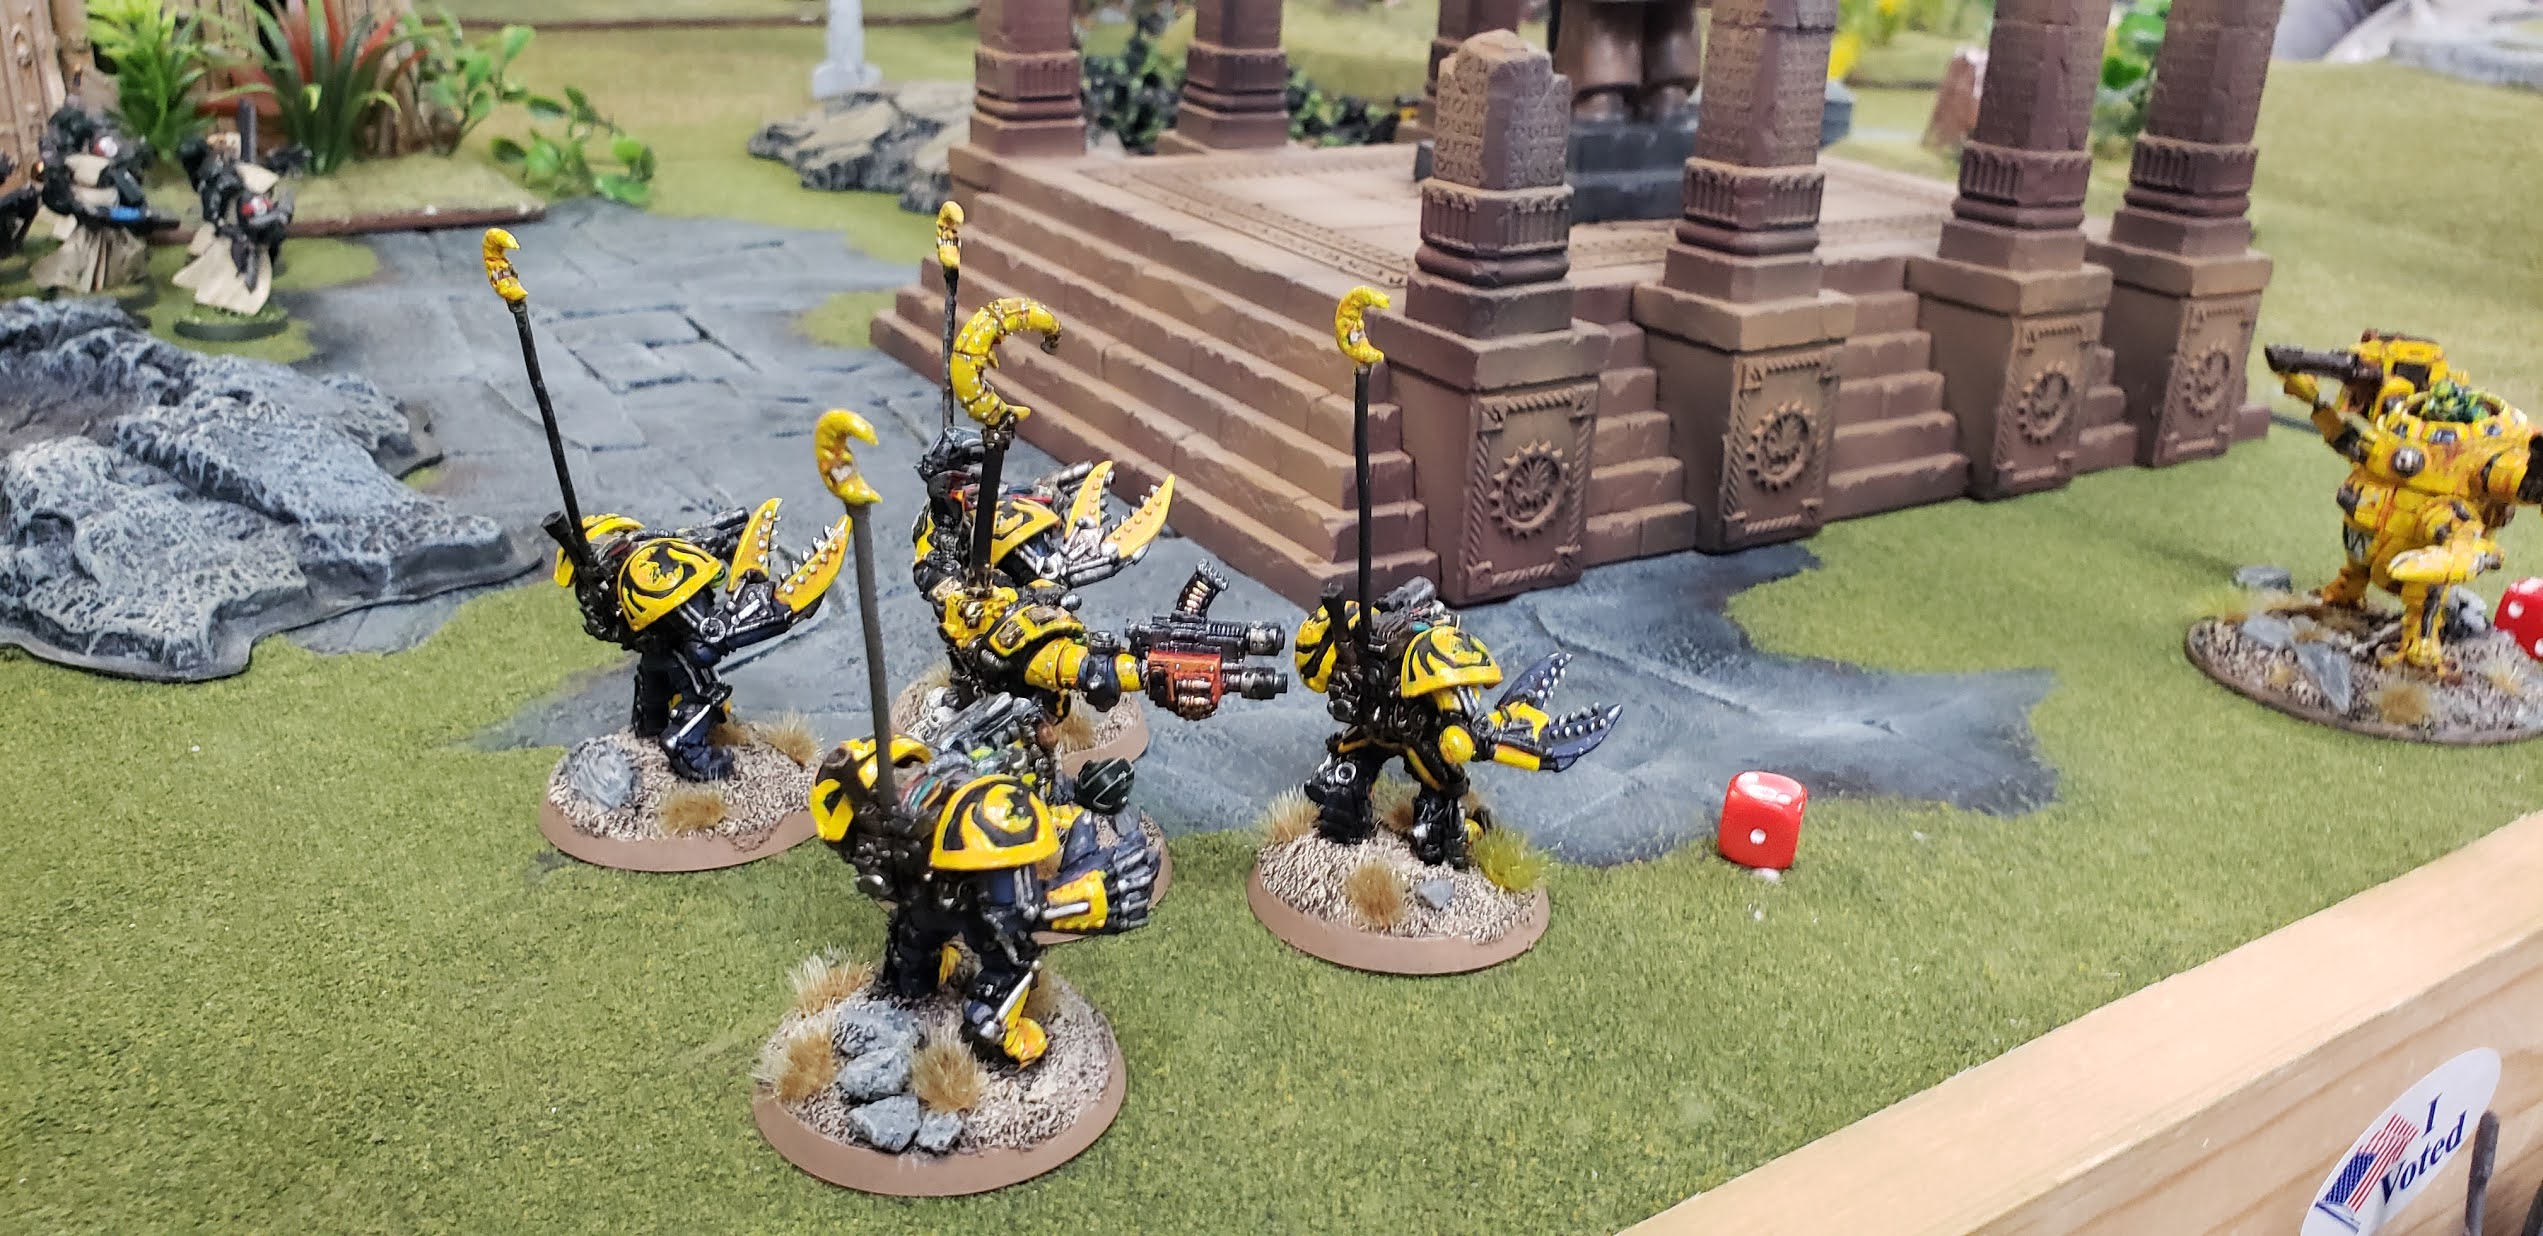
Chaos Deployment.
I opted not to bring the Daemons in via reinforcement points as that seemed like more to keep up with than I was presently prepared to do, and with most of my army being fairly fast I figured it wouldn't be too hard of a march to the otherside.
Dark Angel deployment.

The calm before the storm...
Turn One began with the Dark Angels going first. The Dark Angels concentrated on one group of Daemonettes, wiping it out, and the Devastators earned their name by nearly destroying the Vindicator. One lucky re-roll kept it in the game with 2 Wounds left! Meanwhile, my Landraider shrugged off the attacks that were fired at it. In retaliation my Landraider, the The Blood Dumpster, fired back, annihilating one of the Dark Angel Dreads and killing a Marine from a Tactical squad. Meanwhile the Vindicator, clanking around with a Movement rate of 3, limped around in the back field.

End of Turn One
Turn 2 is when everything hits the fan. Michael kicks things off by parking the Drop Pod next to the objective that I had left virtually abandoned in my Deployment Zone. He brought his speeder around to use as bait for the Daemon Prince (or maybe the Vindicator) and sets his sights on a rear assault.
The arrival.
These forces attacked the Black Legion unit in the ruins, wiping them out. And the Librarian put 2 Mortal Wounds onto my Warlord riding the Juggernaut. Meanwhile further up field the entire Dark Angel force unleashed on the Fiends of Slaanesh who were racing quickly forward and in desperate need to hug someone. Their speed and resilience clearly struck a nerve in the Dark Angels and they wanted none of their hugs or attention (the models have out-stretched arms that almost look like that they want a hug!) It took CPs and tenacity, but eventually they were destroyed (note to self: I need more!). "No hugs!" Declared the Dark Angels defiantly.

End of Dark Angels Turn 2.

Chaos Turn 2, and it was time to get stuck in. Tactical Blunder #2: taking the bait! I had assumed that the Champion on the Juggernaut could at least kill that Librarian in the Fight Phase, but although I hurt him, it was not enough. With the other two characters piling on, the Chaos Leader on his Juggernaut was slain. The psychic power the Librarian  had played on him, Aversion, definitely didn't help his survival odds. The Daemon Prince ignored the flyer and dove into the Tactical Squad, however he didn't hardly kill any of these guys and they proved to be quite tough!

The contest of champions! 

Elsewhere, the Blood Dumpster unloaded the Khorne Berserkers to assist their leader in the Juggernaut (they shoot worse than my Space Wolves) while it shot the heavy bolter at the Tactical Squad behind it, the twin-linked Las Cannons blew up another Dreadnought, laying it low with 19 unsaved wounds! The Blood Dumpster likes this edition, clearly!

Blood Dumpster!!!
The Keeper of Secrets, She Who Milks, ran up the field with the remaining Daemonettes. Using one of her psionic attacks to kill one of the Tac Marines lurking in the craters.

The purple wave approaches.
Turn 3.

With the Fiends gone attention was given to the Plaguebearers shambling up to the Dark Angel lines. Thanks to their toughness and Disgusting Resilience, only 2 died.  A few Daemonettes were also picked off but they hung there when it came to check Morale thanks to the careful implementation of my CPs. Somehow my Daemon Prince survived the brutal Fight phase with like a Wound left.

Chaos Turn 3, and the Daemon Prince flew out of melee, thankful to still be attached to the mortal realm, and wanting nothing more to do with those characters and their thunderhammers! His withdrawal gave the backfield to the Dark Angels, leaving only the barely functioning Vindicator left to fire wildly at the remaining Dark Angels.

The Dark Angels take the field and secure the objective! 
The Herald of Slaanesh, Plague Bearers and the last squad of Chaos Marines were slowly making their way up yhe field. The Chaos Marines provided fire support for the Slaanesh Daemons who were making their way swiftly to the Dark Angel lines.

"What does 'meander' mean?"
The Keeper if Secrets charged the Tactical Marines in the Crater, slaughtering them with delightful ease. The Daemonettes crashed into the othet Dark Angel squad in the ruins wiping out all but two if them!

"Hold the line!"
The Landraider chose to be bold and split it's Las Cannon shots between the two Razorbacks, but this only resulted in damaging one of them due to half the shots missing and only one damaging.

With this, it was past time to close up the shop so regrettably we had to stop the game here. The VP tally was 6 vp to 1vp, Dark Angels for the win!

Even if I had managed to take the objective in his zone I would not have been able to claim the points needed to surpass his tally. So what went wrong?

As previously stated my choice of battefield layout did work against me, but it was not a full-on Gettysburg scenario that it looked like it would've been. If not for those Daemonic Invulnerable saves, and a few well executed Command Point Rerolls, the death toll would have been worse I think.

Devastators hold their position.
In hindsight I feel that my 2nd big mistake was going after the Dark Angels that arrived in the Drop Pod in my deployment zone. If I just speed on ahead and ignored them they would have been a less useful asset to him, and I could have used the Berserkers against foes that wouldn't have the Warlord around to lean on.

She Who Milks, claiming souls...

My MVPs in this fight were the Keeper of Secrets and the Land Raider. Particularly the Land Raider! The Blood dumpster racked up some very impressive kills and I was pleased with its effectiveness.

Blood Dumpster earns the MVP.
All-in-all it was a good game and an educational one for me. I think next time I'll keep my detachments limited from choices from the same codex.

Special thanks to Warfrog and Matt for their rules insights and assistance with this game.


Sunday, July 29, 2018

Kill Team Launch Party


Kill Team Party!

Hello! This past Saturday my local gaming store, Hobbytown USA hosted a Kill Team launch party. It was a big launch for Hobbytown, probably the biggest I have seen at this location. They had plenty of Kill Team products in stock (which they sold a lot of!) And they had multiple tables set up for purposes of conducting demo games. And according to Matt, the man cordinating the event, they had quite a turn out for their first session. That session ran from late in the morning until 5pm, and the evening session ran from 6pm until 10pm.


The Kill Team event poster.

The event had some nifty give-aways: buttons (aka badges for my UK readers), a poster (for those who arrived early enough to snag one) and some really cool CP tracker dials. And pizza.


The Reaper's Mirth assembled before a dial.

I arrived at the 6pm session with 2 teams in tow, but I decided to run with the Harlequins since I never got to use them in the previous version of Kill Team. Matt gave me a super quick crash course on the rules, I threw together a team of 7 Troupers for 98 points, rolled up some quirks and background (fun but not game affecting), and I was ready to hit the table.

Racing towards the Skitarii.

Bob and Matt were already pretty familar with the rules at this point, so we decided to try the 4-way team battle. Bob had Dark Angels, Matt had Tyranid Genestealers, Jim and Chyanne had Skitarii and I had my Harlies.  One of the new (and refreshing!) changes to the game is the Iniative phase. All parties roll off each round to determine the turn order for that round. This added some variety to this game for sure and was especially refreshing in a 4 way match like this.

Genestealers pour into the Dark Angel wall of bullets.
I had a difficult time adjusting to how charging works now, but it was more an adjustment from decades of learned behavior than it was comprehension. This early mistakes caused some tactical blunders that surely cost some Harlequin lives, but my biggest foes were the dice were using. If I hit, I rarely wounded, but my armor save attempts were especially frustrating as I pretty much failed most of the ones I was asked to make. All well! LOL!

Look who  is charging who.
Multiple charges in the fight phase was an interesting thing to experience. In the pic above a Genestealer charged a Skitarii, the my Harlequin charged that Skitarii, then another Genestealer charged my Harlie. It was definitely a  crazy and swirling melee!

Slaughtered by Genestealers.
Once I got my Leader engaged with a foe, I finally got to expeience the joy of the Harlequins Kiss shredding a target to death. By the time this had occurred I was down to less than half of my force being alive. Most of the Harlequin had been shot to death by Bob's uncanny ability to roll 6s on Overwatch!

Harlequin Leader showing the clockwork guys how to dance! 

Ultimately this game shrank down to an area of a single building, the structure the Dark Angels were holding onto tightly! With a few marines left to defend the building from the invading xenos, the Dark Angels stood firmly in piles of dead clowns and shattered chitton.

This Harelquin and Dark Angel fought each other for 5 rounds! 
I had one Harelquin that charged one of the Dark Angels on the 2nd storey of the ruins way back on turn 2. That fight carried on until it finished on the ground level on turn 6. The Harelquin trouper finally surrendered to the beating it had been taking.


Finally it ended, with Bob hanging on steadfastly against my sole surviving Harelquin and Matt's remaining Genestealer.

The grand finale.

It was good, fast-paced fun and once we master the rules it should go even quicker for us. We hope to run a campaign at some point to as to experience the leveling system as well. I haven't gotten the book yet but I had really good look through it. I'm definitely looking forward to making some more Kill Teams as the diversity looks very appealing to me. Also, those numbered counters that come with the boxed game will be really handy in future 4 way games for keeping up with whose turn it is.

Alpha Legion vs. Dark Angels.

While we played our game there were other KT games taking place as well as a massive Chaos vs. Dark Angel 8th ed battle.  I think the Dark Angels won, but it appeared to have been an bloody good game!

This looks like a fun party, yes?