Thursday, September 29, 2011

The Portable Neverness

As some of you know, or might have read, I travel a lot for business, and as a result, often my hobby time is neglected. Worse yet, the relaxing escape that mini-painting brings me is not available when I need it most. So my dear friend, Mrs. Bink, introduced me to a solution that I already had: go portable!


Years ago I got (either as a gift or I bought it myself, I can't recall) a small tackle box. I want to say we got this at K-Mart. It's original purpose was to be used as a place to store, divide and subdivide my various gaming dice. Dumping all of those into another tackle box I proceeded, at her kind suggestion, to organize this into a portable paint box/station/mini-carrier. This particular box divides into two sections.

The top section:


Fits the smaller paint pots perfectly, the rear groove fits the older paints well too. The front is perfect for brushes, etc. The bins are customizable and I can 'slot' in or out the dividers. Mrs. Bink also suggest that the inside of the top could be used as a palate or workstation. Not sure if I will do that however...

The bottom is far bigger and can store most GW vehicles! Here I have things like glues, clippers, decals, a water bottle, etc.


The models I brought with me on this trip are store securely and snug in this bottom (with some bits stored in the top half of the box)


These are two land speeders, one you might have seen some work in progress shots of in a prior blog, and the other one is the next one I will tackle. Also, being that the main blog is called 'Pods to drop...' I have brought a drop pod on sprue (pre-primed) and still in it's box, which I hope to get a good start on during the week that I'm up here.

If you're curious in the exact model of this box, I have never removed the product sticker, so, assuming it's still in production and available, perhaps you can still find it if you so desire:


Hopefully I will actually have some down time to do some modeling!

-Joel

Wednesday, September 28, 2011

Neverness enters the Space Race


+++From the cold ship yards of Fenris, emerges the battle barge 'Ragnar's Breath'. Pictured above on it's first test voyage, not yet fully armed and outfitted with the killing arsenal that will rid the nearby systems of the the xenos scum that pollute them. Hark, for the origin of this majestic war machine is upon you.+++


It's been damn near 10 years since I last played BFG. Warfrog and I spent a solid day playing the heck out this game, and I don't think either of us has messed with it since. However Masta Cheef and his grot underlings have been playing it off and on and bloging away with some impressive paint-jobs, and with my gathering of the Rogue Trader supplements for the RPG, my interest in finally building my fleet has been growing. Recently while shifting my...um....'stock' around, I came across this battle barge in a zip-loc GW UK parts bag. Why I ordered this like this I have no idea, but alas here it was:


Cleaned up, which was to me a far more challenging task then I originally thought (remember this statement, it becomes the theme) I figured I could quickly paint this between business trips.
Here it is base coated in Shadow Grey. This was a pain in the ass, as all the little details were preventing paint from filling the voids. Once I got to a satisfactory point, I wanted to proceed, but the fricking model kept chipping. So, again, satisfied with it at a certain point, I took it outside and blasted it with one of my favorite art tools: Workable Fixative.

The mid coat and highlights went fairly quickly, and here it was just before the final highlight stages and assembly.


And a closer view...


Assembly, again was a pain in the ass that I thought would be far less challenging. Once I got most of it together, I added decals to the...fin things with the yellow circles... and then proceeded to build it most of the way.


Here it is without the turrets and lances -just don't have the time tonight to do them and do this blog. Also I've been itching to play around with photographing this ship against the star field background that I made a few years ago using felt squares, paint and a tooth brush. This is my star field for playing the game on but I works good for photos too I think. With slightly better lighting, I think I can achieve the effect I'm after (my favorite pic is the one that I started this blog entry with)


Once I finish this (adding the guns), and move on to the rest of the fleet, I will take more pics and experiment a bit more with the lighting.

-Joel


Monday, September 26, 2011

Pods to Drop and Lands to Raid (and Speed) part 8

It's been a long time since I was able to focus on some mini painting, but this weekend I made a bit of progress on the Land Speeder Typhoon (that I haven't touched since...late June?) In the pic above you can see where I have touched up the middle coat, and worked on the Aquila emblem on the front as well as the shoulder pads of the crew.

This pic is a focus on the gunner. The chest Aquila gave me a real challenge. Ideally I would like to paint these models in a disassembled state prior to building them, but the necessities of having a field able army that doesn't look like a pack of cripples sort of gets in the way of this practice. Typically for Space Wolves I base the Aquila on the chest with Fiery Orange, then mid-coat with varying degrees of Sunburst Yellow before topping it off with highlights of Bad Moon Yellow and a dash of Skull white. But, this rarely works as the Bad Moon yellow, it not thick enough, can give off a bizarre greenish cast or worse, run into the grooves. There for a few strategic applications of brown ink helps contrast the grooves, and a muted wash of orange ink will help mute the yellow a bit, before adding few additional highlights of the yellows. I feel this is not very rewarding work however, and since I'm liking the bronze/gold effect on the Aquila on the front of the Speeder (and the Drop Pod -see 1st entry in this series) I'm tempted to try this out on the next Wolf Pack that I paint.

Here are the collected parts of the Typhoon, I finally painted the launchers choosing to make the warheads red (I have made them white on past models, but ultimately feel that the red contrasts better).

As further proof of my old school cred:

When I did the original Land Speeder a few years back I opted to use these decals. Having used the classic 'Ragnar' style decals over the years, I found them to be a source of frustration, especially trying to apply them to the unforgiving curvature of the Space Marine shoulder pads. In an effort to be unique, and to bring my army around full circle, I've decided to use this style for my army's company markings. Also, I feel this mixes well with the newer style, and so my army will contain a mix (sometimes on the same model) of these emblems.

...and here they are, applied to the two crew members, Also note that the Landspeeder Typhoon now has it's final highlight of Skull White on the hull and the marines.

Just a few more steps and this will be done!

_Joel

Saturday, August 06, 2011

Past works

Nothing new to talk about, so I shall dive into the archives to look upon 'paint-jobs past'.


First up is Cypher. I entered this model in Golden Demon '99 (didn't get far, I was up against stuff that looked liked it fell from heaven it was so good),


I've been very pleased with the way his robes turned out. This is the paint scheme my good friend The Dr. and I decided to use for this Dark Angels. At the time Cypher could be used by the opposing Chaos player (as well as a squad of Fallen) and I had intended to do a full squad of Fallen just to hassle him with. However with each edition 40k gets, the Fallen and Cypher tend to get left further behind, so there was no reason to ever do up the full squad (other than that they would look sweet!). I have a bitz bag with at least 10 Cypher backpacks just waiting for the day when the Fallen will once again have rules...
This is one of the few examples I have of using non-metallic paints to do a metallic color scheme. I think, a decade later, it still holds up well ...

Next up, these minis are all non-40k. In fact, they are not even GW models! (Gasp!) In the last decade my group and I were on a major D&D 3rd edition kick, and I took great joy in painting single models for my friends. So when I got this new camera, I went over to see my friends and snapped a few pics of the models I have painted for them over the years.

This is Gloe the wizard. I really enjoyed painting this one.

Kax the young...as she was in her early dungeon diving days...


...and Kax after she became a Pirate Queen. (we had to update the mini after that! Arrr!)


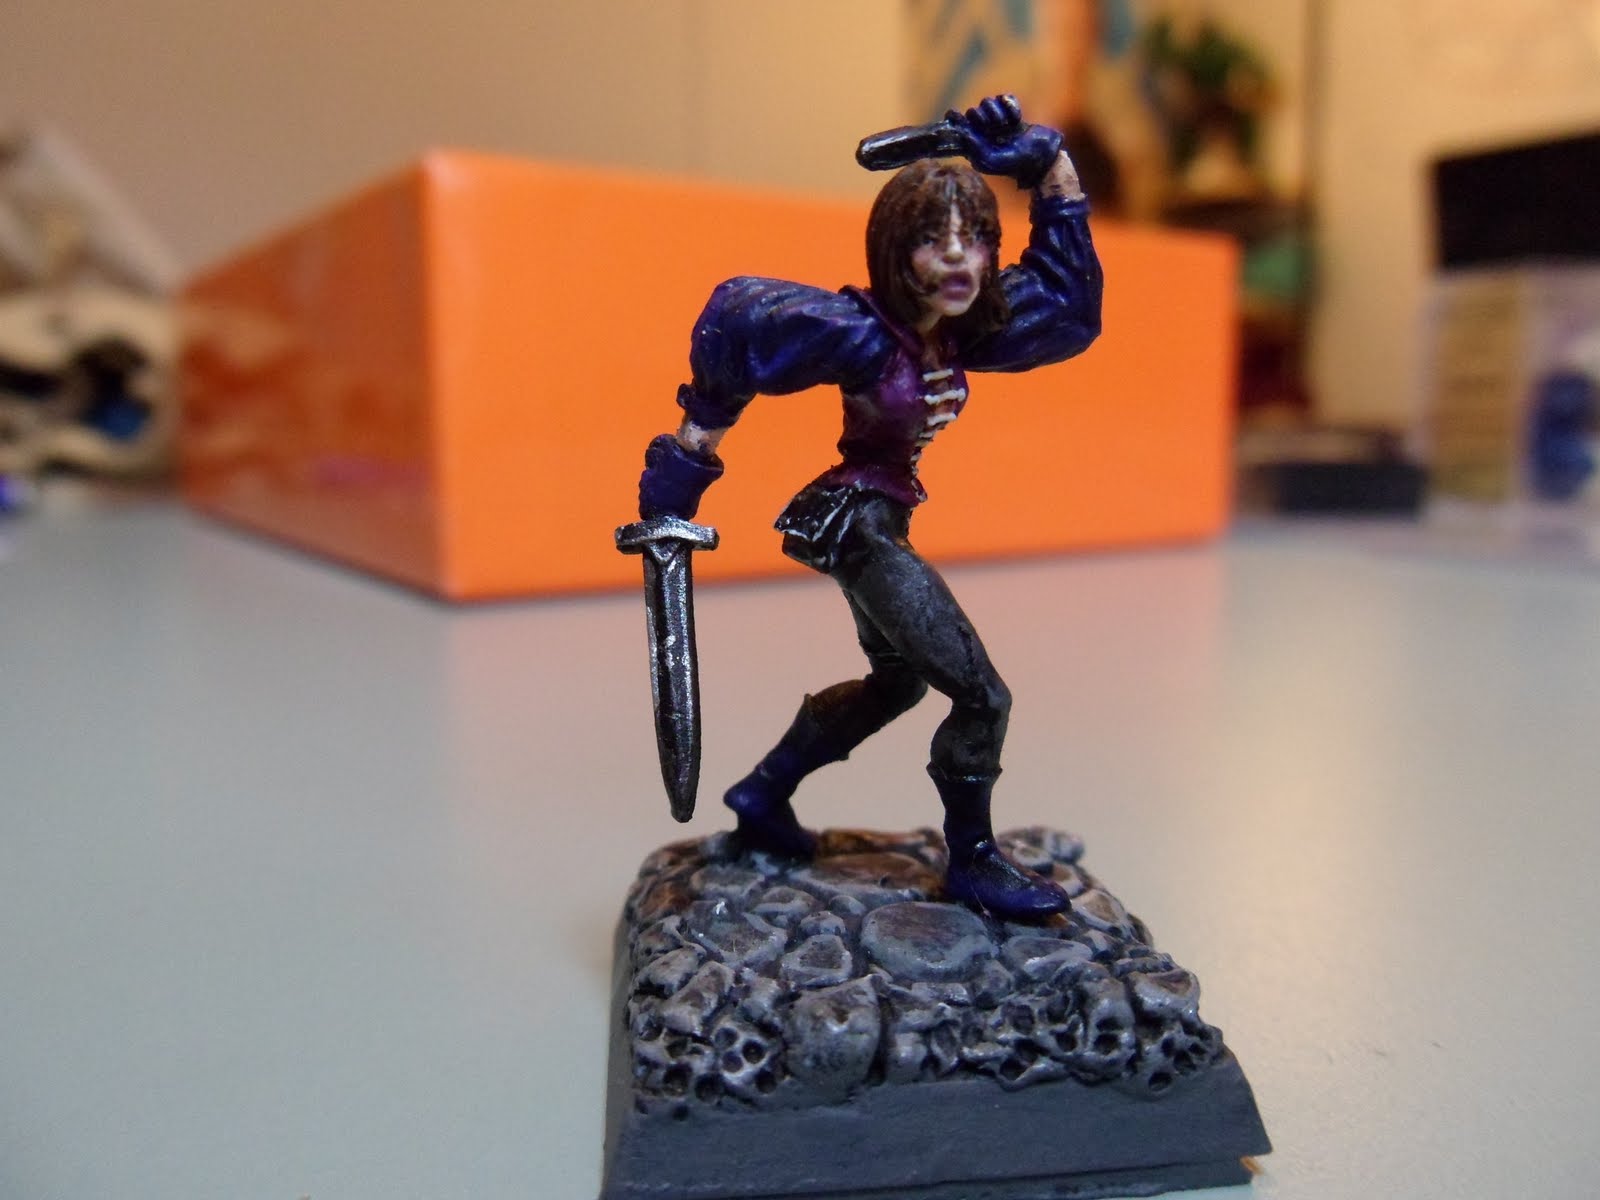
And finally Bink's bad-ass assassin. Much slaughter and mayhem was carried out by her.

Hope you enjoyed!


Friday, July 22, 2011

Deodorant Tank parade on 4th of July weekend

Obviously 4th of July weekend was weeks ago, but as you might guess my schedule has prevented this update from being timely. During said weekend, I visited an old friend of mine in Cincinnati (we shall call him 'Doctor'), He was in the process of cleaning out a lot the extras and overstock that he has accumulated over a period of  2 decades of being in the GW hobby, and also working on his Dark Angels. While doing so, he noticed he had a lot more of the original Rogue Trader era Predator tanks than he thought! Which led to us discussing what the Iron Wing was supposed to be, and if GW were to ever elaborate on it, how they intended it to function etc. (The Iron Wing, BTW, was the mechanized vehicle arm of the Dark Angels, discussed only once - as far as I can tell- in early Epic materials), Then he pulls out the deodorant tank!

Yes, somewhere, he acquired this thing in a trade, we're pretty sure from an old HS buddy. The missile launcher on it's side is made from Legos!

On the other side we have an oddly place satellite /radar dish which appears to be the hatch from a Rhino tank, as are the handle in front of it.
The turret is an actual original Predator tank turret, only that it doesn't swivel and is therefore set up for fixed fire. This was the reason the Doctor pulled this out; he intends to break it back down and restore the turret back to a Predator chassis. He told me this after I got such a great kick out of this that I even offered to paint it! "No, I'm going to reuse that turret!"
Back in the early days of Rogue Trader, anything went! The deodorant tank was merely the poor-boy's quick option for vehicle that look 'sci-fi-ish' with just the right amount of imagination and bit of paint.

We also played Necromunda.


None of the models are mine, and most of these the Doctor also acquired in trades over the years. I played the Van Sars (in Xmas red) and he played the painted Orlocks. We spent some time setting up scenery and creating our gangs, and then we played. Here is my side of the field, with a Heavy (with a Heavy Plasma gun) hiding and in overwathc, with my Gang leader and the 2 juves.
He got in the 1st shot of the game, pinning one of my guys on the tower. Here's my guy on the high spire targeting his two gangers. This pic was taken for LOS purposes was never intended to be a blogging pic, but why not? He has a pic of the same situation from his vantage point (if he sends it I'll post it).

Here's my guy taking a shot at a target below. On another turn he'd throw a grenade through that window taking out a heavy and a his gang leader, an action that would force a bottle test which would end the game. The thing about Necromunda is, it's not ALL in the actual game, but the post game. We both did fairly well I recall, however next time we meet, he will be the one bringing in the giant-killer bonus! This is the 2nd time using Van Sar models I don't own to play this game, and I really need to commit myself to tracking those models down and painting a gang for myself.

-Joel


Thursday, July 07, 2011

Pods to drop and Lands to Raid (and Speed--Part 7)

Just when I thought I had left on a business trip with out my pics, I find them! So, here's an update. While last home, I found myself somewhat surprised to find that on e-bay the Land Raider Crusader bits I wanted to get extras of were going for more than the cost of just buying the sprue out-right from GW! Amazing! While pondering my next move I found myself working on the Landspeeder Typhoon that can be seen throughout these 'Pods to drop' articles (funny that I'm not currently working any Drop Pods, but I like the title!). So there I was working on the model, when I decided it was time to put the pack markings on their right shoulder pads. However I quickly discovered that trying to get a brush into those spaces, especially one dabbed in red paint, was far too messy and futile than I had suspected. If you've been following this series so far, you might have gauged that I like to build these models after I paint them to avoid having areas my paint can't reach. Therefore I was left with no choice but to get a bit crude and rip the gunner out!

Another thing that had bothered me about the gunner was that whoever the person was that assembled this model (I think I wrote before that I pulled this out of a garbage can at an old FLGS) was trying to get a more dynamic pose for the gunner, so their solution was to hack the bar that the gun is supposed to be mounted on, so that it rested lower. When I reassemble this, I will remount the gun back onto the bar, and just apply 'battle damage' to the area with the damaged bar. As you can see with this pic, the driver has a vast area where my paint was not able to reach, as well as the back side of the gunner and the area he sits at.
This other pic shows that the gunner's legs were difficult to reach too. I know that while being used in the game, the likelihood that anyone would spot this would be slim, but it would just bother me if anyone could.

Here is the detached gunner, and you see the very limits to where my paint could reach. Again, although the likelihood of the gunner's back being spotted is slim, the shoulder pad would definitely me an annoyance.
Here you can see that I did the base coat for the pack markings and touched up the Shadow Gray base coat.

Another thing that bothered me was the tail of the Land Speeder. In the top image, you can see that the previous owner put it on backwards. While liked this because it distinguished it from the other one I have built already, I always thought it was a bit fragile. Scrutinizing it while working on it, I decided that this was just fricking stupid, and tore it off. After all, the 'flaps' were backwards!

It's subtle, but you might be able to detect a slight 'bowing' in the center of this tail. Not sure how to fix that...

Here you can see that I have touched up those hard to reach spaces. The driver was secured a bit too firmly, but having the driver out was enough to enable me to get a brush into those tight areas. Having base coated those spots, I then applied the pack marking base coats. This picture really shows off the barren spot where the heavy bolter was, and where I'm going to have to apply battle-damage.

And this is pretty much were I left off! More updates on this, and the Land Raider, in about a week!

-Joel


Monday, June 27, 2011

An update, plus some Terminator basing.

First update: Concerning White Dwarf, GW announced on their website the other day the changes to the release schedule and when subscribers should expect their copies to arrive. And, true to their word, I walk down to the mailbox and pull out the latest issue! Which, although focused on the new Storm of Magic expansion for WHRB, did have some interesting changes: 1. Zero LOTR content! No, really! 2. Usable content in the way of City Fight stratagems and some fairly inspiring articles revolving around the Cities of Death Codex. Although not a 'return to form' I was pleased with this issue.

The picture below is a collection of old terminator marines that I decided to glue to the bigger style bases in preparation for a game I played to today with Warfrog. Ultimately I will use green-stuff to smooth out the base. I've found that gluing the original base to the bigger base, not only makes the model a tad taller, and more in line with the current size of the terminators, but also provides some cool opportunities with modeling.


These models are all fairly old. The oldest being the models from the '89 range of terminators. The 2nd edition terminators tended to to be a bit more robust, and the finally the 2nd edition Space Hulk plastic terminators (pictured up front). But none of these guys freak out the kids at the local game-store quite like these guys:


These are the original Space Hulk terminators! LOL! I love 'em! So clunky, yet so much character. These miniatures were painted just before I truly came to grips with how I wanted their paint scheme to work for me, so they tend to be a bit muddy looking. Also, back then I never primed miniatures. I'm not sure why, I just didn't. For the most part, this worked out OK, but on these models, which were molded in a dark blue plastic, it really made a difference with the paint scheme. I intend to have all my terminators painted up to the standard that this Rune Priest Terminator (below) has been painted too, hopefully sooner than later:


Ha-ha,...damn, I just realized I'll have to fix his base too!
By the way, all the terminators above died at the hands of Warfrog's Eldar (accept for the the 2 that ran...I mean 'withdrew'... from the battle). We took pictures of the event which I think Warfrog plans on posting on his blog http://warfrog.blogspot.com/ so keep an eye out for that. Also, I got to see the roll-up 'rubber' battle mat that he recently reviewed; very cool products! If time, and my burning stomach ache, hadn't been against us we were hoping to paint it this evening.

Here was the army I used, lined up for pre-deployment.


The land raider crusader hasn't progressed much since the last write-up mainly due to some extra bits I've decided to order for it that I haven't managed to find yet at a price I can accept. (Why people will pay more money for a single piece off of a sprue than buying the entire sprue from GW directly is just a mystery I can't seem to solve). However I have made some progress on the landspeeder that appears in that series of articles, and I will be posting an update on that soon. That's all for updates that I have for now,
take care!
-Joel