Continuing on from
the first part of this saga, I have made considerable progress on this warp-crazed ork. He is almost done. Here are the steps that got him up to this point:
 |
| Primed. |
A fairly "no frills" step, but Chaos Black spray is expensive so why not celebrate it? The next pic is a basecoat on the stairs. I haven't done anymore than this to it so far, so expect more in depth discussion on this piece in Part 3 or 4.
 |
| Basecoat on the base. |
The ork flesh was basecoated using Caliban Green. The yellow parts were basecoated in Fiery Orange. The "black" area had a layer of an old Citadel dark blue color (the name of which alludes me currently -it is from the old Epic set) applied to it.
 |
| Basecoats. |
Goblin Green was the next layer on the flesh, which was followed by a wash of green/yellow ink.
 |
| Goblin Green! |
Sunburst Yellow was painted over the Fiery Orange. But I felt it need a bit more depth... as did the "black" areas. I drybrushed on some Shadow Grey highlights to those areas.
 |
| Sunburst Yellow |
Applebarrel Kiwi was layered on the flesh. Nuln Oil was washed over the "black" area to tone them back down. I used two washes of Nuln Oil to get the look I was happy with.
 |
| Kiwi on the flesh. |
The added depth came to me in the form a fairly new color that I have added to my palete; Bloodletter! This was washed over the Sunburst Yellow.
 |
| Bloodletter ink wash. |
Sunburst Yellow was this carefully applied over the this layer, and I think this worked well improviding the depth in tone that I sought. I may go back to the
Meganobs and apply these steps also, but I have yet to scrutinize them in this regard. Sunburst yellow was also applied to the flesh as a final highlight.
 |
| Sunburst yellow 2nd application. |
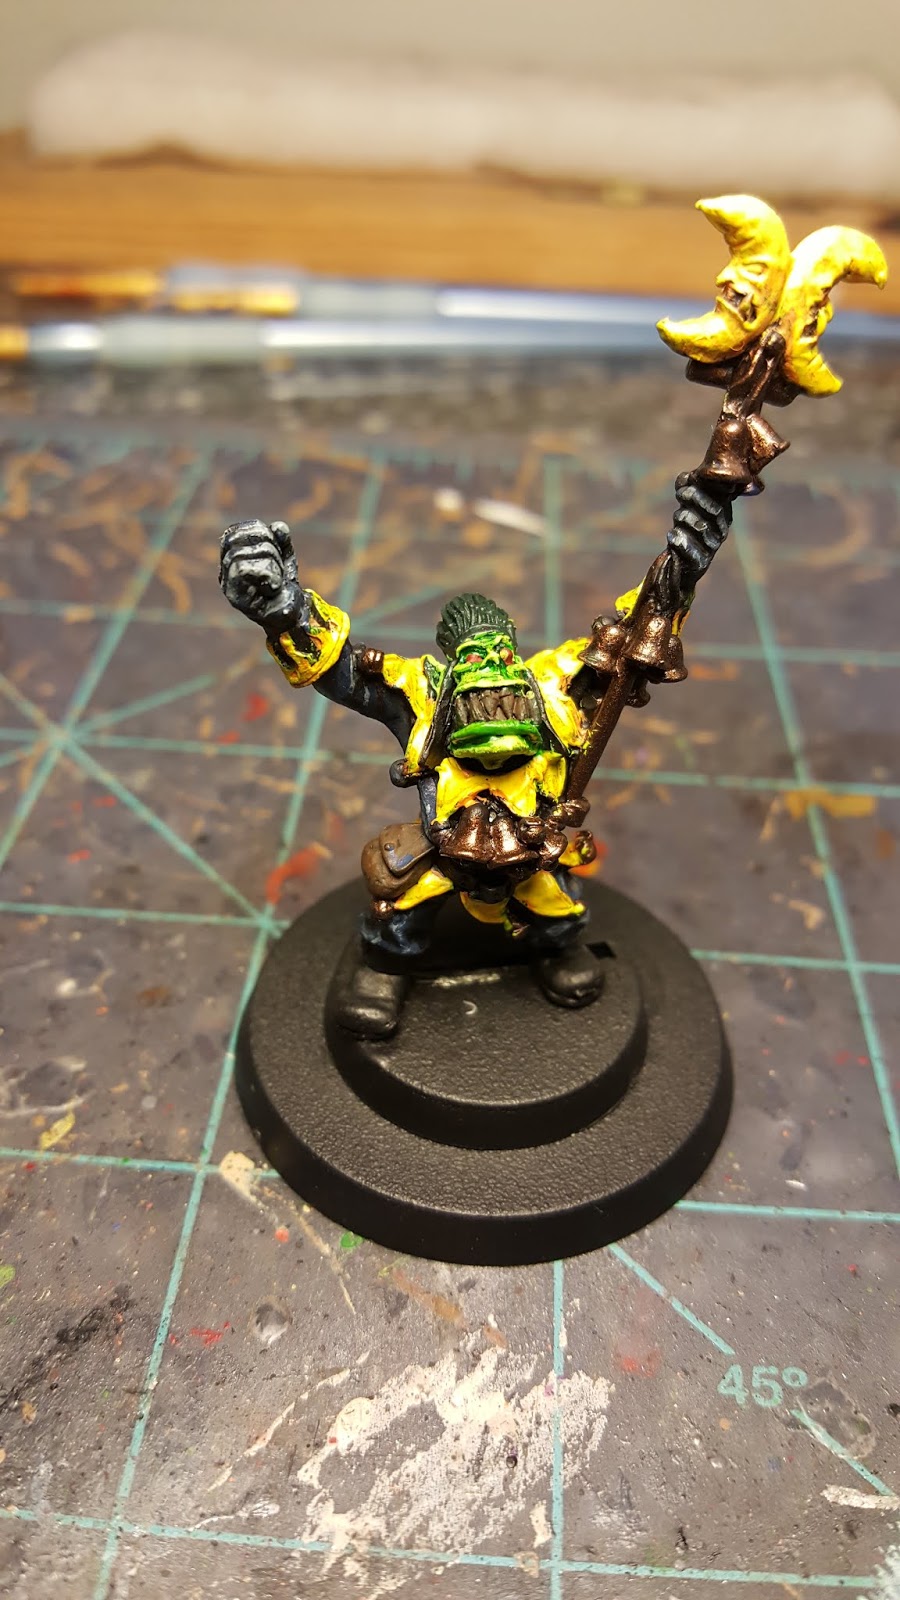
Next, I turned my attention to the yellow highlights. I used Bad Moon Yellow for this. I mean, it's only proper, right?
 |
| Bad Moon Yellow highlights. |
I used an old Ral Partha Bronze on the bells and staff. These are not done, as I will likely take them up to Shinning Gold before I probably bring them back down with an ink wash.
 |
| Bronze on the bells. |
And that is where I was forced to stop. Until next time!


4 comments:
That came out really well. Bravo. I do like the old school stuff.
He's an absolute classic and you've done him justice !
Great work :)
Thanks for the kind complements, I hope the final product meets your expectations.
Post a Comment