
I started with the flesh.

And some of the bases have metal on them, so I picked out those areas using Leadbelcher.

Next I started to apply the Khorne Red basecoats to their body armor. And then I didn't touch these things for over two years! But something recently inspired me to do so.
Fast forward about 28 months from when all of the above was written. My current job only has me scheduled for 1 day a week but I can be called in any day. I wake up and get ready in anticipation of work, and during that nervewracking wait time I found it to be quite a relief to jam on some miniatures. Instead of jamming on the miniatures already on my table I found myself picking at these wyches. With such a fleeting window of opportunity I just haven't been taking the work in progress shots I originally had hoped to do with this project. So I just jammed on them until they were done.
 |
| The Slicing Noose. |
I was originally going to showcase two models at a time but with the way this turned out, I'm just going to wrap it all up here.
 |
| WiP shot. |
I wanted the rims on these bases to be different from the Terracotta color that I typically use as it doesn't work right with these industrialized scenic bases. I tried Folkart Antique Copper (666 proceeds the name on the label so I suppose that is the model number or something? It seemed appropriate regardless.) which has a new penny sheen look to it. I liked it at first but ultimately decided that it overwhelmed the models so I lightly painted over that with Leadbelcher which gave me a really interesting look.
 |
| Folk Art 666 Antique Copper. |
The first of these finished models is the leader of the squad, Vylekh the Untouchable. I followed the pics of the Slicing Noose from the pamphlet that came in the Kill Team box as far as trying to figure out what is what on these models. They are insanely detailed for a base troop kit. Vylech has some extra details on whip and trophy rack that I took pains trying to reproduce. Not sure how successful it was but I feel "close enough" about it.
 |
| Vylekh the Untouchable. |
A detail that stuck out on all of them are their IV tubes of stimulate chemicals throughout their bodies. The damned things just kept being discovered long after I thought I was close to.being done with this unit.
 |
| Bithanded Khaur. |
These combat drug tubes were painted using Rotting Flesh base coat with a glaze of Tesseract Glow. I think these turned out well.
 |
| Veshrari the Cruel. |
The weird skin pelts they all wear at their groins were all painted in typical Cadian Flesh through Kislev Flesh staging. I think it's the most disturbing aspect of these models...
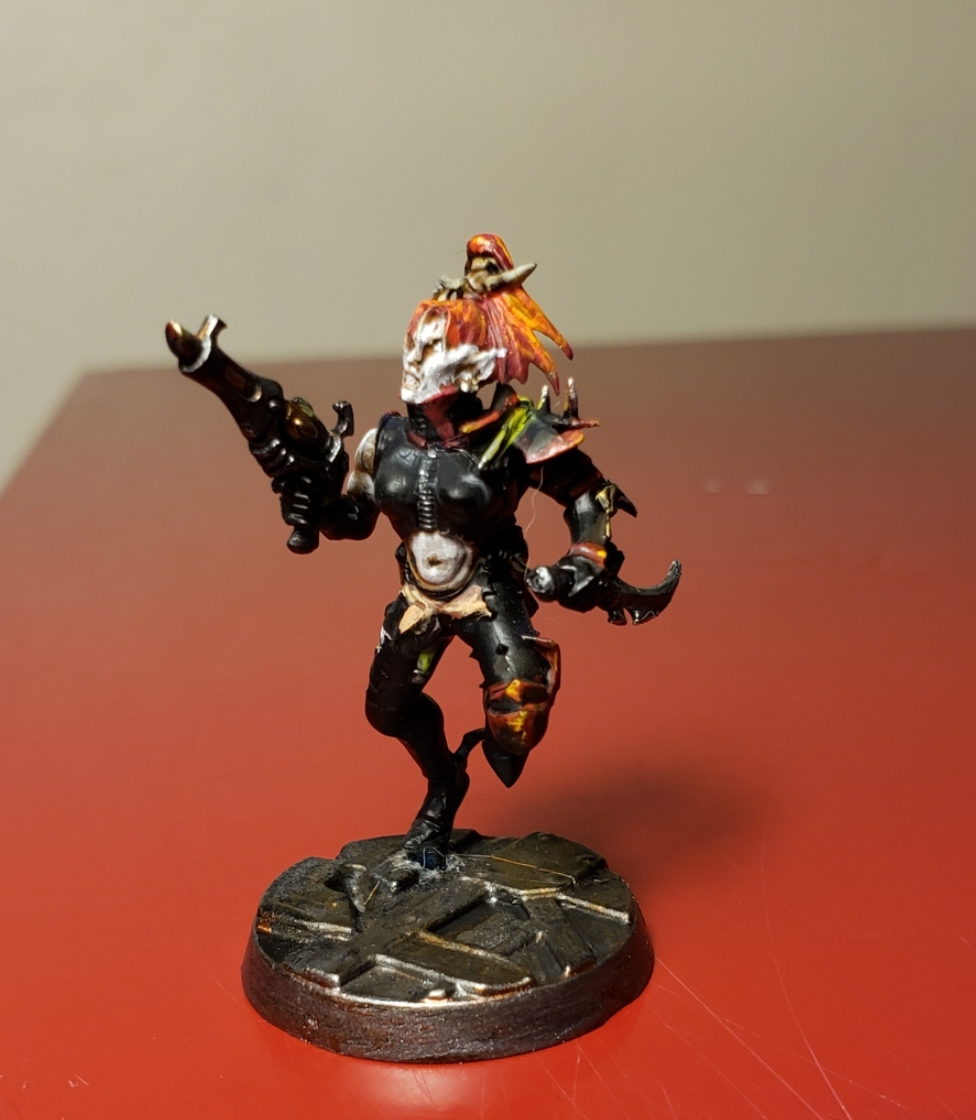 |
| Pelythia Berrebaal. |
The hair was done by using a basecoat of Wazdakka Red, the Fire Dragon Orange which was followed by a wash of Bloodletter. This was lastly highlighted with another light dryburshing of Fiery Orange.
 |
| Mellyx Veluxis. |
Ultimately I think I preferred how the flesh turned out on my Venom Pilots so I will likely return to that method on whatever murder elves that I paint next.
 |
| Unless the Screaming Blade. |
 |
| Thessa khrone. |
 |
| Nyx Bloodslyk. |
The bones and hair ties were done using Ushanti Bone, washed with Agrax Earthshade, with the bones highlighted again with Ushanti Bone.
 |
| Xela Vexx. |
The greenish glow of the eye slots on the crome masks were done by using Rotting Flesh (or whatever it's modern equivalent is called) with Tesseract glow washed over it. This came better than I had hoped! In the pics of the Slicing Noose pamphlet these masks were painted White, but I just didn't like the way it looked so I opted for Mithereal Silver.
 |
| Shexen the Faceless. |
And that's it, they're done! Will they see battle in a Kill Team or a 40k game first? There are challenges for both, but for now I am just pleased to get them done. Having said that, while taking these pics I found myself nitpicking at some details which I may go back and correct. (Seriously, is that a fricking cat hair on Vylekh's face?!) If so there just might be a part 3... but, I am thinking I should do up a second unit, and use The Slicing Noose as coloring guides for the next batch. Either way, it's nice to have options, right?


