Sunday, March 28, 2021

Eeew, Grotti (Part 2)


Grotti.

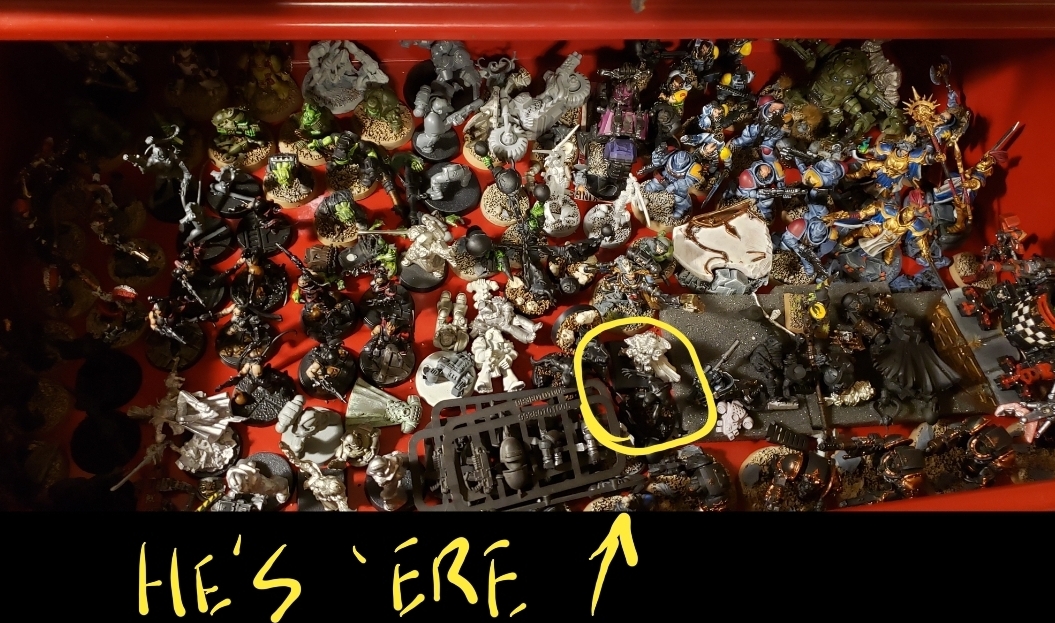
It's close to 5 years now since I last put any consideration towards this miniature. While reviewing my painting queue backlog at the New Year I found him lurking under some backpack sprues for my Deathwatch Marines. I have more nurglings that I want to paint in the near future and I wanted to play around with some different color schemes, so finding him was a nice surprise. 


In the first post on this little fellow (Eeew, Grotti) I wrote about how I was indecisive regarding how I wanted to color him. Sadly the rules for this fellow were quickly left behind with the change from 7th Edition Warhammer 40,000 to the 8tb, and I doubt he'll be back in 9th. His disappearance from the rules meant the necessity for completion was all but eliminated. But now he has a use as a test-bed for some color experiments. 

And the color experiment that I have in mind is based on the tutorial (How To Paint Death Guard: Nurlgings) that Warhammer TV posted using Contrast Paints. It seemed simple enough, and I have been curious to see what I could pull off using Contrast Medium and this is the perfect excuse to try it out. 


Pallid Flesh undercoat.

The first step is to paint Pallid Flesh over the entire model. Which is a weird way to start out but watch where this goes from here...

Next I followed the instructions from that video bu adding some Volupuis Pink Contrast paint to some Contrast Medium. Once that dried I added some more Volupuis Pink with a bit less Contrast Medium to the recesses. I was quite pleased with the results thus far! 

Contrast Medium/Volupuis Pink layer.

Continuing on with steps layer out in the video, I next applied some "very cheeky highlights" to the raised areas of the fleshy bits. This was done using Pallid Wyche Flesh. Again, I am loving how this is turning out, and even more so considering the speed in which it was accomplished in. 

Pallid Wyche Flesh highlight.
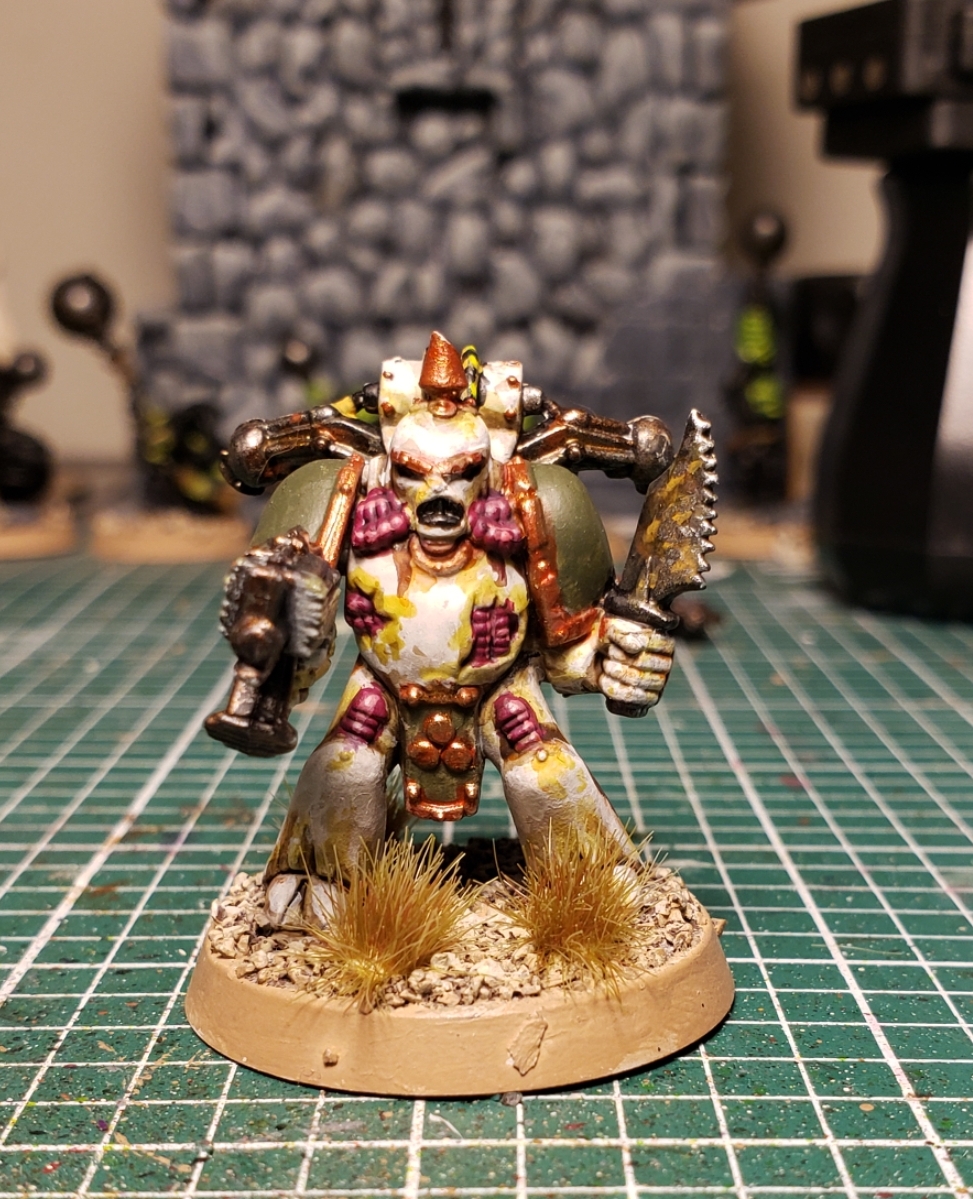
It was time for the final touches. The tongue was painted using the same technique I used for the guts on the recent Death Guard Experiments (Screamer Pink, Druchii Violet and Pink Horror). The horns I decided to keep simple and low-key. I did this by mixing 75% Drakenhof Nightshade and 25% Coelia Greenshade. Finally I dotted the eyes with Folkart Lemmonade.

Final touches.


Finally I finished off the base's rim and added a  grass tuft or two...and presto, done! Although I am considering adding some gloss varnish to the grossier bits...

The scenic Grotti.

Despite the perception one may get from the staging pics, it really went pretty quick. Which makes me considerably happy when I realize just how may nurglings I will be painting in the future (hint: it'll be a lot).

Tuesday, March 23, 2021

Tales From The Smoking Wyrm #3


Hello! I am happy, nay, THRILLED to announce that the Kickstarter for Tales From The Smoking Wyrm #3 is now live! And before I had the chance to share that news with you folks here, it has already funded! It funded in less than 2 hours and is still going strong. 

Join us!

If you missed my posts in the past regarding the two previous issues, here is a descriptive summary from the Kickstarter: "Tales from the Smoking Wyrm is a fanzine inspired not just by the roleplaying game Dungeon Crawl Classics (DCC), but also by the wondrous fanzines of the past 40 years! While we focus on DCC, the material produced can be easily translated into any Old School Renaissance (OSR) system, or even 5th edition D&D—something several of our reviewers have noticed as well!"

Archomental fun!

I have been looking at a lot of Fighting Fantasy and old (very old) Warhammer art as well as classic John Buscema Conan for inspiration for some the art that did for this issue. I am not sure how well that stuff shines through in my art per se, but I'm talking about the vibe that those early pieces inspired me. Anyway, I hope you check it out and thank you ahead of time if you decide to support us.

A snippet from my comic feature, Onward Retainer!


Here's the link again: .kickstarter Tales From The Smoking Wyrm-issue-3. There are pretty tasty add-ons this time around also. We hope you get it and we hope you love it! 

As usual, TK Rats are hiding within... 

-Joel

Thursday, March 18, 2021

The Fifth Death Guard Experiment

 The fifth and final miniature from this old five model boxed set to find itself part of my experiments in Death Guard coloration is the guy I decided to make into the unit Champion. I never originally intended to make this guy the unit Champion, it just all sort of happened. When I opened up the box at the beginning of this project I discovered that his head spike was broke off. I found a bit from a Fantasy Khorne miniature that had a skull stuck on it. I attached this to his head and I really liked the results. 

With skulls on his mind.

This simple little kit bashed repair made me think I could do a bit more, so I swapped out his Plague Knife with a sword from a Plaguebarer. My initial thought was that it would just count as a Plague Knife, it just looked different. But when I saw the new Codex and in it they have a model of a Plague Champion with a blade that also looked just like a Plaguebearer's weapon. Well, it only made sense that this guys should also be a Plague Champion. And since I don't think I have a Champion miniature from this time to lead this unit, so he got the promotion. 


The 'Gets Hot! Special' plasma pistol.

But now that I had committed this miniature into becoming the squad leader it only made sense to maximize his potential, so I decided to swap out his bolter for a plasma pistol. Instead of cutting off the gun from his old arm I just used a whole new arm from the '90s era plastic Chaos Space Marines kit. The plasma pistol comes from the late 2nd edition era Ork Assault Sprue. From back when plasma weapons were something that orks used in abundance. These plasma guns looked more suitable for Chaos than they did the Ork line, and to prove the point, here it is on this guy.  I dubbed it the "Gets Hot! Special" since these things have killed more friends than foes since '96 (and yet, like dunces  we still use them...).
View of the backpack detail.

Here he is with all five members of his boxed set.

The Rotten Many. 

I still have many more '90s era Death Guard to paint, but so far these experiments have all been fullfilling and I like how they have turned out. Let's look at their glamor shots now:

Sgt Whitehead*, Plague Champion.

Note that I haven't decided which icons to use on their shoulder pads yet. I hope to have that figured out sooner than later...

The whole revolting gang.

I have two more boxes of these models to build up and paint as well as a few Special Weapons and a banner guy to go with them. It should make a small revolting detachment when they are all done.. 

*Thanks Masta Cheef for the name suggestion.

Monday, March 15, 2021

The Fourth Death Guard Experiment.

 The fourth member of these old school (it pains me to admit that '96 is old, but here we are...*sigh*) has been completed. He is pretty close to the previous guy, Experiment #3, who followed the steps and scheme for Experiment #2.  To sum up, he is supposed to be the third step in the transition from the Horus Heresy era scheme to the current era Death Guard look. The last guy will be the fourth step. Got it? Good! Let's check him out. 


I toned dowb the rust that was so pervasive on the Experiment #3, and applied Plaguebearer Contrast paint in the receeding areas and the rotty bits.  The rust on the plague knife was painted to be closer in steps to the one that Experiment #1 has, which is all rusty and tetanus evoking. The results are a more dirty and grimey look, even though it does appear to a bit subtle in these photos. It's got a Blanchitsu vibe to it that I have never been able to pull off before I really think that's cool.


So with that here is the current look of the progression:

The Rotten Many line up.

So far so fun! We'll be looking at the last guy really soon, and in that post I will get better pics of all these guys, who, I have to admit, have been more fun to paint than I thought they would be. 


Monday, March 08, 2021

Great Unclean One kit maximizing Part 1 (TSG Project)


Greetings. Some time ago Dr. TSG sent me some photos of a project he had started. You see, he just loves to convert models and has a rather strong dislike of the current trend of mono-posed models that offer little customization. So when he got his hands on the current Great Unclean One kit, with all it's head options, the Chaos gods spoke to him and inspired a rather unique conversion opportunity: an actively mutating Great Unclean One! Actually, he had this idea way before getting the kit. I found an old text exchange between us from when GW first revealed this kit. At the time he said: "I am going to convert some metal versions onto this..." He was referring to the old metal 1st Edition versions that he still has in blister packs.  But seeing these extra heads on the sprue clearly presented a more favorable modeling opportunity, so out came the tools and Green stuff and off to work he went on it.


This conversion resulted in the creation of additional faces manifesting on his backside, screaming in impotent rage over not having full possession of this body. I think it looks freak'n awesome! 


He took the opportunity to also fill in the obvious join lines as well.


And that's all for now. Dr TSG has been busy with building his modeling/hobby studio so it may be a while before he can get back this (and other) projects.

Monday, March 01, 2021

He's a Mekaniak

 It's time to paint a Mekboy for my Blood Axe detachment. Some of you may have seen this chap before as I had originally started this paintjob with the intention of using him for a Goff themed Gorkamorka gang. That project fizzled out and he has been stuck in the queue ever since. While accessing my paint queue back at the New Year I found this guy lurking in the back of the pack and it occurred to me that he fit my Blood Axes so much better than he did the Goffs. And so, here we are,

It's like these old models should have always been on 32mm bases. 

The first thing I needed to do was get his base extended out to 32mm. After attaching the base extender onto the model I gritted it up and started the process of painting it. Then I colored the cap and uniform (unlike other orks, Blood Axes truly believe in uniforms. Well, theoretically anyway.) Tamiya Color Acrylic Paint Olive Drab. The stuff coats good and it it's nice and dark over the Chaos Black primer. 

Olive Drab.

After this I launched into this full throttle, after all my window to work on this was very small. I liberally washed Agrax Earthshade all over the Olive Drab. After that I added Castellon Green over that layer. A final highlight of Loren Forest was applied to finish off the Olive Drab uniform.

A leather apron for a Mekboy's bits and kit.

I decided to paint the apron to appear like it's leather. I think it looks good over all, and doesn't clash or overwhelm the Olive Drab. The tools contrast nicely against it also. 

Oily rags, a Mekboy trapping indeed.

The accessories were fun to do also, particularly the oily rag hanging on his side. I tried to paint the yellow and black stripes on the band that does around the cap to sort of resemble some of the Blood Axe art that I remember seeing from way back in the day. I wanted to make the toolbox rough and worn as well. You might notice I got some black on the back of his hand. Instead of fixing it I figured it's best to leave it alone. In fact, as much oil and grease this guy's going to be exposed to I ought to add more, like all over the model! 

Tuft love.

But I resisted that urge, because I was really digging how this miniature is turning out over all. So, after a few final touches it was time to add the flock. -But I almost missed a step! 

Decal added.

Sifting through my decal collection I came across this old Mekboy icon. I was originally looking for a Blood Axe one to add to him but thought that the specialist badge made a lot more sense. Since the decal's probably close to 30 years old, I added a layer of 'ard Coat over it to secure the bond. The only thing left to do is spray a protective coat on him to reduce chipping since he is metal. But I will have to wait until it's a bit warmer outside for that. 

And presto, it's done! And a very fast turn around time it was! I think I'm going to like painting Blood Axes. I find them to be way more easier to paint than Bad Moons or Goffs. Having said that, I ought to finish those Blood Axe Boyz I started on back in 2019 'ey?