Showing posts with label Land Raider Crusader. Show all posts

Wednesday, April 25, 2018

7th Year Blog Birthday Post (or Pods to Drop and Lands to Raid part 1 redux)

Seven years? In some ways it feels longer!

Unlike last year's birthday I am not doing any give aways for anyone to win this year. (I know, I suck) Although that was a fun thing to do, my hobby time is a lot thinner currently and I just don't have time to make that work out this year. Plus, I hated excluding some of the local people from it. I wanted to avoid an appearance of a bias... but excluding people just feels...mean.

So this year, I think I will do a brief flashback to the first year and an overview of what's going on these days.

First off, if you are on Facebook I invite you to send me a friend request and also request to join our group: Neverness Hobbies. We have discussions about new releases, rumors, etc that I would otherwise not ever post in this blog. 

The Land Raider from earliest posts.
Now for a Neverness Chronicle birthday flashback. The blog started off as a WIP series focusing on my Drop Pods and Land Raider for my Space Wolves. Although the Land Raider would be finished in time, those Drop Pods are still in an unplayable state. (I really should correct that).

The other day while doing some site maintenance on this blog I found that I had the original version of the very first blog post (linked above)  saved as a draft. I am not sure why I did this, but there it was. The verbage was similar to what was posted but the final post was a bit more polished, professional in tone (to the point of being overly verbose) and not as excited and relaxed in tone. Maybe I was nervous and not so comfortable yet with the idea of blog writing? I can not recall, but the difference is there.  So I figured, why waste all that writting? Why not share it here as a retrospective sort of thing? Why not indeed, so here it is raw and unedited:


Pods to Drop and Lands to Raid part 1

Ok, so onto what truly inspired me to start this blog. Last Saturday I played a 40K game and tried out the Space Marine drop pod for the first time and was impressed with the tacticality and functionality of it. So the next day I decided that I needed more! So while rumageing about in my miniature closet (the names doesn't really do it justice, I have more unopened models in there than what Hobbytown currently has in stock! LOL) I have three more unopened drop pods. I knew immediately that I wanted a bunch of these, so I got four  in a sweet deal online. It took me a LONG time to build the first one however. It has to be the most complicated kit GW carries, and if you care about how these things look, you HAVE to paint it before you build it. So I did, and with work, etc, it took me something like 7 months to complete it.
Here it is:


So, I grabbed a box, tore off the shrink wrap, and took the sprues outside and primed them black. This was on Easter Sunday morning. When I came back from my folk's house later that day, I went in was going to grap an additional box when my old Land Raider Cruesader box called out to me.


This was a kit I picked up about 10 years ago now, and started to paint the bits while on the sprue. As i was about to assemble it, i discovered that the blisters in the box were identical meaning that I had doubles of some parts while missing others. I must have moved out my parents house around this time and just never dealt with GW customer service to get the issue corrected.


Last year, I pulled this thing out, only to rediscover my dilema, only now, this kit no longer is made and it has been updated with plastic parts. It was more convenient, and a tad more advantagous, to just order the plastic sprue seperately. Which I did, tossed it in the box, and after driving and flying all over the nation's interior, forgot about it again (I was probably focusing on getting the drop pod done).


So, Sunday, I pulled this out and said: "Oh HELL yeah! I'm doing THIS!" And started goofing around with it. The goofing turned into commitment, and before I knew it, it was really late at night and I had gotten pretty far with it!


...and thus ends the draft post. As you can see, I was very excited about starting this blog and getting some focus back into these modeling projects. One of the things I was glad about was to see how far improved my picture quality has improved! A big difference seven years makes.

I hope you enjoyed this strange flashback, I hope year seven is a memorable one for us all.

Friday, December 27, 2013

Pods to Drop and Lands to Raid part 12


Unlike the previous post in this series where I had little to show on the Land Raider Crusader, this time all I have to show and tell is the Land Raider. In fact, I have (mostly) completed it! Inspired by the last post in this series, I decided to push myself to complete what I had started on this model by Christmas.

First thing I had to do was complete the twin-linked Las Cannon sponsons, which you can see here. I would add the targeting systems and decals soon after this pic was taken.


I spent quite a bit of time getting the polarity aligned correctly with the magnets, but in the end all I had to do was turn them over and they now fit firmly onto the chassis.


Next up was deciding what to do about the multimelta turret. In the end I decided to add a techmarine techpriest gunner but in a lower position. The stormbolter gunner had grey armor with a red Adeptus Mechanicus shoulder plate but this guy I wanted to make all red. I just like this look for the Mechanicus, and to make things feel a bit more full-circle with my army, I opted for the MK VI "beaky" helmet.

I painted the head by mounting it to a pin-vice. 

The components are gathered. 


In the Rogue Trader days the beaky marines were often painted with a stripe going down the center of their helms. I particularly recall seeing a Techmarine painted with a yellow and black cautions stripe on his helm and thought it might be cool to do this guy like that.

The yellow stripe was added first by drawing it on with Blazing Orange then topping it with Sunburst Yellow.

I then drew on the black stripes. 
 I sort of messed it up the first time but I painted over the black then redrew it on again.

Just screams old-school tech marine doesn't he? 
 Then I added him to his turret.

Ready to melt stuff!
I positioned his head in the direction of the monitor on the gun's blast shield.

 I am still debating whether to attached the hatches to it like I did to the Storm Bolter. It makes sense too for modeling purposes, but for practicality purposes the connection to the ring of the hatch is sort of fragile.


Both hatch weapons and crew being compared while I make a decision on it...
 I sent these pics to a few friends while I was working on the multimelta, to which Da Masta Cheef responded with "But Multimeltas only roll '2's to hit!", an allusion toward his personal lack of success using one on his Land Raider Crusader. In fact he ripped it off of his model I believe. I vaporized an Ultramarine with one last week, so I felt it was worth taking. :)

And here is everything pretty much done after I added the decals.


One of the reasons to make this tank this way was so that I could still view the interior details. I am very pleased with how this turned out!

Hail to the Great Machine Spirit. 
 Here is the Landraider outside in natural light (albeit, the harsh low winter light) without any sponsons or addition weapons.

A disarmed Land Raider.
A fully armed Land Raider Crusader
A fully armed standard Land Raider 

Land Raider Crusader

Standard Land Raider

 I will do a set of Sponsons for the Land Raider Redeemer as well, so I can have all three options as my disposal.

Also I intend to add some slight wear-and-tear on this tank, like chipped paint and scrapes, mostly around the door, and maybe some ground splatter toward the bottom near the tracks and on them. I want to put a spot light on, but the obvious place to put it is in the way of the multimelta when I swing it that way. It's not vital, but I like to be as WYSISYG as much as possible.

Meanwhile, work (slowly) continues on the Drop Pod #2.


Sunday, December 22, 2013

'Carnage!'

Greetings from the bloodied battlefields of the 41st millennium! Knowing that my time for playing the game before the New Year arrives was very limited, I decided to finish the year out with my Space Wolves taking to the field of battle. Also I might've been inspired to do so because I spent the day working toward finishing the Land Raider Crusader (as showcased in the early 'Pods to Drop and Lands to Raid' series) and got it to the point that I thought it was time to give it a proper shake down. When I arrived to Hobbytown, we discovered that we were limited on tables for the evening and we had more players in attendance then we typically do. Mac just so happened to have his PDA with the new 'Carnage!' downloaded on to it, and suddenly the lack of tables was no longer an issue.

Brought to us by GamesWorkshopDigitalEditions 
As part of the Advent Calendar series of daily releases that Games Workshop is doing they released to the world 'Carnage!' on December 17th. Here is a brief description according to their Facebook page:
"('Carnage!') is a new four-player Mission for Warhammer 40,000. ‘Carnage!’ is a brutal game that pits your army against three opponents in furious all-out war. Alliances will be made and broken, blood will be spilt, for there can only be one victor."

So Mac (Ultramarines), Scott (Imperial Fists), Skylar (Chaos Space Marines) and I, "Neverness" (Space Wolves) decided to give this a try. We each had 1500 point lists. My list comprised of the Land Raider Crusader on it's maiden voyage (so to speak), a whirlwind, 5 Wolfguard, a full squad of 10 Grey Hunters, a smaller squad of Grey Hunters which the Rune Priest would join, a pack of missile launcher totting Long Fangs, a Lone Wolf and my Wolflord Sven Axegrinder. 

Ready to deploy! 
 I don't have a list of what my opponents had, only that I knew going in that it was going to be a hard fight considering that we all had powered armor and my army was balanced more toward dealing with hordes as opposed to armor penetration. I ended up deploying last.

Chaos and Space Wolves deployment zones. Note that the Long Fangs are inside the bunker.
 Opposite me on this short side of the table is the Chaos force. All of us eyeing, with concern, the Helldrake sitting off-table in Reserve...
Ultramarines and Imperial Fist deployment zones.

The Ultramarines and Imperial Fists had squads waiting to deploy in drop pods (I had to put in a Rhino in place of my drop pod which I accidentally left at home!). I had nothing staying out in reserves. This is amusing due to my Warlord Trait, "Strategic Genius", which allows re-rolls on reserve rolls. Genius isn't anything Sven has ever been accused of before and why should he have to deal with such a charge now?

"The Relic" a lost suit of armor. 
 I went first. Nothing much accomplished on my first turn other than killing a few of the Las Cannon wielding Havocs that were perched high on a rocky outcropping. It was dark on this first turn and the Night-Fighting rules were in effect which spared more of the lives of Chaos foes with in my reach... I had hoped to get the "First Blood" Secondary Objective but it was not to be. I raced the Rhino up field and launched smoke.

Space Wolf turn 1.
 The Chaos first turn began, 
 The Chaos force focused mostly on trying to kill the Lone Wolf who was lapping over towards his line. He deflected every las cannon hit with his Storm Shield, saved every bolter hit or simply didn't feel any pain from them. It was a lot of shots, and he didn't get a scratch. Chaos was worried, while the Fists and Ultras watched with respectable interest and relief that he wasn't heading in their direction! The rest of the Chaos force took shots and maneuvers against the Imperial Fists (there is apparently a standing rivalry with these two).

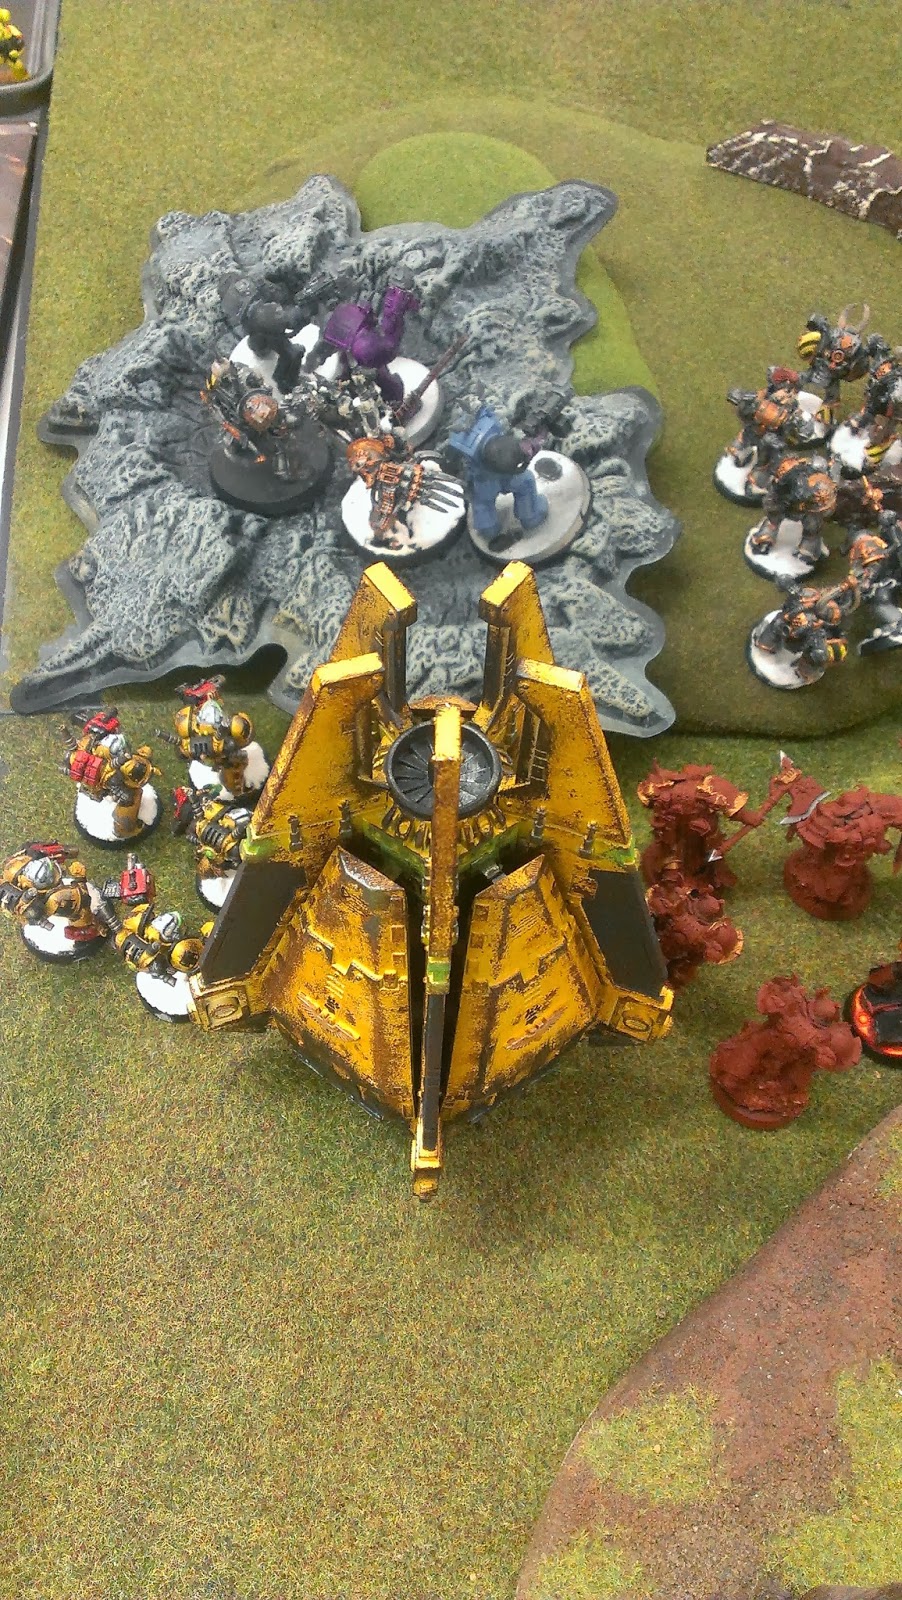
The Imperial Fist first turn starts with the screaming arrival of the Imperial Fist Drop Pod, arriving right on target on the edge of the Chaos deployment zone. it was close!  They jumped out, and with deadly precision blew up the Chaos Landraider! My Land Raider crew took note of this action with nervous apprehension...

Ambush!
The Imperial Fists charge the hill, with the Contemptor Dreadnought leading the way.

 Ultramarines first turn. 
Attempting to replicate the success of the Imperial Fist's tactics., the Ultramarines tried the same thing, only his dice betrayed him and the Drop Pod scattered off of the board, and to make matters worse, he rolled a 1 on the mishap table, losing a very potent Command Squad! Mac says the point value of that unit was over 300 points. Ouch.
The dice say NO, and scatter the Drop Pod 7" away and off the table...
 After dealing with the shock of that loss, Mac refocused his attentions, mostly on me, took his rage out on my smaller Grey Hunter squad and killed all by one member of the pack, leaving just him and the Rune Priest.
Imagine a lot of Space Wolf bodies in the big green space...
 The smoke on the rhino helped it survive as it avoided being slagged by las cannons!

Space Wolves turn 2. 
I was mostly concerned with the treacherous machinations of the Ultramarines, however their power armor proved effective against my firepower when ours had failed! Perhaps this is why we're fighting over a dead Ultramarine -they have superior armor tech!?

My Rune Priest and Grey Hunter charge the Ultramarines, with the Rune Priest taking a wound from an Overwatch shot!
Space Wolves vs. Ultramarines! The Rune Priest would remain locked here for awhile...
 On the Chaos front I reduced the Havocs numbers down a little more and sent the Lone Wolf striding forward.

 Chaos Turn two. 
The Helldrake arrives. It annihilates an Imperial Fist Devastator squad with it's Bale Flamer! Mac and I look up from our own little war to see the common foe has taken the field!

"KILL IT!!!"
 The three remaining Chaos Marines (I had picked off a few last round) moved forward to deal with the Lone Wolf, who still refused to take a hit. The red guys charged the Imperial Fist drop pod crew.

Over the course of two assault rounds, these red guys would kill off the drop pod crew.
 Imperial Fist turn 2. 
Basically Scott threw everything at the Helldrake. But it was no good, as it was still flying and still looking to kill more!

Ultramarines turn 2 (The uneasy truce)

Concerned about Helldrake and the obvious bloodbath we were setting up for each other, Mac asked for a parley, a temporary truce, to deal with the Helldrake as opposed to having a Terminator slug-fest in the middle of the field. I reluctantly agreed, leaving only our melee as it was. He teleported his terminator squad and Warlord on top of the hill taking the objective.

Teleport successful! 
 This mission does use hidden objectives, and it turned out to be a Skyfire Nexus! Quite impress suit of armor indeed! And very fortunate for us all. The terminators opened up on the Helldrake, damaging it. A krak missile from the cyclone missile launcher destroyed the bale flamer, eliminating the Helldrake's most troublesome aspect.

Space Wolves Turn 3

i repositioned my Landradier Crusader to assist with dealing with the Helldrake, but it failed to bring down the daemon engine. My Rhino held it's ground, while the Lone Wolf had moved up to charge the 3 Khorned-marked Chaos Marines that had been sent to eliminate him, only to have his glory robbed from him by the Long Fangs that wiped the unit out with Krak Missiles. I imagined the Lone Wolf turning around and cussing his comrades who were probably giddy about the whole incident...

I still think I should've ignored the truce the dealt with the rhinos instead.
 Chaos Turn 3.

The Helldrake performed a vector strike against the Contemptor, knocking off some hull points. It flew over to the far side of the Ultramarine deployment zone far away from any action...


Meanwhile the Chaos Warlord and the Imperial Fist Warlord would tangle for a few assault phases in close combat, with the two warriors ultimately killing each other!
"I say, you wouldn't mind terribly to place your head on one of these spikes would you? It would be a awfully helpful." 
 Imperial Fist Turn 3.
The Fists moved up on the Ultras, now that the threat of the Helldrake has flown by, and set up to make a gambit for the objective, as well as focusing on tabling the Chaos force.

Ultramarines Turn 4

With almost the whole force deployed to hold the center, Mac let the treachery of the Ultramarines be revealed. He opened up on the Imperial Fists, destroying the Contemptor Dreadnought. He then deployed his Devastators who wrecked the Rhino, forcing the Grey Hunters to bail out, and pinning them! (My Space Wolves are rarely pinned!). He also had his Techmarine jump in to assist the two marines that had locked in combat with the Runepriest, defeating the Runepriest.

"Bail out lads, and hit the dirt!"
 Space Wolves Turn 4

Enraged by this Ultramarine treachery, The Land Raider Crusader moved up, and the Terminators deployed. The combined fired power of the Crusader and Wolf Guard Terminator squad reduced the Devastators down to just 2 men. They had no chance once Wolfguard charged, and their scalps were claimed for Russ. A 6" consolidation allowed the Wolf Guard to take the Objective.

"We've taken the hill, prepare to defend it!"
 Meanwhile on the other side of the field, the Lone Wolf charged and finally took a wound from the overwatch attack of the red Chaos Marines, who were then defeated and ran down by him. He consolidated to confront the Ultramarine Assault Squad that had been sent "to help".

"Say, any of you guys up for giving me a glorious death?"
 Chaos Turn 4. 

The only thing he had left at this point was lone Havoc marine, and the Helldrake. The Helldrake attempted to vector strike a rhino that was broke down in the Ultramarine deployment zone, and it managed to remove a hull point.

Imperial Fist turn 4. 

With revenge in mind, the Imperial Fists opened up and tore apart the Ultramarines, eliminating an Assault Squad and most of the Terminators! He took a shot against the last Havoc, effectively tabling the Chaos army.
The final pic.
Ultramarines Turn 4. 

We noted how late it was (we played an hour and half over the usual stop time), and assessing the field, Mac decided to call the game, declaring me the victor for being on the objective. I wished we had at least played through his turn, but as late as it was, it made sense to stop. 

My final thoughts on this scenario is that it is very fun! However time is something to consider, as each turn takes longer to work through as opposed to a two-on-two game. Next time we might knock the points back a bit in order to finish a proper game in the time allowed. A bit like the overview of Triumph and Treachery, alliances can be made and torn asunder in a matter of moments, and find that a fun aspect that you never see in a typical 40k game. 

Thanks for a good game guys!
...
You can download the eBook edition of this new Mission here:
http://www.blacklibrary.com/games-workshop-digital-editions/Carnage.html

Sunday, December 08, 2013

Pods to Drop and Lands to Raid part 11

It has been a long time since I added to this series, but don't think that I have been idle on these items during this time. For those of you who might be seeing this series for the 1st time, this is a focus on select vehicles in my Space Wolves army and for the most part I talk about my steps-by-steps in their construction. At the end of Part 10 (which was posted in March of 2012! Yikes!) I listed these items in this series that I would focus on:

  • Minor Touch-ups on the Land Raider Crusader
  • 2 more Land Speeder Typhoons
  • and about 3 more Drop Pods


So let's review these in order.

Land Raider Crusader. Let's Start with the big one. The Land Raider Crusader has had most of the new sponsons painted, they just need to be assembled and magnetized. But I was really hung up, and I still am really, on the multi-melta sponson; I just can't decide whether I like it better with or without a gunner in it. To confound it more, I already have a gunner for the pintle-mounted storm bolter and I just think the Land Raider looks a bit silly with more than one guy sticking out of the top of it.

As of March 6th of 2013, and it hasn't changed since! 

As you can see, it just needs to be assembled and it's done, assuming I choose to not go with a gunner. I'm a bit fond of the burnt metal on the multi-melta's barrel and I like the targeting display. -Just stuck on it still!

Land Speeder Typhoons. I have suspended work on these for the time being, mainly due to my side interest in Dark Angels. I am flirting with whether or not they should be requisitioned by the Ravenwing. Heresy though it it is to think such thoughts as a Space Wolf player, right? Also I haven't really been using Land Speeders a whole lot in my Space Wolf lists recently so the urgency to complete these just hasn't been high.

Drop Pods. As followers of this blog might've read, I have occasionally done some work on my 2nd Space Wolf Drop Pod. I actually started work on this... I think in the fall of 2011 in Elkhart Indiana. I know I hauled it around to a few places intending to work on it, but not getting too far into it. (Wow-Has it really been two years since I started working on this? I remember that trip fondly because I drove from Elkhart IN to South Hampton MA for my cousin's wedding!). Anyway, Drop Pod #2 has seen many miles and many hotel rooms, yet failed to gather much paint! Haha!

These  first two pics where taken on 2/12/2013 while on my last business trip to Nashville and utilizing the Portable Neverness Kit.


In this first pic, you can see that I was starting on the first layer of mid-tones on the doors, and I had, crudely, hand painted the Wolf Guard icons on the exterior fins. I recall that I painted on this kit for awhile before stopping to write a blog post using my work laptop. Often back then I would post from the road as time was too precious and fleeting at home, and posting from the road helped to take my mind away from the trivialities of work. And it was fun!


This was as far as I got with that night, and few weeks later I switched jobs and now I don't travel like I did. As a result, I have not touched this kit or the Portable Neverness kit instead painting either random things for a day or two, or focusing on my WHFB Orcs.

Last Saturday, that changed. I was planning on spending the evening at my girlfriend's place, and she had to go to sleep early in order to get up to go to work (we're talking 4am-early) and I wasn't going to disturb her rest! So, what to do... and there was the Portable Neverness kit with the Drop Pod box on it, so I said :what the heck," took a snap-shot of the open doors of  Drop Pod #1 for reference, grabbed up the kits, and after spending a lovely evening with my gal, I then worked on this project well into the night.

A model being a model! 
 I finished all the mid-tones on the exterior pieces, as well as tightened up the Wolf Guard patterns on the fins.

I then clipped and assembled the doors. This is a kit where rubber-bands are definitely your friend!


And finally I further tightened up the Wolf Guard Pack markings and painted them with Bad Moon Yellow.

All done by hand, no ruling, templates, etc. 

Not bad for a late evening's focus. I haven't had much time this past week for anything hobby related as I have been focused on studying for a major work-related test. But last night, I repeated what I did in the previous week and made some more progress. This next pic shows where I added more to the mid tones on the doors and to the interior floor.


And this one shows more progress on the doors particularly where I added the thinned washes and dabs of Space Wolf Grey before tightening it up with solid Space Wolf Grey.


I didn't take a pic of the fins where I went and added metallic colors to some of the metal bits on it. The rest of the interior parts I will try to do at home once I have completed this study course for work.

All in all, I'm excited again about this drop pod, and hope to make more progress on it soon!