Showing posts with label Chaos Biker. Show all posts

Tuesday, August 31, 2021

Chaos Bikers (Part 9)


Taking a break from painting my Deathwatch army, I decided to be a bit chaotic for a bit and finish off this guy who has been mocking me every day that I walked past the painting table. I had about 20 minutes to kill this morning and that was enough time to tinker on something light. I picked up this model and realized that there was very little left to do on it, so I knocked it out.  

Here's a work in progress shot of the console area. Tesseract Glow being my savior on getting the main screen the way I wanted it took. 

Main consol.

I finished the metallic filigree by washing it with red ink (that's the original '80's-'90's stuff for clarification), then lightly highlighting it with a modern color called Sycorax Bronze which I think turned out very well. 
 
Front faring details.

Then I added Mithereal Silver to high light the areas I thought would get chipped most often. Like the foot rests, handle grips, spikes and blades. Afterwards I mounted it to it's base.


I am sticking with the old skinny bases for my Chaos Bikers, mainly because having already down work on a number of them already I am not too keen on tearing them off their bases. Some of my other armies that utilize bikers, orks for example, I may move to the newer oval bases.


At this time I have decided to leave the rider unattached to bike as he fits so well and I like the option to be able to remove him.


Unlike the other optional champions I have made for  this unit, I have not been able to take him out yet for a glamor shot, but I intend to do so soon. 


Friday, April 16, 2021

Chaos Bikers (Part 8)


The current level of progress.

Progress has continued since the last time I worked on this guy. What follows is how I got this guy up to this point. 

 The metallic trim and filigree is the most obvious addition. This was done using Balthazar Gold as the base with Auric Armor Gold drybrushed over it. 

Basecoats on the trim.

To finish off the trim I went over all over it with Red ink glaze 

The finished trim. 

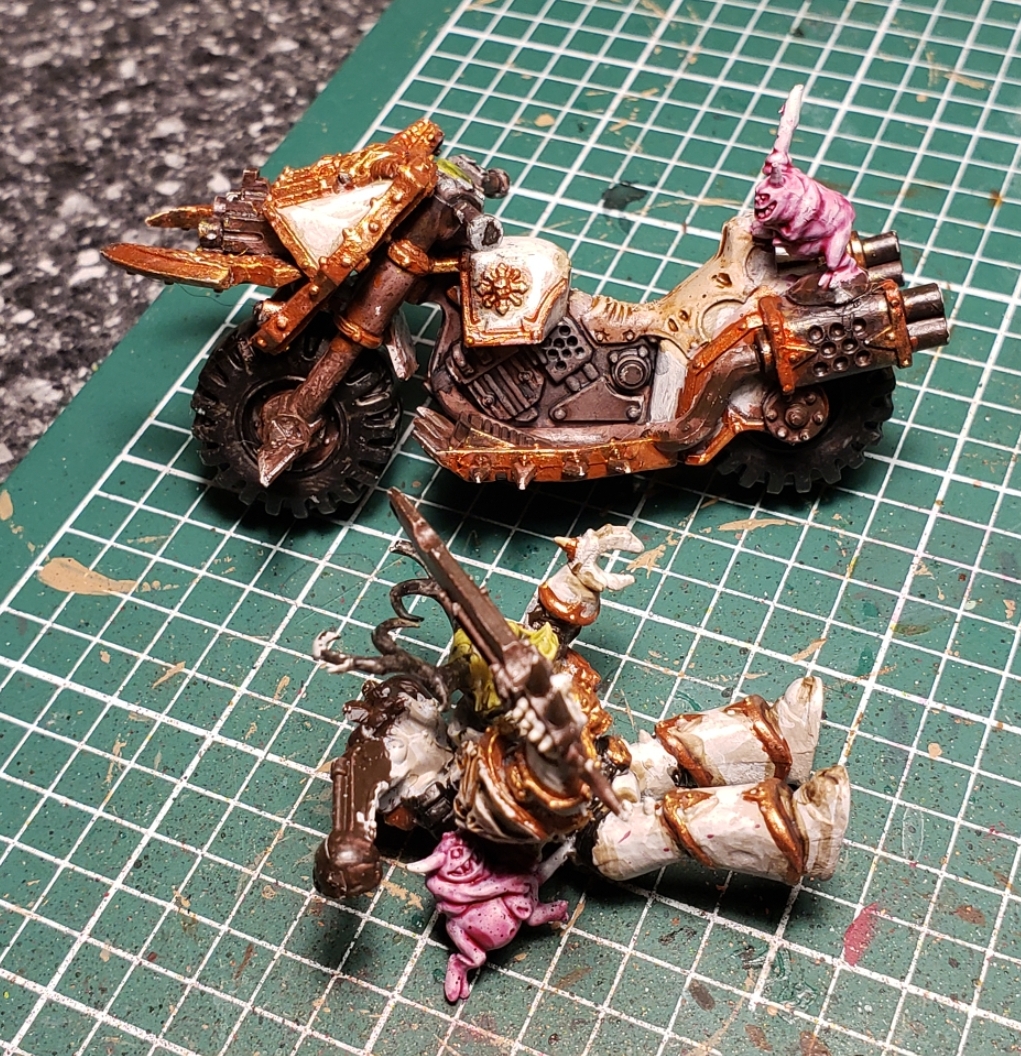
I went over the mechanical areas of the bike using Black Contrast Paint. This deepened things up nicely and really adds a dirty and oily aspect to this thing. Next I turned my attention to the two nurglings, following the process outline in Eeew, Grotti Part-2. 

Nurglings, half-way thru the paint stages.

After finishing the nurglings, I thought the final Pallid Flesh look didn't stand out against the aged pre-heresy Death Guard color of the bike. So I added an additional wash of the Contrast Medium and the Volupus Pink Contrast Paint mix to pinken these little buggers up a bit.  I like how they have turned out. 

Pinkies!

I used Tesseract Glow Technical Paint on the console screen. I like how it came out. It's a bit abstract but I think it's function comes acrossed in the complete result. This technical paint has turned out to be quite a useful tool for me, and I don't have any Necrons!
 
The display screen.

Over all this thing is starting to come together. Yeah, it looks a little sloppy but it will tighten up in the highlight stage (hopefully). 


Monday, April 05, 2021

Chaos Bikers (Part 7)


Something revolting in development.

When I set out to build and paint this unit the original concept was to have all of the standard bikes be Black Legion colored with the Champion singled out as representing whatever Mark Of Chaos I was bestowing upon the unit. With the changes of game editions since I last worked on these guys (or played them) the need to show the chaos marks in this manner has become somewhat redundant. Hell, Death Guard don't even have Chaos Bikers as an option any longer! But, that hasn't stopped me from realizing my vision. While going through my paint queue this guy leapt out at me. With my recent Death Guard Experiments I knew I just had to finish this guy. 

Drilling and pinning. Some hobby skills never die...

You might have noticed his crazy Plaguebearer head. I found it in a bitz box while looking for other bits to stick on this guy and I was immediately inspired to make this mutation become a thing. I had to create the ball joint for the neck out of greenstuff in order to get this head to look right. 

So much for following helmet laws...

I stuck a nurgling rider on the back of the bike which I think came out very characterful. I really like how his foot is propped up perfectly on the backrest of the rider's seat. 

A rotten rider.

Next I added another nurgling at his side. This little chum (hehe, "chum"!) is joyfully pulling out the rider's guts in typical backseat driver fashion. 

"Hang on to my guts little dude!"


As you might guess, this was a fun thing to model up. As you can see the nurgling is totally attached to the driver, happily holding on by the guy's guts. 

Hanging on tightly! 

After priming it, it was time to figure out how to paint this thing. Last time I showed you Grotti and the way I colored him which was totally done with this model in mind. 

Basecoats mostly done.

The basecoats you see here are as follows.:

The fleshy seat and face stretched over his right shoulder pad were coated using Gulliman Flesh Contrast Paint. I like how the seat came out so much that I am likely to just leave it as is. 

The rider's head was done using Plaguebearer Flesh Contrast Paint. 

All the brown metal areas were basecoated using Rhinox Hide. 

The rider and bike's armor was based using Rakarth Flesh. The rider and bike are going to look a lot like The fourth Death Guard Experiment, hopefully. 

I got to be fast and sloppy at this stage, but going forward I will need to slow down a bit and focus on the details.