Showing posts with label Rhino Tank. Show all posts

Friday, February 11, 2022

Deathwatch Rhinoback (Part 3)

 The Rhinoback is now done! Let's review it from all the different angles: 


It was an easy and fairly straightforward thing to paint. I added some random silver flecks on some of the corners, as depicted on the box photo, to represent scarring and scratches. 


 I added the radar dish to the back as I wanted it to be a permanent feature on this tank. The scroll on the back door is blank in this photo but it now says 'Purge or Bust'. I think that may be this vehicle's informal name. 


The fuel cans and tool box was also kept simple but I used colors on them that don't appear anywhere else on this model so that they stick out a bit more. 


It's an interesting, but absolutely useless, detail to have this blast shield able to rise up and reveal two windows. I painted them anyway because it never fails that someone would check that and call me out on it at the game store the first time i take this thing in for a game. 


I am keeping the Heavy Bolter and the Las Cannons loose so they can swivel and be interchangeable. 


And I can also use duel storm bolters even though they fit awkwardly together. But it'll work just fine for game play.


The gunner was a bit of a conundrum as I was unsure which chapter I wanted to go with. I knew I wanted something I hadn't done before and I threw out to rabble to pick one of Cheef's gazillion chapters and the only response was from Cheef himself suggesting Rainbow Warriors. Which I seriously did look into running with but...


 ...I decided instead to go with something I could use a skull decal with. A much easier way to go than trying to hand draw the Rainbow Warriors chapter badge. After searching various tomes and websites I settled on The Emperor's Swords. An easy (-ish) design to work with and they have a very weird history (-ies?).  Who knows, perhaps this guy is the sole survivor of this Chapter? 

And that's a wrap for this project, now to figure out how and when to get this onto a tabletop... 


Thursday, January 20, 2022

Deathwatch Rhinoback (Part 2)

 Just a quick update this week. Since the first post I have modeled up a few more options and primed the model. Being a Deathwatch tank, heck, a black prime damn near completes it!   


I like running Rhinos with two storm bolters and it was really bugging me that I didn't have an option for a second storm bolter.  So I gave in and built a guy manning one. It's not a perfect fit, but it fits nevertheless. Plus I thought it would be neat to have a gunner up there. What chapter will he be from is still something I have yet to decide. Maybe I will randomly pick one of Cheef's Chapters? 


If you look to the rear you'll see that I added a radar dish; I just thought it looked interesting back there.

So, that's all for now. Next will come the basecoats and the rest of the proper painting. 

Thursday, January 13, 2022

Deathwatch Rhinoback (Part 1)

 It's actually a Rhino and a Razorback (I was being cute with the names on the title). Sorta. You see I am buying this thing so that I can use this vehicle for either a Rhino or a Razorback by simply swapping out the back hatch for the twin linked heavy weapon base. 

Rhino. 

I bought this thing for a 'Tanksgiving challenge' (i.e. paint a tank in November) but there was no way the events in my life would let that happen. So instead I decided to kick off the New Year with it.  I haven't built this version of the Rhino before. Yeah, I know it's been around for over 20 years now, but I haven't had a need for the "new" version until now. I have quite a few of the old ones however, and I think they do the job just fine. I have never built a Razorback before in any version, so I decided to make this into one. But I am really enjoying this kit so far and it's been a fun highlight to this whole Deathwatch project. 

Bound up and wound up so tight.

I built this in slow stages, using rubber bands to apply pressure so that the glue can bound better and reduce gaps. I get a kick out of models with interior details and this kit was no exception. Although I wonder how tore up that console is going to get by the bulky armored Marines scrapping past it when it uses the right-side door. It could also explain all the marines that died in previous editions who couldn't get out fast enough when their vehicle exploded...

How obstructed is that door?

The console itself was a lot of fun, I just painted the screens with White Scar and then applied a few washes of Tesseract Glow over that.  

Hatch view of the interior.

The interior was spray painted with a brown color. I dry brushed a metallic over tthe flor and batch for the final look. It leaves those areas looking a bit weathered or dirty which I think works well. The walls were done using a leather brown color and dried brushed with a sand stone. Again, it looks rough, worn and dirty, which I expect a well used APC to be.

Sandstone colored walls.

Here you can see the interior is done. I don't see any point in detailing this any further as anyone seeing this is only going to get a fleeting glance of it when the rear hatch is opened. But I enjoy a level of satisfaction just knowing that it's there. 


But before I moved on, I just had to add a bit of graffiti...
It's not advice, it's a proven tactic! 

After this, the assembly continued. The top hull was attached and again I employed rubberbands to secure the tightest bond.
 

It was at this point I decided to make it so that I could switch out between a Razorback and a Rhino. And I am building it so I have the option to use, or not use, a Hunterkiller Missile, Stormbolter, a searchlight* or just an empty spot in case there is no points available for the nifty extras.. The top hatches just fit right on, and I am not even going to bother with magnets. 

Options are awesome.

Next I will build the Razorback weapons before moving on to the rest of the painting.

*I come from a time when these were seriously relevant. 


Saturday, July 06, 2013

Distracted by Rhinos...pt2

What better thing to do on a 4th of July than parade your armies about? Well since I had no plans at all on the 4th, and it was for the most part a rainy day, I stayed in to paint models. Instead of finishing that regiment of Fantasy Orcs, I found myself painting tanks. Again, I was distracted-by-rhinos!

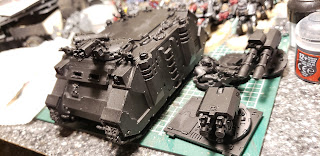
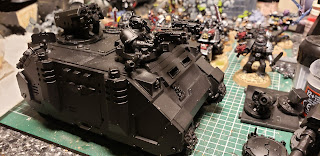
In particular, I just wanted to get this rhino painted. It has been kicking around with just a shadow grey base coat for almost a decade now, and I was tired of seeing it in this state. BTW, this is one that my previous local game store gave me, it was left behind after a weekend of gaming and unclaimed after a few weeks so he gave it to me. It was torn up bad and missing pieces, so I added an assortment of tank accessories from some Tamiya kits and other bits to sort of make up for it.

Drawing on the claws in pencil.

Drawing the claws onto the roof hatch, added door handles after this.

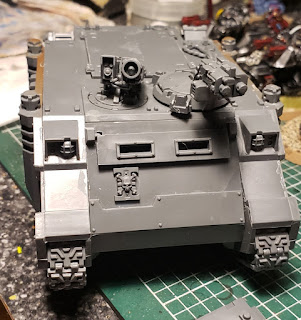
I have gotten fairly good at hand drawing and painting these 'claw' iconography onto Space Wolf tanks. It is still a pain the but doing them on Space Marine shoulder pads though.

Adding the scab red basecoat.

Adding the Firey Orange base-coat for the yellow
Yeah, yeah, I hear you: "But Neverness, don't you hate Blood Claws?" Well, not the concept, just their current state. And this tank was always theirs. So I stuck with plan.

Adding the mid-coat.


Adding the Space Wolf Grey coat.
 It wasn't long after this that I had the realization that I would never but Blood Claws into this tank. It only makes sense to put them, in a maxed out squad, into a Land Crusader.

All well...LOL

I also deepened the low-lights on my Leman Russ Exterminator (that'll get it's own post eventually) and my whirlwind, which has earned it's additional paint job with it's recent battlefield performance. I not only darkened it's tone, but finished the hull all the way up to the white highlight. I just need to apply a few more touch-ups and it is done. Also I am stuck on where to place the Storm Bolter add on? This original model really didn't provide a spot for it. Thinking on it, it is the reason we stuck the stormbolter on the dover-blade on this Dark Angel whirlwind.  I rarely take any upgrades to my whirlwinds, as they really only have one role, so I might just leave it off.


Looking at it reduced, I think I need to darken it a bit more...

++++++++++++++++++++++++++++++++++++++++++++++++++++++++++++++++

SITE UPDATE:
I have added a new page called Other Armies to summarize and provide links to my armies that aren't Space Wolves or Orks. Check it out on the top bar on this blog. I have pics there that do not appear anywhere else on this blog. It is a never-ending work in progress which I intend to continuously update.

 I hope you enjoy!

Tuesday, November 27, 2012

Distracted by Rhinos...pt1

The 3 rhinos, in the state that they have been in for close to 10 years...
As I played through the last few games, I grew more and more dissatisfied that the vehicles that I tend to use the most were only half painted (and barely even to that level). Worse, they were this weird fusion between the old style (see the Space Wolf Gallery: Vindicator) and the current (in the same gallery, see the Land Speeder Typhoon). The current being of a darker tone over all with more Shadow Gray, as opposed to the older style which had Space Wolf Gray as the dominate tone. Oddly, these 3 old (this frame remained in production longer then ANY 40K models! I challenge you to find another!) Rogue Trader era models were in my collection in a weird transitional state where one was highlighted up to Space Wolves Gray, one in the middle tone, and one half-assed base-coated.

In recent games I have been only using the two with the most color, and I decided that I just needed to finish them. In October I took a small vacation and during that time while working on the Bastion (another blog entry coming soon) I decided to throw some paint on these things with the delusion that this would be fast (ha!).
The 1st thing to do a was tone down the over-bearing highlights, so I went in and did that with a watered down Shadow Gray using pure paint for the darkest areas.
This particular one I really deepened it quite a bit.....


One I was satisfied with this recovery of the deeper tone, I proceeded to tighten up the the middle color (a sort of ...Masta Cheef don't start...Baby Blue-ish color) and the Space Wolf Gray highlight. As well as the free-hand forms of the Grey Hunter pack icons.


 You might spot in my battle-reports that I don't glue down the rear hatch or the smaller pair of hatches that the bolters rest on. This is so I can remove them during game play, as well as swivel them when the tanks become imoblized. I am contemplating magnetizing them...


It's a bit subtle, but here is the transitional state of the storm bolter hatches. And the hunter-killer (guaranteed to miss!) missiles as well...
 Well, over this past weekend I picked these rhinos back up and damn near finished them!


 They are not done yet, but i  am very pleased with their progress up to the this point!


All I have left to do is to paint the lights, finish the metallic areas, and apply decals.


 Also, during the aforementioned vacation, I decided to spend some time (and money) organizing my bitz bins to a more user friendly state. I think it has done wonders for my whole modeling area and saves me time from having to look for weird and wonky bitz.

Another update coming soon!