Showing posts with label wolf guard. Show all posts

Wednesday, October 17, 2018

Terminator Basing (Part 4)

Here is Joshi Krakenbite, completed sans decals. He brings the fire and thunder to his unwitting foes.
Joshi Krakenbite, assembled for battle!

I tried to make the flame patterns on his Heavy Flamer as seen on the 40k 2nd edition era Space Wolves Codex.  I think it's pretty close... but I will let you guys judge how well it's turned out. You can view that cover back in Part-3.

"Fire! Fire!!!"

Rear view.
It didn't take much from the previous post to get this guy done. Well done sans decals anyway. I won't decal these Wolf Guard until I get them all done.

If I had a hammer...
Next up is Bori Stonepaw. This guy carries a Cyclone Missile Launcher. I had hoped to have him a bit futher along for this post, but I hope you can appreciate how far he has come along regardless.

Bori Stonepaw
Progress shall continue, but in the meanwhile I have a Dreadtober pledge to finish up...

Wednesday, September 26, 2018

Terminator Basing (Part 3)

The crux.
Here is a project that had been pretty-much abandoned. We last featured these guys many years ago in Terminator Basing Part-1. (Part 2 featured Sven Axegrinder). Well, the recent Space Wolf Codex has me wanting to do some Space Wolf projects, or rather finish some. Also, I was thrilled/horrified to see how well thunderhammers perform in 8th ed, and wanted to get some of my own onto the battlefield. Reviewing my models, I came to the floss box that contains my Wolf Guard. They have somehow managed to accumulate paint over the years despite my never posting any blog posts about them, although none of them were ever finished. Indeed, they have come a long way since I first posted anything regarding them.

The slow march of progress....

I mentioned above being impressed by thunder hammers. This was not the first time that this has happened, and at one point roughly 10 years ago, I purchased an upgrade blister pack that contained five thunder hammers, stormshields, and Terminus Crux shoulder pads. They were some of the worst mold-line and flash infested metal miniatures I have ever bought from GW. And for whatever reason, I simply never moved on with the project. Until Now. Joshi Krakenbite will be the first bearer of a thunder hammer for the Wolf Guard of Sven Axegrinder.

Wolf Guard Joshi Krakenbite steps up! 
Recently while looking at all of the previous covers for the years worth of Codex: Space Wolf tomes, it struck me that the original one from 1993 (2nd Edition) is the only one with accurate colors on the armor. For the most part anyway. It is weird as the models pictured inside it were not all this dark, yet the ones in the current (2018) codex are, even though that book's cover depicts a Space Wolf painted in a non-Shadow Grey look. It is just a strange observation. But back to the '93 edition: I have always loved this cover. The model from that time has the exact heavy flamer, and sort of like I did for a recently inspired Goff ork I am going to attempt to paint that heavy flamer just like that!

Heavy Flamer snip from the '93 Codex: Space Wolves. 
And here it is so far! I Still need to add flame patterns onto the yellow band. Overall I think I got the colors pretty close.

Old school Heavy Flamer.
I tried use the newer colors that GW produces for the Space Wolves but they just aren't bright enough. Luckily I have enough old Space Wolves Grey to get these Wolf Guard painted but I do need to track more down at some point.

Space Wolf colora done, pending touch-ups. 
Unlike some older models, I have decided to paint the acquilla in metallics. I think I like this look, and it is less difficult to pull off than my previous preference.

Krakenbite's progress.

This guy is almost done, and I shall continue to work on him, and his brothers, before Dreadtober-2018 begins. So far I am really enjoying this trip back to Fenris...


Saturday, April 20, 2013

My solution to my Space Wolf biker dilema...and a rant about Blood Claws


"Let's not shoot them and just charge!"
"Ok!!! ...You know this means you'll strike last with that power fist right?"
"Shhh! I'm preparing to deliver a devastating charge..."


"But all I need to do is squeeze the trigger!"


Back in the early days of Warhammer 40,000 4th edition, when the 3rd edition Codex: Space Wolves was still semi-current, I began to put together a squad of Blood Claw Bikers (now called, cutely enough, 'Swiftclaw Bikers'). Years later, I looked at finishing them up with the 5th edition Codex:Space Marines list, and looking over it I quickly found (and wasn't surprised to find) that the weapon options I had planned out originally were no longer valid. This caused me to scrutinize the rules, and like the regular Blood Claws, I found the points vs. payoff were very much not jiving well with me.

Disarmament treaties really suck


Let me elucidate: The Blood Claws/Swift Claws suffer from a reduced WS & BS with totally supported background to justify this. They also have the Berserk Charge special rule which I feel is quite a good asset and trade off for the stat penalty, and Headstrong which reinforces their commitment to being crazy, forcing them to charge into an assault if within 6" of a foe.

Between this codex and the previous one, the Blood Claws base cost went up a point however the Head Strong special rule was blessed with this additional caveat: if within 6" of an enemy model and not accompanied by a character model, the Blood Claws/Swift Claws are so worked up that they cannot take the time to aim their pistols. "They're too carried away" with frothing, raging and just going berserk-crazy to point the gun -pistol- in their hand in the direction that they are about to charge. Reading it as is, it sorta makes sense. Sorta. But then after they do charge they count this unaimable pistol as an extra Attack in melee which is now used in conjunction with their close combat weapon! This really is weird when you consider orks who have Furious Charge that somehow can wander up to a unit, shoot it twice with a shoota, then charge in -furiously- and even get a point increase to their strength! And they didn't have to 'prepare', 'work it up' or get 'carried away' to achieve this benefit!


And since I'm ranting I have to throw this in: Blood Claws get similar weapon upgrades with their previous Codex entry, however some significant changes have been made. Now, if I take the maximum Squad size of 15, I can get a free Special Weapon in addition to the one I might have already bought! Two melta guns for the price of one! Nice! But that isn't the issue. Actually, looking at it now, two free flamers in 6th edition is sort of appealing...but only as a counter-charge strategy with Overwatch! The template of the gun isn't long enough to use it effectively as it is about 6" long, and, well, the Blood Claw holding it is just too "carried away" to actually use this weapon! Unless someone declares a charge at him! LOL, But despite that weird scenario, it's in the close combat weapon choices that irks me...


Pictured here is the Blood Claw unit built using the 2nd edition Codex. Yes kids, they ALL have power gloves! They weren't quite as awesome back then, but still awesome enough to model up the unit. They are still some of my favorite paint jobs, and I just still don't have the heart to rip those arms off and modernize them for the current rules, so they get reassigned to other units in need of a good power fist model.


With the 3rd edition book Blood Claws used to be able to take up to 3 power fists (12pts each) or power weapons (8pts each) and I used this option often and effectively. After all, this is a unit made for assaulting and close combat and they were good at it! So, I sense the designers of the current book wanted to nerf or punish this unit, and they did so by limiting the unit to one of these choices and upping the cost. The one power fist now costs 24pts! And in the new rules set, they are more difficult to keep alive than in the edition (5th) that this book was written for.

I hope I have made a strong case as to why I simply don't use them any more. Grey Hunters, for the same cost, just make far more sense, have a good stat line, and are simply more tactically versatile. Comparing the Swiftclaws to the Blood Claws they seem to have the same hang-ups really. There are some weapon choices on my models that I will need to change but this isn't that big a deal. But for their cost, I just didn't see how their usefulness would justify the time I was going to spend working on them. If you follow this blog you might have learned that I just am not as quick as I used to be with painting, so to dedicate my time to work on a unit I would either rarely take or never take would be silly, but I really like these models! I want to paint them! And I have wanted to build the Attack Bike since I bought it.


 Then it struck me out of the blue the other day: Wolfguard! I can take all my bikers as a separate Wolf Guard unit! Furthermore, 33pts is the base cost to do this vs. 25pts base cost of a Swiftclaw with reduced BS &WS and I get an extra point of A and LD and without wonky special rules! And the weapon options suddenly get into the realm of solid dairy products: Power Weapons for 10pts, Power Fists for 20pts, Frost Blades for 25pts, etc. and we're talking EACH here! Yeah, they get expensive quick, and I can't take an Attack Bike with this option (waagh), but my goodness! Time to go hunt me some Nob bikers! LOL! I am pretty much sold on this and will probably (re)start work on them this week.


Stay tuned, meanwhile if you have any thoughts or comments I would like to see them!


The original pic I took for the intro, but it was even sillier when I realized he doesn't have a gun....

Sunday, February 12, 2012

"So Ronery, and sadry a rone"


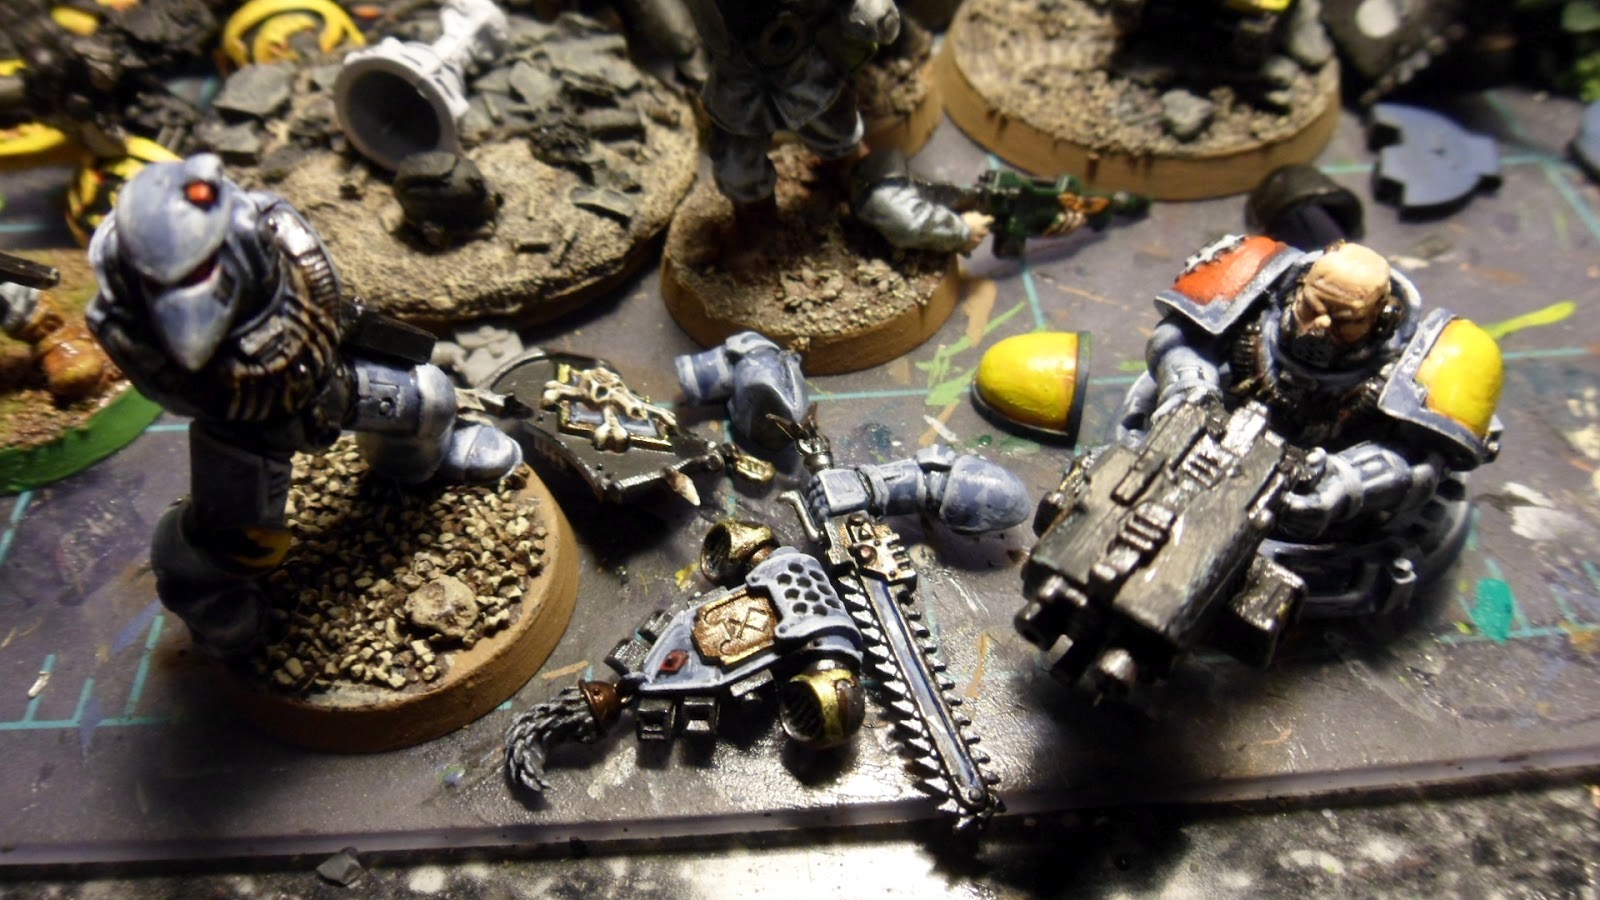
It's been awhile since I had anything newly finished to post, but I finally got the Lone Wolf that I started to build back in...well, that last time I had a game with Warfrog actually. So if you recall the New Years Resolution I made to try to get as many of the single minis on my painting table painted this year, you might spot this Space Wolf model standing next to a gunner with a red shoulder pad. That fellow is this Lone Wolf. Here he is below prior to being assembled and just few coats of paint away from being done.


Seguewaying slightly before I talk more about the Lone Wolf, the gunner was originally the gunner to my Leman Russ Exterminator, who found himself unemployed when his vehicle got dropped from the latest Space Wolf Codex. He had been reassigned to my Land Raider Crusader that I've been slowly working on in the 'Pods to Drop Lands to Raid' series.


Here is the gunner again mostly done and with those Old School Decals added. I applied decals to 3 shoulder pads today, one on the gunner obviously, one for the Lone Wolf, and one for a Death Watch Marine that I have yet to show you all. The hatches you see to the right are intended to the Land Raider's multi-melta...

...which in this pic is about 75% done. It is currently about 85% done. I was torn with adding another gunner to it, but in the end I think a Land Raider might look a bit silly with too many marines poking out of the hatches. So the hatches will remain shut and I will have to add handles to this gun.

OK, back to the Lone Wolf...


It wasn't until I was painting it that I realized that the "chain" of the chain sword is exposed on this models, so I went in past it and tried to create a shimmering 'icy' look to it. I let you lot tell me I pulled off the illusion. Also, I decided to make his pack markings 'wolf guard' just in case I wanted to used the model as a Wolf Guard leader for a squad instead of a Lone Wolf, 'cause why not?


Used a simple dry brush technique for the wolf tail. I'm pleased with the plate on the backpack.


I really am pleased with how the bone bits came out on this model. However looking at these pics on the computer at a size vastly larger than the model does help me scrutinize it with a more critical eye. I see that the black line on the knee join, which look passable on the actual model looks crooked as hell on the blown image.

So is Mr. Lone Wolf done? 99% yes. A few more minor touch ups, static grass on the base, and a light blast of sealer and he will be!

I'll be back on the road and once again taking the Portable Neverness kit with me (I flew on my last excursion and couldn't take anything with me) as well as the drop pod and other assorted items to work on. My dear friend Mrs. Bink has started her only Blog  redbirdmuse after much pressure from me to do so. She's been hand crafting her own colorful journals for awhile now and they look very cool. One of her characters in my Dark Heresy campaign is a Sister of Battle and we have been talking about doing a journal for this character in the style that she uses for her journals. I will be taking my sketch pad with me on the road and I hope to come back with some images she can use.  'Til next time,

Saturday, December 24, 2011

Terminator Basing (Part 1)

Since I've been home from my latest work-trip, I've been painting all kinds of minis. It's an example in vainglory to try to get some of the single models off of my modeling station, and my focus keeps bouncing from night to night depending on just how much time I actually have. I have worked some on the Landspeeder Typhoon (almost done!), a Lone Wolf, some Death Watch marines and some Dark Eldar. None of these are at a stage that they're worthy of being presented in this blog.

 I have noticed that one of my most viewed posts is An Update plus some-terminator-basing, which is quite curious considering how utterly uninformative that post really seemed to be on the matter. So I decided to work more on it and post pics as I go along. So if you will, consider that the preamble to this series. In that post I was quickly getting my Wolf Guard Terminators ready for a battle against the vile Warfrog by simply gluing the existing model straight onto the bigger bases. This, as you're about to learn, was never meant to be a temporary solution:

 In the pic above you got a Terminator just as he was on the day I glued him to the base. Pretty much ready to go to step two.

This is Step 2, at least for this model. I applied green-stuff to the lower 'tier' and smoothed it out so the 'tier' effect went away to replace it with a 'mound' effect. By the way, this is a Rogue Trader era model, when GW finally figured out what they wanted the Terminators to look like. He's the Heavy Flamer model.

If you look at the feet of this Terminator, you can see that his feet have these really extreme gaps between the model and the base. Instead of bending the feet or just filling in the gaps, I decided to just get creative with that void...

So using the pieces of the thin slate/shale piece that came in a basing set that GW sells, I was able to find pieces that fit the gaps perfectly. These were the 1st two pieces, you'll see below (in the background) that I continued to stack more rock all over this base.


Here's another example. I swear looking at these models, it's surprising they didn't come up with putting the Terminators on bigger bases back in the beginning. Check out how the sides of the models feet hang off of the slotta base!
This was easily fixed by just adding some appropriately sized rocks!
So, after adding rocks to those models, I applied the green stuff to minimize the 'tier' effect between the two bases. For continuity purposes, I added a rock to that first model.
 Had some extra green stuff so I did a 4th model, a Cyclone Missile Launcher Terminator. Once the green stuff was applied I mixed up some Elmers Glue with water and brushed it on the base.
Then I dipped it into this sand tub I have (some rocks got mixed in a while back, no big deal though), shook the model around and presto: a sanded up base! I this a light sand that I get out of a spring-house on my folk's property here in Tennessee. It's very fine and collects on a stone slab when the springs flood.  Having said that, you can either find it in nature or buy it. It's just sand.
 Here they are all lined up. However I like a bit more 'depth' to these bases, especially when the green-stuff shows through as that is the sand most likely to wear off.
So I apply glue to those spots, and dip the models again into a bag of bigger grains (these are really, really small stone bits I got from a local hobby store). And the pre-painted stage of this project is done!
Unlike many of my friends and apparently 'the pros' out there, I do the bases before (usually) before I prime the models. Nothing annoys me more than having a finished model that I'm really satisfied with just to get paint all over it's legs while I'm trying to paint the base. It's just strange to me to it like that, plus doing it that way sometimes gives the appearance that base was an after thought, an pedestal, or some other secondary prop, whereas I like to think that I'm giving the illusion that this model is one piece that's connected to this little piece of environment. It almost helps tell the model's story. ...perhaps I over think this stuff! LOL...

...anyway, look for part two, and additional updates to the series's that I have, in the new year! Have a Happy Holidays! 

Wednesday, November 16, 2011

Space Wolves Gallery (part 4)

I discovered that I had some pics in a storage device that I need to clear that I never posted. So here they are:

This guy is a Wolf Guard that I painted around 2001. I still am quite pleased with how it turned out. For some reason I can not explain, I was thinking that the last ork weapon sprue that GW was putting into their blister packs towards the end of 2nd edition had a bulky crudeness that, with a proper paint-job and scope, looked fairly fitting for the Space Wolves. I'm not sure I have that same opinion these days, but this model works I think.


In this pic you can see the Auspex hanging from his belt,  which I painted some details on to indicate that it was on. Also the decal worked out well on the left shoulder pad. The key is to repaint over it once you've cut out all the air bubbles...:)


The model is supposed to have a power fist, but with the addition of two combat accessories from the original plastic Space Marine kit (RTB01) and some electrical FX, this guy now has a pretty cool looking lightning claw!
Per the fluff, I leave the "older" marines a tanner color on their skin pigmentation. The Blood Claws, when I get to them, will be quite lighter skinned.

This Rune Priest was also shown in a previous post, but this is a different angle. Note that most of the painting was done by Rob, the local hero whose 28mm combat is matched only by...well, it's debatable. But he's a swell guy, and I acquired this model in a trade. However he only had this model painted up to a Shadow Grey brightness, so I completed it by applying the next two highlights, and added more highlights to the bone areas. I'm really pleased with how it turned out, considering that I only did the mid-stages and the highlights!


I can't recall if this exact pic has been posted already, but I know I have already discussed this, so all I will say now is that I am completely determined to get that base completed before the new year!

'Til next time!