Sunday, February 26, 2017

Celestial Lions Kill Team ( icons)


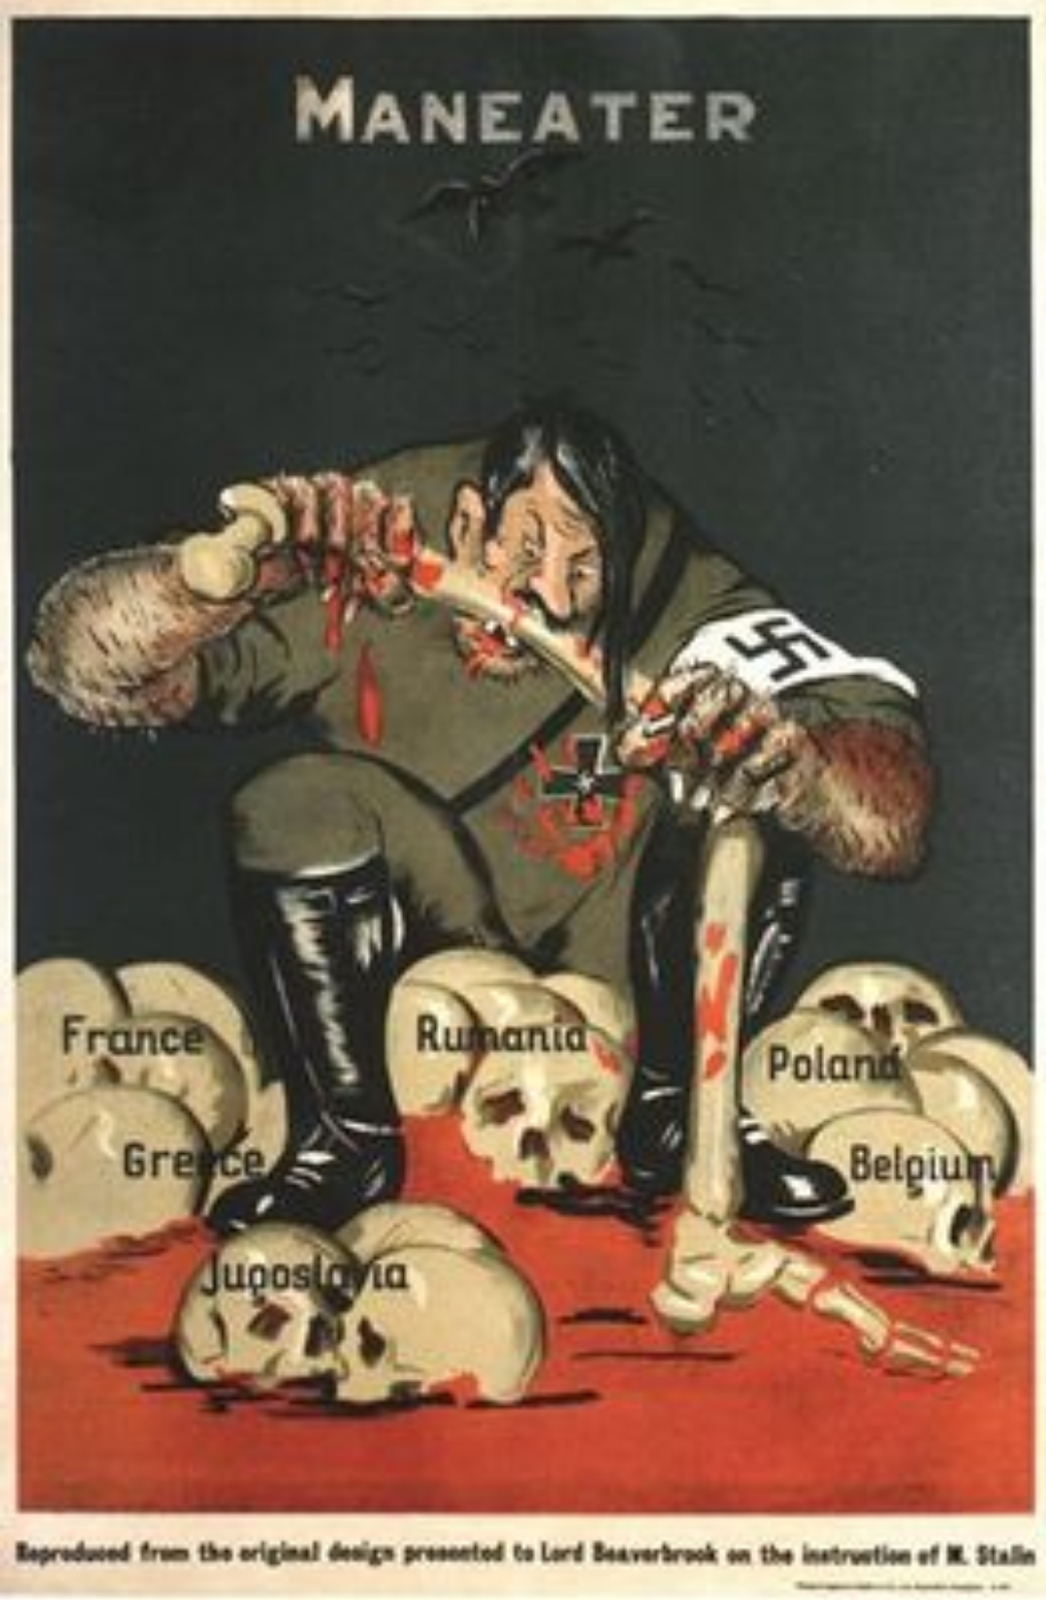
As any dedicated Celestial Lion Player (assuming you can find one) will tell you, there isn't much at all in the way of official visual reference for this Chapter. We have the image above, taken from the old 3rd War of Armageddon campaign website, and the artwork in and on the cover of the Armageddon omnibus from the Black Library. Prior to the Armadeddon Black Library novel the only official background source (that I know of) was from the old Armageddon 3 site. Using the Wayback Machine site I was able to explore that old campaign site. It was a very cool support page and it was a lot of fun to use and access during that campaign back in the summer of '00. I took a few snips from that site to show you the Celestial Lions stuff. Again, it isn't much:

Found via the Wayback Machine*,  the Armageddon 3 website.

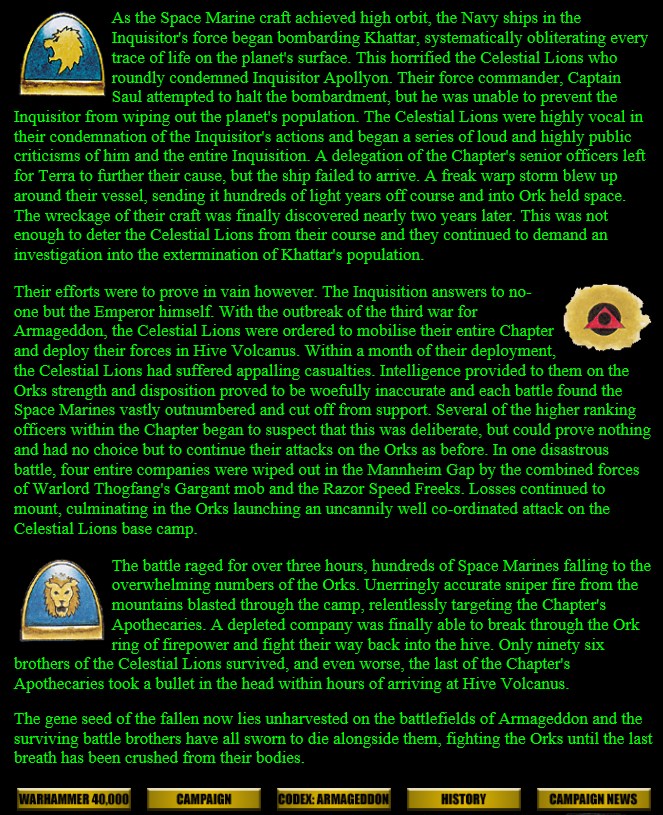
The original and official story of the Celestial Lions.
Miniatures are an even worse scenario, as I believe there has never been an official painted example featured in a GW publication (although there have been fan -and I think WD staff?- models showcased but those are super rare). Which leads to a question of iconography. We are presented with two different shoulder pads, one showing a colored in lion's head looking straight-on:

Straight on!
...and the other in a more traditional monotone icon of a lion's head in profile I assumed this is the Chapter's icon as it appears on the left shoulder pad. .

Chapter Icon
Another prominent icon is this symbol that appears on the leg. I assume this is a Campaign Badge, which is something the Game Design/ 'eavy Metal team used to put on all of the marines back in the '90s. These seem to have fallen out of fashion in the same way that Goblin Green bases have but I still like to put them on my Space Wolves.


Interestingly the Armageddon 3 site doesn't give us any more info on this campaign badge. But this other image that I found does, and it says it's for the Fire Wastes Army Group North. Makes sense as this is the area that the Celestial Lions Chapter was stationed on Armageddon, and the place of their fall. I haven't decide yet whether or not I want to include this on my models. 

No idea where this is from. White Dwarf Index Astartes article perhaps?
This next pair of images are far more recent. both are from the Armageddon book. 


This image doesn't reveal much at all in the way of iconography, only that this particular Chapter Icon is the lion head looking straight-on as opposed to a profile. It's nice, but not particularly helpful. It does show the blue on their armor as being darker, which is also how I originally interpreted it from the old Armageddon 3 site as well. Often when I see other people's painted Celestial Lions they tend to paint the blue as a turquoise, which looks great as well, but not how I thought it looked on the original site.

The painting used for the cover of Armageddon.
Above is the painting used on the Armageddon two-story collection. The second story in this collection, Blood and Fire, is also available as an ePub download on it's own and has it's own cover.  It shows the Celestial Lion a lot more prominently and, of interest to me, it reveals his right shoulder pad as using the traditional upward pointing arrow that has been associated with Space Marine Tactical Squads in accordance to the Codex Astartes. The arrow on that cover is painted gold as well. 

Believe it or not, that last bit is quite a revelation!


What follows next goes back over a decade to when I first considered doing the Celestial Lions as an army. I decided that I wanted to hand-paint the lion icon onto the marine shoulder pads. One day, I found myself in a car dealer's waiting room waiting for an oil change and I had my sketch book handy. I worked up some sketches. This next image is roughly how I decided I wanted the icon on my guys to look like. 

Profile sketch. 
Another sketch had me putting stars into the dark blue, which I thought might look bad-ass. Also it really plays up the "celestial' aspect of this Chapter in addition to it just being their name.

Starfield idea. 
This next crude sketch was more working out the icon on the armor.

Crude but effective. 
After doodling about in the sketchbook I was inspired to approach my first project for the Celestial Lions. And here he is: 


I painted him in what felt like record time and entered him into a local painting competition. (He came in 2nd!). I used the forward looking straight on image of the lion for the banner, and hand painted the chapter icon onto the appropriate shoulder.


So now, as I work on my Celestial Lions Kill Team I found myself considering whether or not I wanted to make the icon mono color like a traditional Chapter Icon, or color it in simple colors like I did for the Terminator Captain. After much consideration I decided to make it hard on myself and repeat the image from the Captain's armor. Below you can see the earliest stages of my efforts to make this happen.


It's a lot of work and takes a lot of focus, but I hope it works out well for me in the end. Since I am not going to do much more for this army beyond a Kill Team, I figured the extra effort couldn't hurt. Now if I had a full 2K army to paint, I definitely would have looked into getting unique decals made!

The Wayback Machine. It doesn't always work though.

The first nine images in this post are Copyright Games Workshop and are used here for the purposes of review and not as a challenge to their individual copyrights. 

Sunday, February 19, 2017

Polar Skirmish

 The Bob and I got in another Kill Team game. Again we went with Dark Eldar vs. Dark Angels. Just to break up the monotony we decided to play on our local store's snow board. After searching for as many scenery pieces that we thought went with it best, we set up a board that we felt was simple and pleasing to our eyes (and the camera).

Next we selected a mission, and we decided to keep playing these in the order that the missions are presented in the Kill Team book. Being our third Kill Team mission against each other, we logically chose #3: Head Hunt. Both sides are tasked to eliminate the other side's leader. Back in December I played this scenario against Screech's nids but that proved to be a total debacle due to their Instinctive Behavior rolls. But he did manage to snuff out my leader! This game would be a bit more of a typical encounter without so much confusion and mass routes.


Dark Eldar deployment, left flank.

Dark Eldar deployment,  total quadrant. 
Having tissue paper for armor against those Space Marine bolters it only made sense that the Dark Eldar would be placed in cover. The marines did likewise, but more to avoid LOS from my Reaping Splinter Cannon than any real fear of my weapons AP.

Dark Angels deployment.

He failed to Seize the Initiative so I went first. With exception to a few strategic moves, the Dark Eldar mostly stood their ground and fired their weapons. They killed 2 Marines in the first round of firing which I thought was a pretty good start.


1st round shooting
The Dark Angels in cover returned fire, while the other half of their force marched toward the ruined cathedral in search of their target.

Dark Angels 1st Round advance
Dark Eldar Turn 2, and it was obvious that the Dark Angels would need to have their advance cut off. I sent 3 DE out to intercept them: the Sybarite, the Shedder and the female without a helmet.

Xenos meet The Unforgiven on Turn 2..
One of the marines was taken out by a shot from the Sybarite's fusion pistol, while the shredder scattered wildly. The DE charged, but the shredder was killed by Overwatch. The Sybarite easily snuffed her foe (her trait allows her to wound on 2+) and she consolidated away from the fight in a vain effort to seek cover away from the vengeful bolters what would be turned her way. The female was locked in combat, saved by a Feel No Pain roll of a 6!

Kill Spree! Note that we decided to leave the dead for dramtic effect.

As expected, on their Turn 2 the Dark Angels gunned down the Sybarite. The rest leaving their companion to continue to wrestle with the DE woman while they proceeded back to their task of headhunting.

Elsewhere the Dark Eldar and Dark Angels traded more fire with each other.

The Hunt Continues

Turn 3, I moved the leader to higher ground and deeper cover while I had moved 3 DE Warriors down to the lower level to intercept the Dark Angels. However their efforts were laughable as the vengeful Dark Angels stormed the cathedral.  One Kabalite-warrior was melted in plasma fire while another was cut down by the fierce aggression of the Dark Angel Vet. Sgt. Leader himself!

Turn 3, Dark Angels storm the ruins!

Attack from above.
The DA leader Consolidated up a level in his persuit of the DE leader. On Turn 4 the DE now had Furious Charge as part of their Power Through Pain, and it was clear to me that the time to hide and run was over. The DE leader fired a splinter pistol into the Vet Sgt's head but luckily for him his armor deflected it.

A close quarters duel!
Then she dived down at him in an impressive charge. The Furious Charge helped and the Vet. Sgt was defeated.

The Dark Angel leader is defeated, the DE leader consolidates.

By this point, after much back and forth only one Dark Angel remained in the opposite ruins while the other half of the team had cleared the lower levels of the ruined cathedral of xenos scum.

A duel that started on Turn 2 finally ends on Turn 5!
We were starting to wonder if the melee that had started on Turn 2 was turning into something  a bit more inappropriate when finally on Turn 5 the Dark Angel bested his Dark Eldar foe.

With the Dark Eldar Lesder hiding on the top of the cathedral out of LOS of the Dark Angels on the ground, they turned their attention to the Kabalite-warriors who had left their positions in the other ruins and were now sneaking outside of the ruined cathedral. They opened up on the silhouettes and shadows of the xenos killing one of them.

Killing silhouettes. 
Having finally eliminated the last Dark Angel from the other ruins last turn, the Splinter Cannon looked for targets in the cathedral seeing the perfect shot through the windows. Impressive though this was, the Astartes made his save.

Reaping through the windows!
This next pic is the result of me trying to see if the Dark Angel had LOS to the DE Leader on the top of the cathedral, as to me I thought he did. But the camera proved otherwise.

LOS test.

It didn't matter though, as another Dark Angel had made his way up there and shot her, fullfilling his mission objective and getting revenge for his Veteran Sergeant.

In the pic below, you can see way down below in the opposite ruins a lone Dark Eldar Warrior breaking through the enemy lines.

The Dark Eldar leader falls!

It was a very good game! But we didn't realize just how tight things actually were until we tallied our VPs.

Dark Eldar VPs
First Blood 1
Missile Launcher (Specialist) 1
Leader 3
Break Enemy  1
Linebreaker 1
= 7 VPs

Dark Angels
Leader 3
Sybarite  (Specialist) 1
Shredder (Specialist) 1
Break Enemy 1
Linebreaker 1
= 7 VPs

-A true tie!

Thanks again Bob, looking forward to more Kill Team games soon!

Thursday, February 16, 2017

Celestial Lions Kill Team (Part 3)

Pushing on from the last post, I continued working on these models by completing the base-coating of the blue areas and washing Chestnut ink into the recesses of their gold armor. I then highlighted the black Aquilas on their chests with a dark gray followed by a glaze of Nuln Oil.

After all the steps above were applied.

After this I worked on their eyes before moving on to highlighting the blue areas.

Eyes done and highlights on blue.
Looking at the photo above, and scrutinizing it, I felt like the highlights on blue came out sloppier than I would like, so I attempted to tone it down with a blue ink wash.

After the ink wash
This seemed to satisfy me. Also I went ahead and painted the left leg knee pads in dark blue. I haven't entirely determined what is going to be on those pads yet, but I am thinking I want to put a number or numeral that designates their squad or company affiliation on that spot.

Next, I began applying Shinning Gold to the armor.

Ohhh shiny.

Now the models are beginning to really tighten up as I start to make my way down to the final stages. In the next post I will discuss the Celestial Lions iconography, as it's possibly the most obsure chapter in the entire GW canon in this regard.


Saturday, February 04, 2017

If you're gonna die...

Finally! Finally, after many attempts since before Christmas, finally The Bob and I were able to play a game of Bolt Action. Bonus: we were joined by the notorious Screech. Both of them agreed to play 500pts of Germans vs. my 1000pts of British. We rolled up the Mission and got No Man's Land.

1000 points of British soldiers, ready for glory!

The British line.

The German line.
 The No Man's Land scenario begins with a massive preliminary bombardment. The first unit struck was my Sherman Firefly, and after some astounding dice rolls from Bob, the tank was reduced to a burning hulk. Considering how many points this thing is you can imagine what a loss this asset will be for my army for the rest of this battle.

Serious first blood.
Most of our units accumilated Pin Markers and some units even lost a guy or two, but Screech's tank was also hit hard by the shelling and was immobilized. The bombardment left a smokey haze on the battlefield reducing viability to 24" for the first game turn.

Pinned down by Jerry! 
For some reason I didn't take a lot of pics between the 1st and 5th Turns. I guess I was focused on trying to find a break in their lines but this proved to be a futile gesture . By the time we reached Turn 5, my right flanks was crumbled, my other Section was bogged down in a crater. Before they were murdered, both my FOOs had called in strikes but neither was as effective as they had been in other games. My Bren Carrier was fairly effective chewing up its targets and causing Bob's Germans a bit of frustration. It had been carrying the PIAT Team, who managed to deploy and hit a target only for it to fail to kill anyone. They were gunned down for their efforts.

Early part of Turn 5
Despite the unrealistic odds my 2nd Lieutenant held firm and continued to support the Section stuck in the crater.

"This way lads!"
After his men had finally moved his artillery into a more effective position, Bob was finally able to get rid of that Bren Carrier.
KA-BOOM!
It was getting bleak as Screech's Germans just hadn't died like they should have and they swarmed the crater shooting the Brits until they broke. This left my 2nd Lieutenant standing alone and prepared for a final blaze of glory. He took a shot at the Unit Leader of one of Bob's units as he was the sole survivor of that squad (and I'll be damned if I didn't want at least 1 VP!)

"Rally around me lads....lads?"
He failed to kill that officer, who in turn returned fire and killed him!

It was obvious by the end of Turn 6 that the Brits were done for. Leaving only my Geneva Convention-cursing medic and a single member of a mortar team alive. I'm sure the Germans let them sit out the rest of the war comfortably...

"Think we can take 'em doc?"
Regardless of the crushing defeat, I still had fun although my dice were extremely random in this game. That Bombardment in the beginning really changed the course of the game for both sides. Missing that VC Firefly's support made for a world of difference. Using my Bren Carrier more aggressively was a lot of fun but ultimately I got a little wreckless with it. Once Bob was able to bring his big gun into position it was done for. In the end I plan on finally retooling this list, maybe drop some of the 2-man support units and use the points for Vet. Upgrades instead. We'll see. But this isn't the last those Jerrys have seen of us!