Showing posts with label Death Castle. Show all posts

Sunday, January 20, 2019

Death Castle (Part 12)

DEATH CASTLE PART 12

As Da Masta Chief  has recently (and kindly-ish) pointed out to me, and the followers on our Facebook Group,  I'm over due for an update on this project.

Death Castle in the present.

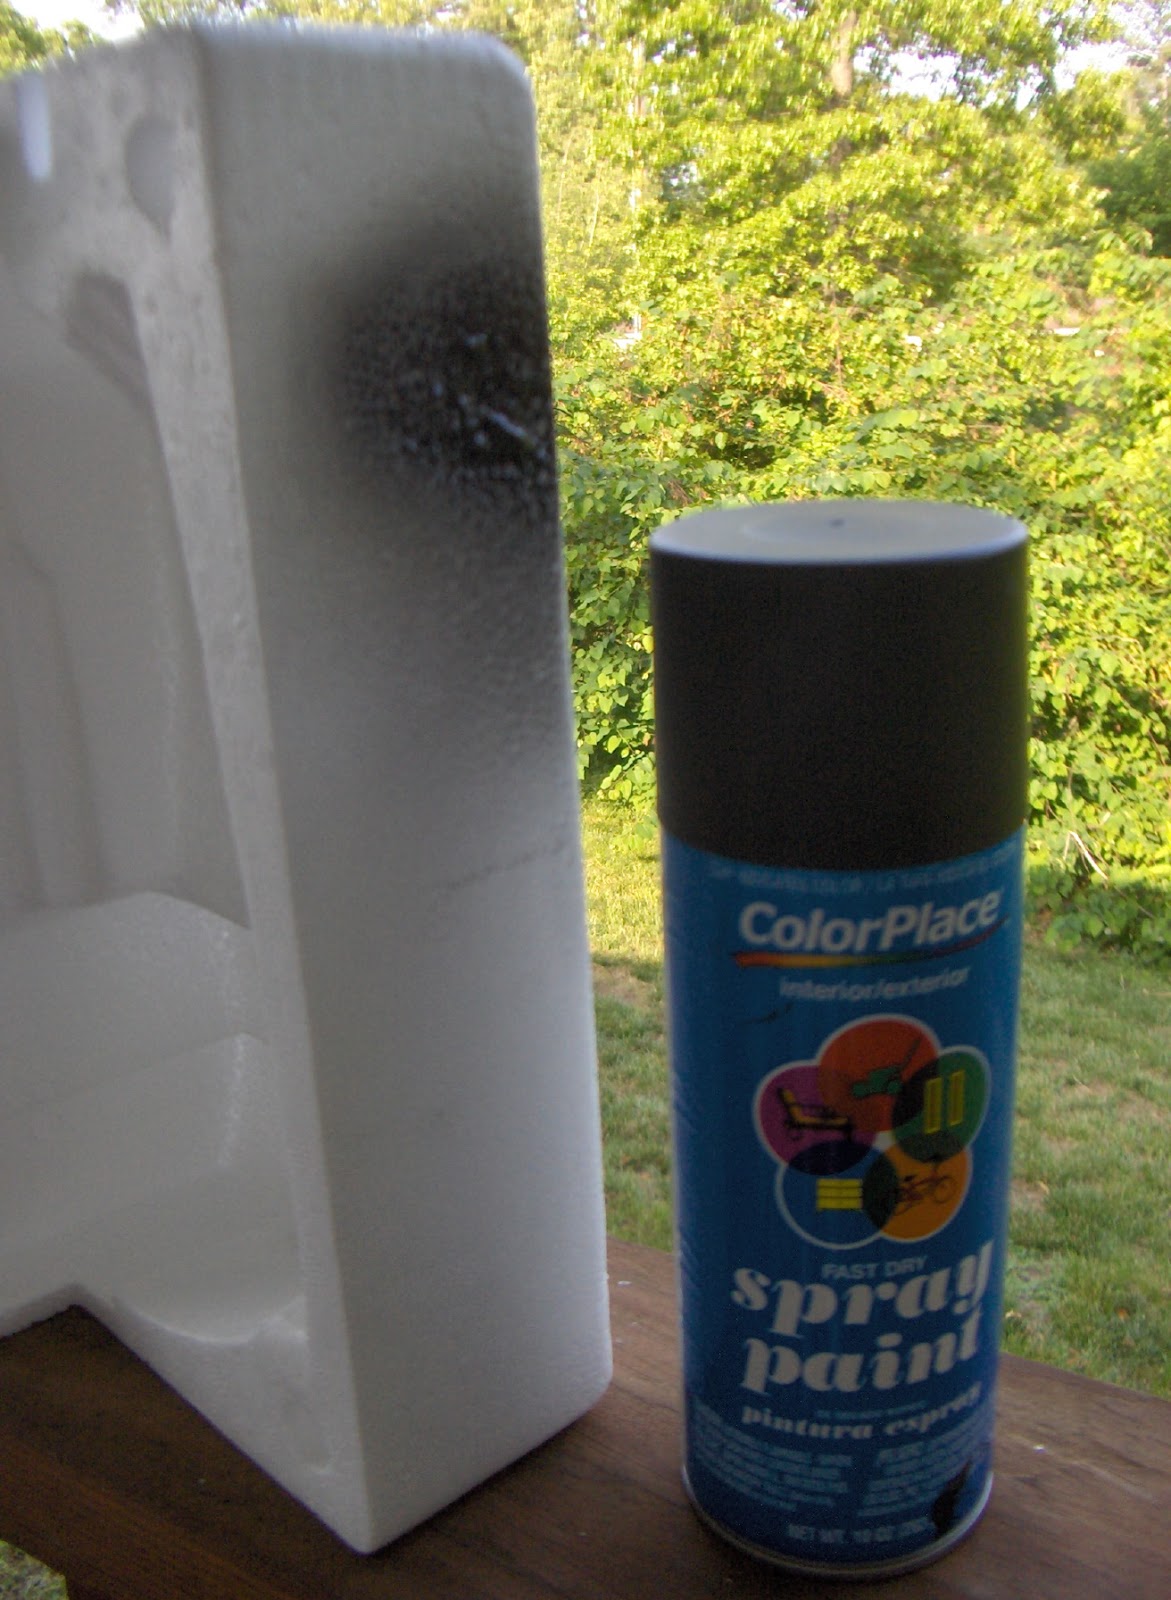
Last winter (2018) I set about painting the stone work on the walls of Death Castle. it was coming along decently. I got most of it finished over the course of about three Sundays. It started out with an Appel Barrel Graphite base coat over the entire thing. Thankfully Walmart sells that stuff in really big bottles so I have more than enough for this task and just about anything else that I use that color for.

Graphite basecoat. 

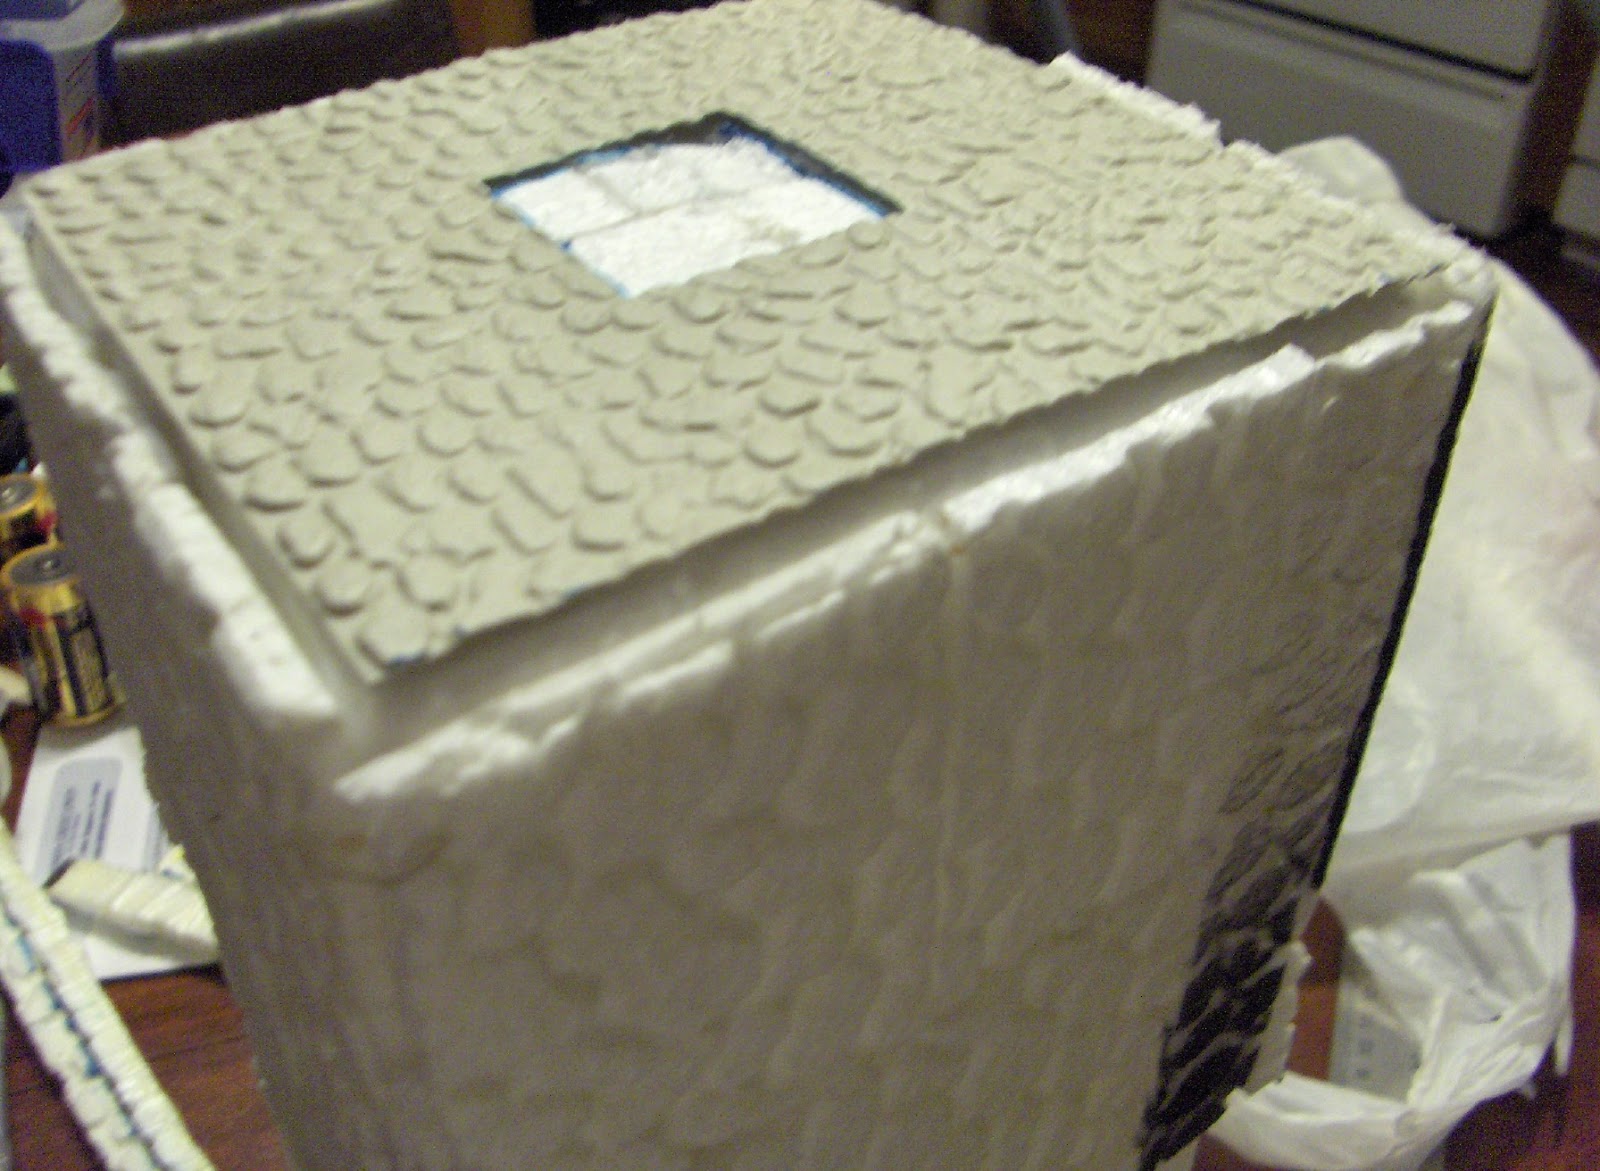
I slightly mismatched the highlight color with the tower, but I should be able to correct that decently with some touch-ups at some point. Overall, I like how it turned out. However it makes the upper quarter, the solid styrofoam sections, really stand out in an awkward way. And I was stumped on what to do about it. I brainstormed and discussed it with a few friends, but the answers I came up with didn't appeal to me. After many months of being stalled out on this thing, I came up with two workable solutions.

I swear that corner doesn't look that weird in real life!

Solution 1: Sheet styrene brick sections. Cut them to the pattern needed and glue them on. It worked out great on the roof top for this tower and I have made plans in the past to make other things using that stuff. I decided that this would be, due to the crude nature of this thing, expensive, time consuming, frustrating and likely to have crappy results.

Solution 2: Take a soldering iron to it and burn out some grooves. At first, I loved the idea. Then I thought about it and realized just how unforgiving any mistakes could be. One wrong move and I could really mess things up -badly!

After pondering on it for even longer, I have resigned myself to take my chances and go for it using Solution 2.  However, to avoid a house full of styrofoam fumes I will have to do it outdoors, so I likely won't do this until it warms up outside. So Spring/Summer is my penciled in expectation for the next time I will likely work on this thing.

It has been a long and strange trip for this thing so far, but the ride isn't over yet!

Sunday, December 17, 2017

Death Castle (Part 11.5)


This post concludes the re-presentation of the Death Castle thread I originally posted on http://warhammer-empire.com way back in 2008. See Part 1 for why I am posting it here.

++++++++++++++++++++++++++++++++++++++++++++++++++++++++++++++++++++++++++++++++

11.5
Originally posted on Warhammer-Empire March 20th 2009
Did some more work on the castle today.

Bird's eye view of the top. 

Here is a birds eye view of the top of the tower with the roof stones complete. After some experimenting I opted not to put a handle or hinges on any kind on the roof hatch so as not unbalance any models that may be positioned on the roof. So this is essentially done.

 Though it may be hard to see in some of these pics, I did randomly highlight a few stone by giving them a mix of a watered down brown / flesh ink wash.


After finishing that, I put the handles on the doors! They came out OK I think. I painted these metal, and they stand out good I think.


I painted the housing for the banner pole a rusty metal color to convey a bit of age to the tower (as if it didn’t look war-torn and ravaged already!). I also added some rust color to the stone beneath to show the rocks being stained by the slow decay of the banner holder.


And finally here is a profile shot taken outside in natural lighting.


The next step is the balcony. It may be awhile until the next post as not only will that part of the project be time consuming, but work is about to get a bit taxing.  

Saturday, December 09, 2017

Death Castle (Part 11)


This post continues the re-presentation of the Death Castle thread I originally posted on http://warhammer-empire.com way back in 2008. See Part 1 for why I am reposting it here.

++++++++++++++++++++++++++++++++++++++++++++++++++++++++++++++++++++++++++++++++


Part 11: Return to Death Castle! 
First posted at Warhammer-Empire on March 20th 2009.

Yes, after too many months of neglect, and admittedly, modeler’s block, two nights ago I returned to Death Castle. Right before Thanksgiving, I returned to 40k in a big way, and my Orks required, and still do, a lot of attention. My schedule is tough and things that require ‘a lot of attention’ taxes heavily on what little free time I have to devote to any of my modeling projects. However, with spring fast approaching I forced myself to let the boyz wait for a while and complete this project. I may have missed my deadline, but I’d rather do this right and be ultimately satisfied than just hack my way through to a finish line.

When I last worked on this project, I was hung up on the way the castle walls have settled in such a way that mounting it to the base will become a major undertaking. I have figured out a way around that though, so when the time comes to do that part of the project, I shouldn’t have too many worries.

Tower doors redone.


I started right where I left off, continuing to concentrate on the tower. Upon returning to it, I decided that I hated the coloring on the doors and took a new approach. I based coated them brown and worked up a few highlights in various tan colors using mostly a dry brushing technique. Finally satisfied with that, I approached the stones. As you can see in the first photo, another layer of base coat was required.

The tower, now fully painted!

The paints I used on the stones was Americana Graphite by DecoArt (base coat), AppleBarrel Colors Pewter Grey, and for the high light color I used Citadel Fortress Grey. Some stones are painted lighter than other others, and some darker, for a more realistic look. I’m going to go back and apply washes to a few odd stones, such as brown or terra cotta, to get an even more varied look.

Close-up on the door. 

I still need to highlight the stones on the roof and add the door handles before I tackle the balcony, which is still only halfway done, before the tower is done. I intend to get a lot more done on this soon.

Sunday, December 03, 2017

Death Castle (Part 10)


PART 10

It’s been too long since I updated this, but work has, slowly, progressed on Death Castle. There’s been a lot of drama in and around my life (personal and work) over the past two months that has had a hard impact on my free time. The few moments of peace working on this castle have been quite rewarding. Though I doubt I’ll beat the December deadline, my ultimate goal is to hit a New Year deadline.

Now with paint. 


The first thing you’ll notice, obviously, is that the tower now has paint on it. Sadly, these photos do not do the base coat justice, and the camera flash has the annoying effect of illuminating all the weird little shadow bits in the Styrofoam the paint couldn’t get too, and which cannot be seen in the normal lighting. Never-the-less, seeing it from the perspective of these photos really helps me get critical with the whole piece; I’m definitely not done with the base coat!!!

A closer look.

Also, since last time, I’ve added the arrowslits. These are the ones GW made, and I was wise enough to buy two blisters of them about 8-9 years ago anticipating a project like this one. (Who says hording is bad). It really did take quite a bit of time to fill in all the gapes I could. I was so happy to reach the point when most of them were filled, that I rushed out and sprayed the tower black and didn’t realize I’d left off the arrowslits until I started to basecoat it! It was easy enough to fix though. I think they add a bit of character, and hopefully will be handy in the actual game as well.


How it all goes together. 

The doors are proving to be a bit of a challenge. I’m experimenting with painting them now, as you might be able to tell from these photos. I have figured out the solution to my handle dilemma, but I won’t put those on until after the doors are finished.

The door dilemma.


Wednesday, November 22, 2017

Death Castle (Part 9)


PART 9

The doors have been attached to the tower. 


The tower has doors. 

This was more difficult than I imagined, but so far the results look good. I still need to figure out how to make handles and hinges but I figure I can work that out bit later. Note that the upper level door will be opening up to a deck/balcony that will be used as a fighting platform.

Add caption

This pic shows how the tower is going to relate to this section of the castle and I put a few models near it to get a vibe of what it all should look like after I complete it. As you can see I’ve base coated the castle walls already. I’m going to take the whole castle up to one more level of painting before I permanently mount it to the base.


Back to the tower, I began work on the tower’s crenelations. The main crenelations were made from the pieces originally cut from the walls at the start of this renovation project. As they are only vaguely the same size I’m hoping this unevenness will give the appearance that this castle is old and weathered.


This first pic shows the first two corners with a model on the tower’s top to give me a sense of scale. Note that one corner has a metal tube ‘bracketed’ to the tower’s base. This will be a banner holder. Once the project is complete I will make a series of interchangeable banners that can be switched out during play for different occupiers. The metal tube came out of an old Motorolla cell phone (Nextel i90). It’s amazing what kind of cool junk you can get out of old tech devices, but it’s usually more appropriate for 40k instead of fantasy.


Here is the tower with all of the main crenelations. In between them will be a short wall that extends the main wall up a bit provide a tad more cover the men on top. I’ll be adding that on tonight I hope. Again, the unevenness of crenelations will help convey that old worn-torn weathered look that I’m going for. Hopefully when the whole project is down one will think that the castle and tower were always part of the same model. I’m not sure how well it can be seen in this pic but there is now a wooden door in the center of the tower roof.


PART 9.1

Note: This 9.1 post was never posted on Warhammer-Empire for some reason, and the next post, Part 10, posted almost 2 months later, covers some of the things I wrote below. Never-the-less, for prosperity's sake and the simple desire for completeness, I shall include it here . 


I’ve finished the basic construction of the tower. I took a long time to fill in the gaps. By the way, I used Jo Sanja’s Texture Paste to do this. Texture past is usually used my painters to provide rugged surfaces for some embellishing techniques, or to fill in and smooth out a canvas before painting. I’ve found it works great with Styrofoam and cardboard. Some of the smaller gaps I used Elmers glue.


I then carefully added on the arrow slits. I’m glad that I bought these when I did as I’ve discovered they can be a bit of a challenge to find now.  

I then decided the doors needed more detail. I added crossbars to the 3 doors, and handles using wire rings.

This is basically a progress shot of the whole project.

What still needs to be done:

Painting, but at this point just base coating and maybe the second layer.

The tower’s balcony still needs to be completed and attached to the tower.

Expanding the main castle’s upper deck/ramparts of the walls.

Majestic in it's base coat. 

And the whole thing needs to be attached to the base. I’ve noticed, and you can see it in some pics throughout this thread, that since the two halves of the castle were joined together, it resulted in slight warping which is preventing some wall sections from touching the base. I’ve come up with a few ideas that can correct this and may actually work to the overall benefit to the castle’s overall look when completed.


Tuesday, October 03, 2017

Death Castle (Part 8)

The Death Castle saga continues...

PART 8

Progress is slowly being made. My attempt to find the fortress door sprues ended in futility so I’ve taken the Mordheim doorframes and glued slats of balsa wood to the backside to create a door effect. I’ve not figured out how to make door handles yet but I have some ideas I want to try out. There will be three of these for the tower. One at the base, one for the wall level, and one for the balcony.

Tower is capped.


The balcony itself was fairly easy to construct. I’m currently working out how to mount it into the wall, but I’m pretty sure I have an idea that will work. The hand rail for it will take some time to build but it should look nice in the end.


The woody bits.

I’ve capped the tower roof with a sheet of molded plastic card with rock embossing. I cut out a square in the center that will represent the hatch opening. This is done, although not shown, in the picture. Currently I’m at the point where I will work next on the tower battlements and crenulations.  

Monday, September 11, 2017

Death Castle (Part 7)

This post continues the re-presentation of the original Death Castle thread I originally posted on http://warhammer-empire.com way back in 2008. See Part 1 for why I am reposting it here.

++++++++++++++++++++++++++++++++++++++++++++++++++++++++++++++++++++++++++++++++


PART 7
Originally posted July 26 2008.


Death Castle is slowly starting to come along. I've spent a few evenings filling holes, plugging gapes, filling in cracks and smoothing over seams. Not all of them though, I am wanting the final product to maintain a 'rough' look. 

Here's my assistant checking on the quality of my work:

"This piece requires extra scrutiny."

Once that was done, I went ahead and finally spray painted the main body of the castle black. Finally, after 20 years, this Castle has been successfully painted black!

Death Castle- primed! 

I'm sure I mentioned this earlier in the thread, but the paint I used was a floral designers spray paint called Design Masters. You can find it in the U.S. at most Arts & Craft stores or any where that sells fake decorative flowers. Here's what the can looks like, next to a piece of Styrofoam that had been sprayed with it. This is a Flat Black (gloss will not be good for the additional paint I will be applying).


Design Masters,  the safe way to paint Styrofoam.

This other pic shows what a blast of normal black spray paint does to Styrofoam (in case the earlier pics of Death Castle didn't reveal enough already). The spray paint used in this example was Krylon. It causes a chemical reaction that burns and bubbles away at the foam leaving very little color and obvious damage. It can be used intentionally however to create battle damage, and looks really good on some of my 40k scenery. 

Styrofoam damaged by regular spray paint.

Coming up next, I need to tackle the tower...

Monday, August 28, 2017

Death Castle (Part 6)

This post continues the re-presentation of the Death Castle thread I originally posted on http://warhammer-empire.com back in 2008. See Part 1 for why I am reposting it here (hint: Photobucket's bad corporate decision). 

++++++++++++++++++++++++++++++++++++++++++++++++++++++++++++++++++++++++++++++++


PART 6
 Death Castle has slowly progressed.

The part that took me the longest was mounting the plastic Mordheim frame into the main entry way and filling in the resulting gaps. 

The egress is formalized.

For some reason I convinced myself that Woodglue would make a great filler (and it does the trick rather well on small gaps) but the slow drying time proved to be a challenge. I still need to tidy up some areas on the frame. 

Filling the gaps with wood glue.

I have this great latex modeling filler but I seemed to have misplaced it and I’ve not had the spare time to go seek out more at the local stores.

Next came the most important step so far, the joining of the two halves! Death Castle is now whole again!

Joined as one! I am holding it above my head in this picture.

I then proceeded to take old TP tubes and cut out patterns similar to the “rocky” surface of the Styrofoam walls and glued them onto the columns. This should create a more unified look once painted.


Stone patterns on columns.

They seriously are TP tubes.

Next step: Finish filling in all the gaps, and then prime the whole thing so far with Design Masters flat black before adding on the rampart extensions and finishing the tower.  


Thursday, August 24, 2017

Death Castle (Part 5)

This post continues the re-presentation of the original Death Castle thread I originally posted on http://warhammer-empire.com way back in 2008. See Part 1 for why I am reposting it here.

++++++++++++++++++++++++++++++++++++++++++++++++++++++++++++++++++++++++++++++++


PART 5

Progress is slowly being made. The tower’s wall sections are mostly in place and the renovation work has truly begun. I spent some time working the old front wall section off, which proved to be tougher than I thought it would be. 

Serious renovation work!


I was trying to preserve as much of it as I could but it was so brittle and the glue was so tough that it broke up as I removed it. Laying side by side you can really see just how harsh the spray paint was to the original wall.

Comparison of old wall to new wall.


I used a hot glue gun to fix the new wall in place. 

The new wall is added.


I then built from Mordheim building sprues what is going to be the front entrance’s door frame. Getting the door frame mounted to the wall will probably be a challenge.  

The new door frame.

2017 note: As I look back on this project I can't help but be grateful for just how awesome GW's Mail Order service used to be. I ordered those Mordheim sprues (and other assorted bitz) a la carte and it was so awesome to have been able to smoothly do that back then. The bitz program ended and Mail Order turned to total crap not long (within 2 years I think? after this. I don't think I have utilized GW's Mail Order very much since those days...


Wednesday, August 16, 2017

Death Castle (Part 4)

This post continues the re-presentation of the  Death Castle thread I originally posted on http://warhammer-empire.com way back in 2008. See Part 1 for why I am reposting it here.

++++++++++++++++++++++++++++++++++++++++++++++++++++++++++++++++++++++++++++++++

PART 4


The base is mostly complete. 


I have reached a point in the painting where I’m satisfied that I can move on to attaching the castle to it. The base is not totally done; that’ll be the last step of the whole project when I apply the grass. 


I’ve also begun work on the tower. 


I’ve started by evening out the frame and then applying the stone strips that I have left to it. This is proving to be time consuming for a number of factors, mostly being the slow drying time of the glue. Trevor built this castle originally using Elmer’s Wood glue (or Carpenter’s Glue), which I thought was over kill compared to the regular Elmer’s glue. However when it comes to rejoining the two wall sections, attaching it to the base, expanding the ramparts and attaching the tower, I will most likely use that wood glue. I considered using a hot glue gun, but the super quick drying time unfortunately doesn’t allow for mistakes or alternations. If Trevor had not used the Wood glue originally, this castle might not exist anymore at all! So as I piece the tower together, I’m reaching into the inside and putting strips of tape on backside of the cracks. I have some modeling paste stuff that I’ll use to fill in the gaps. The way that I have to join these pieces to the tower frame will help give the illusion that this was always apart of the castle. Since the amount of stone work embossed pieces that I have is preciously limited, I had to take into consideration the extension of the ramparts during this step of construction. I did this by measuring sectioning of the parts that will remain hidden with a sharpie.


I’m also looking at the years of battle damage this castle has suffered and trying to determine how much Styrofoam stone stripping I’ll have left over to be able to repair the walls. As I look at the front of the castle and it’s becoming clear that I may have to replace 80% of it. The section nearest the gate received the worst of the original dose of spray paint in ’89 and the result is that a lot the cobble stone detail is just gone (blame it on the lascannons). The entry way is very badly damaged and I’d like to hide the toilet tissue tube, I mean support column, a lot better.  

I was asked by Duce, one of WH:E's users: How's the ramp work though, is it as steep as the pictures show or is it misleading?


I responded with: 

The ramp is definitely steep! 

Definitely steep!


However there is enough grit on it to hold most models just fine although some of the larger more top heavy ones could have problems with it. 

"Charge!"

Loaded movement trays tend to slid off of it as they are usually quite smooth on the bottom. That's a shame because I made the ramp wide enough for a standard 5X4 mansized unit. 

Saturday, August 12, 2017

Death Castle (Part 3)


This continues the re-presentation of the Death Castle thread I originally posted on http://warhammer-empire.com way back in 2008. See Part 1 for why I am reposting it here. As the perfect affirmation for why I need to do this, I got an official email from Photobocket last week: 


I am unsure how much time I have before the photo links on the original post break, but I will be focused on trying to get this project completed before it happens!

++++++++++++++++++++++++++++++

PART 3
Originally posted on 5/13/2008 on Warhammer-Empire.

I have begun work on the base. No pictures of the base at this stage as it’s too dull to showcase. However I thought an image to give you an idea of the width and height of the tower might be interesting.

The Tower's frame. 

As you can see (below) it will be wide enough to fit most units (US20 empire/US16 Orcs etc.) although ideally I’d think most players would stick an artillery piece on this and I tend to base my artillery on this size movement tray anyway. And it’s going to be fairly tall and should give a commanding impression when done.

Wide enough to accommodate  a full unit. 

I'm thinking I will sort of “jigsaw” the Styrofoam with a foam cutter to avoid strange seam lines and awkward joins.

Prepping the veneer. 


Here's a quote from Dr.TSG the creator of Death Castle: 
"Death Castle was a place of massive death, whereby I slaughtered many opponents over the years. I think the castle should sit on a small bailey--it is only befitting Death Castle! We could even build a full motte & bailey system for the little castle!"

PART 3.1


Death Castle gets it's base.

I have finished the basic construction of the base. After some serious contemplation I settled on making the entry way to the castle a step ramp to give the defenders the advantage of height (imagine the difficulty try to push a battle ram up that and doing it with enough force to pierce the gate!) I may level out the field a bit more and add more rocks at the base of the foundation and alongside the ramp.

It's a long drop of of that wall!
The backside I made almost shear. The small ledges will either have added to them rocks, clumps of grass or brush or be removed altogether. My next step is to apply lots of sand to the base and add the first base coat. I’ll then leave the base aside until I’m ready to attach the castle permanently to it. Then I’ll proceed to the actual repair work on the castle and as you can see I’ve got A LOT of work to do there. What the previous pics failed to show were all the smaller holes and cracks which the sunlight unforgivably reveals. That could take some time to deal with…

Can you see the holes?

A quick update:
Spray Adhesive and Styrofoam don't play well together. It has the same melting effect as standard spray paint does. So, I've spent what little free time I've had this week where daylight was available gluing sand to the base. I went and got a broad paint brush, an old baby food jar, water, Elmers glue and sand from a near by site where an above ground pool once was, and went to town on it. This evening I just used Design Masters floral spray paint on it and gave the thing a base coat of brown and now the it's sitting in my utility shed drying and venting. I'll decide tomorrow if I need more sand on it or not and go from there. I'd like to have the base mostly finished by the weekend so hopefully I can start truly renovating this castle.

NOT a good combo...

Design Masters is the best spray paint to use with Styrofoam as it does not melt it! But the fumes are just as intense. I will give you guys a proper visual demo soon.