Saturday, December 26, 2020

Grots! (Part 3)

 With holidays, family stuff, work and artwork taking up the majority of my time this, I did find a few fleeting moments in December to slap some more paint onto the grots. Pressing forward with these guys, I went ahead and moved on to the next stage which was to apply Tesseract Glow over their Gretchin Green Foundation Paint basecoat. 


Next came the layer of Applebarrel Kiwi,


This is followed by highlight of Sunburst Yellow,


I followed that up by picking out the clothing items that are going to end up yellow. I used Firey Orange for that basecoat. Also I picked out their eyes using Khorne Red and base coated their teeth with a brown. 


I was hoping to have these guys completely painted by the New Year, but that's not likely to happen. Still, I think they are coming along nicely even if it is a bit slowly...


Tuesday, December 08, 2020

Runtherdz (Part 1)


No, he's not a force ghost...

Every gathering of grots need someone to boss 'em around, and my Bad Moon Grots definitely need someone to boss them around. I went searching for an appropriate candidate on eBay and found a deal that included both of the miniatures below* 

A disarmed Gorkamorka Slaver.

Plastic Runtherd from current grots set.

You might notice that the Slaver is missing his right arm and the Runtherd is missing his grabbing stick/ grot prod attachment. 

Bitz to fix 'em! 

There is a bitz seller that had exactly what I needed to make these guys work. A Runtherd arm with both attachments! After I acquired both I got to plotting exactly what to do with them. Clearly the old Slaver will  need to have that paint stripped off (is that...enamel? *shudder*), but the other guy is pretty much good to go. 

Upon arrival. 

I cleaned up the plastic guy, but I have no idea how his original owner applied the grit/texture (sure I could speculate,) to his base so I used a resin base extender to expand his base out to 32mm. I decided to give this guy the grot prod. He will be painted in Bad Moon colors to match those grots that I have been picking and poking at over the past few months. 

Primed and ready for paint!

As for the other guy, he too will probably end up in Bad Moon colors as well, which means I will probably need to paint even more grots, but trust me, I have plenty of them! But, as previously stated, that paint has got to go! Another candidate for the chemical jar is this old Head Honcho miniature (also Gorkamorka era) that came with all those metal grots. It maybe quite a while before that happens though, so for now I will be working on the plastic guy first. 

Heading for the stripping vat! 

*These pics are taken directly from the eBay auction page.


Tuesday, December 01, 2020

Review: Sin of Damnation

Paperback cover. 
Sin of Damnation by Gav Thorpe. Basically this is a narrative breakdown of the plot for the Space Hulk board game that was released about a decade ago. There have apparently been a few different editions of this story printed, my copy is the "Start Here With Black Library" ediiton which has the story Sin of Damnation twinned with a shorter story called Sanguis Irae which I will give it it's own review. Today we are focusing on just the story Sin Of Damnation

We follow the boarding actions of two Terminator Squads of the Blood Angels chapter as they run missions against the Genestealer infestation aboard a massive space hulk. These missions are the exact ones from the Space Hulk game as are the characters. One squad is lead by Sgt Lorenzo and the other is lead by Sgt Gideon. They are reporting to, and being directed by, Capt. Raphael who remains onboard their vessel. 

The story is broken down into time increments starting out at 00.04.36 all the way up to and ending with 00.57.77. This is an interesting nod to the game this is based off of as it is a rigidly timed game with some editions even including a small sand-filled hourglass. One would think that keeping up with the time would matter more to the overall story, but it does not. Much of the story is mostly colorful description of the debris and chaotic mess that is the space hulk itself and of bolters, flamers and assault cannons ripping apart and slaughtering genestealers. A plot sort of manifests about 3/4 of the way into the story. 

++++SPOILERS++++

About 3/4 of way into this story, things start to get a bit more engaging for the reader. Fans and players of the last edition of Space Hulk will know that the every Terminator miniature in the game has a name. And these named characters start dying off in spectacular and heroic fashion. Usually with a vicious claw (or dozen) rending them apart. Auletto's death, is a bit exceptional as he is slain by his fellow Blood Angels after a genestealer implant attack infects him. They "reduce his remains to a charred heap within seconds" via a heavy flamer*. Omnio falls down a shaft only to be (apparently) dispatched by 'stealers. And there are other even more dramatic demises to befall these Terminators.

When they find The Wrath Of Baal, a long lost Blood Angels vessel fused into the Space Hulk they redirect their mission to retrieve an object (the chalice from the game) from it. I personally found this to be quite interesting and had hoped for more discoveries and Blood Angel history or backstory to be revealed but, not really, it was all about getting the cup. 
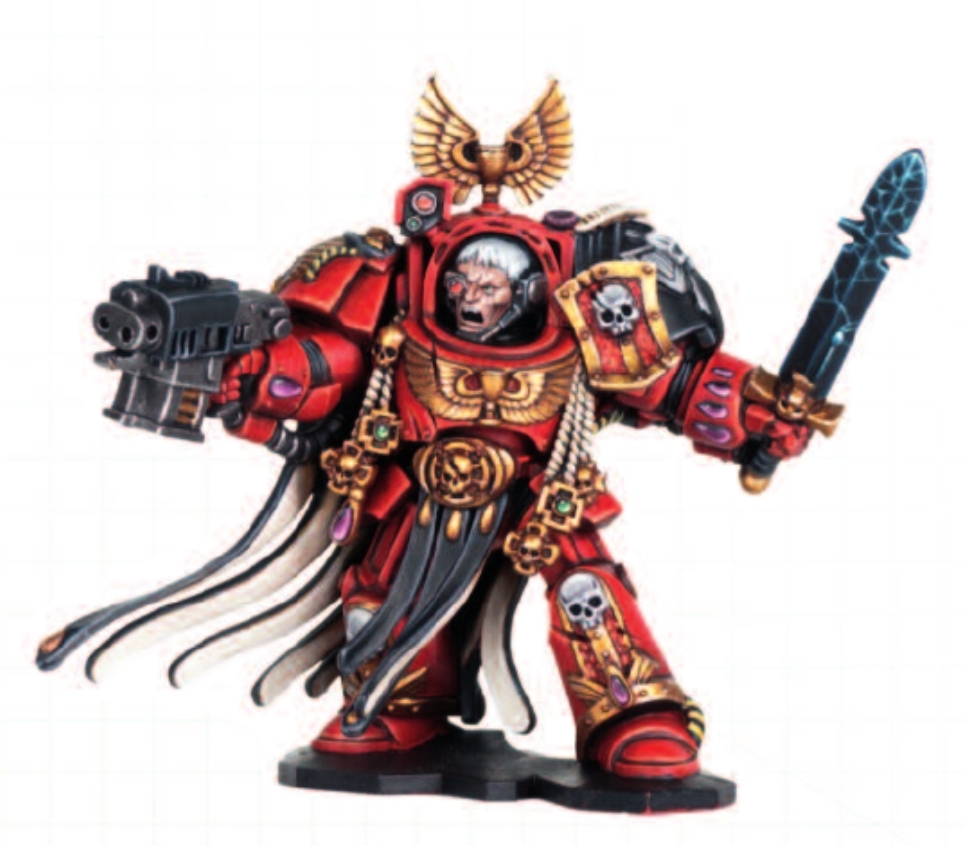
Sergeant Lorenzo.

The most interesting characters are Sgt Lorenzo, Sgt Gideon and the Librarian Calistarius**. I like Gideon mainly because he wasn't Lorenzo. I say this because Lorenzo has a personal hang up about a prior encounter like this on a Space Hulk where a lot of Blood Angels died, but he has survivor's guilt and wants to use this mission to redeem that guilt. This almost gets the guy killed but he comes through in time to defeat the main Broodlord in the end. The story's ending was exciting, and well written and paced, but beware reader, there is a lot of war-porn to grind through to get there!

  • Did I like it? It started off quite well enough, it was well written and engaging, but after a while the repetition wore me down. I guess in the end, if you're literally going to write the events of a game, regardless of how clever the mission scenarios are or not, you're going to just end up with war porn. And this is basically that.  I did begin to like it once the characters were revealed to not have "plot armor" and some of them started to die, and die spectacularly.  Ultimately, yes, I enjoyed it, but it was a grind to get me there. 
  • Was it hard to put down? At first no, but again, repetition leads to boredom. Leading to this deceptively thin book being very difficult to pick back up. The problem here is that you got to sort of keep a score card (in your head or actually written down) in order to keep up with who the cast of characters are and what they are armed with. In truth, sometimes their "character" is essentially their weapon...
  • Could I care about the characters? Honestly? No. They were as expendable as they would be to you if you were playing an actual game of Space Hulk. In fact, I began to root for the the Genestealers to win just so the story would end faster. I found myself actually sympathizing and rooting for the Broodlord, which honestly is what got me through to the end of the story. 
  • Did the writer truly grasp how the 'world' of the 41st millennium? Or is this the work of a hack chasing a paycheck vs. establishing his mark on the ever-expanding 40k universe? Typically this question is answered one way or the other. But this is an exception. Gav clearly knows what he's writing about here, and I honestly think he loves Space Hulk, but I am fairly sure this was a gig he took for a paycheck. He tried to apply some subtext and additional background but it's pretty clear he couldn't stray too far from the brief he was provided. 
  • eBook variant cover.. 
    Was I being talked down too? Not really, but a chart or a Dramatis Personae listing at the start of this story could have helped with keeping up with who's who of the squad as it does sort of get muddled after a bit. To give Gav credit, the way the story is broken down into time increments is a tool to assist with keeping the pacing quick and exciting. It does help the story from being utterly boring. Some of Gav's writing anomalies do pop up and disrupt the pace of the read, which caused me to stop and re-read what I had just read. This happens too much in this story, and being that this is intended to be a fast paced story it's really irritating. For example this line: "Lorenzo approached the Librarian and took the tissue sample from his belt." Seems straightforward enough, but up to this point in the story the reader knows that it is Lorenzo that is carrying the tissue sample, when did the Librarian get it? Why is he taking it back?  The next sentence in the story sort of straightens it out, but, again if it was written correctly ("Lorenzo took the tissue sample from his belt and approached the Librarian.") the confusion would never have happened and I could have followed the story better without any disruption.
  • How predictable is this story? About as predictable as closing a car door. Like a horror movie, sometimes the order and methodology of the characters individual demise can become interesting in and of itself, but these guys don't give you  many reasons for you to care whether they live or not. 
  • Do I recommend this book? Only if you have the deepest passion for Space Hulk's background elements or if you are completely new to the hobby. Otherwise you're likely to be bored by this. 


*A weapon that has always been way more effective in the Space Hulk game than it ever was in the main Warhammer 40,000 game. Another ironic observation is that Terminator armor is way less effective in the Space Hulk game than it is in Warhammer 40,000. 

**They're also the most popular Space Hulk miniatures on eBay as well!

Saturday, November 21, 2020

Bad Moon Nob (Part 2)

 It took me a while to finish this guy, but I finally did it. I haven't done anything with this miniature since May of 2020, but my recent grot project inspired me to get him to a completed state. 

The finished Bad Moon Nob.

The yellow was done by applying a basecoat of Firy Orange, then Sunburst Yellow (thinned), Sunburst yellow deep highlights (unthinned), followed by a Bad Moon Yellow layer with a highlight of Folk Art Lemmonade with a final wash of Lamenters Yellow. And I am fairly pleased with the result! 

...I forgot to paint that tooth! Damnit!

The blacks were simple really, I used Abaddon Black as a base followed by a thinned dark gray (specifically I used Craftmade Graphite but any dark gray ought to suffice), then I dry brushed on a lighter, brighter grey (I used Applebarrel Country Grey), before finished the black with a wash of Nuln Oil. For a blue-ish look Ibhave done all those steps but switched out the Nuln Oil for Drakenhof Nightshade.


All the spikes, ringlets and scrapped metal highlights were done by using my old Mitheril Silver. 


I was tempted to paint some black flames or designs on some of the yellow areas, like on the klaw, but I decided that I liked him well enough as is. 


When I bought this guy, I bought him with a whole squad of Orks, so I guess now I really need to paint them up too, right? 

Friday, November 13, 2020

Grots! (Part 2)

Inspired by the recent Ork vs. Ork game that I played, and needing to get these guys off my table, I decided to kill a bit of time by base coating the flesh on these grots. I used Caliban Green for this, which turned out really dark on top of the black primer. 


Normally I would use my twenty five year old Goblin Green for this next bit but for some baffling reason an old Foundation Paint from around six or so years ago called Gretchin Green leapt into my hand. Odd thing, I didn't buy that to paint greenskins with, but because I thought I might use it on Bolt Action miniatures. I was about to put it back when it occurred to me that this is a thicker paint than that old Goblin Green and should coat really well over that dark Caliban layer. And...wow, this turned out great!
 
Gretchin Green Foundation Paint.

I liked this look so much I was tempted to just stop and declare the battle already won. I kind of dry brushed on the Foundation Paint and it created this natural tonal gradation over the Caliban Green. I really liked it. 

Gretchin Green over black primer. 

However this would clash with the rest of my Orks and Gretchin, so I decided to proceed. But then I had another idea for this stage. Normally I mix Yellow and Green Ink until it looks a bit like Anti-freeze, then I thin that a bit with water. I used that as a wash over all of my greens greenskin flesh. The problem with that is consistency as I rarely get the mixture exactly like the previous batch. And the other problem is how long it takes to do and sometimes I have the third problem of figuring out what to do with the leftover mixture or find that I didn't mix enough. And sitting right there on my desk was a paint I got right when 9th was launched: a Technical Paint called Tesseract Glow. 

But I was hesitant to try it. Up stepped this guy who volunteered himself for the next stage of my experiment. 

"Pro-painted"?

The same deal that got me these grots included this guy also. It's painted ok, but just not in a scheme that will work with my army. However it is a decent basecoat for my style so I decided to go ahead and proceed with my experiment and applied the Gretchin Green.

Gretchin Green.

So far so good, and I thought this was looking rather well, so on to the Tesseract Glow:

Tesseract Glow.

I was really pleased with this! So much so that I was tempted to stop it here. And I did for a few days, contemplating this miniature during that time. But an experiment is an experiment and I had to take It's finale.

Kiwi.

Kiwi was my next stage, and it really kicked up the color. 

Sunburst Yellow highlight.

The final highlight was Sunburst Yellow. And... I think I dig it. So here he is compared to on of the grots from earlier with just the Gretchin Green color, and a Bad Moon Nob (that I really need to finish). And...I think it works. But I could use some feedback to consider so feel free to comment below. 

A gathering of Green. 


Wednesday, November 04, 2020

Dreadtober Black Legion Hellbrute (Part 5)

 Thanks to Marc over at the main Dreadtober site for allowing a deadline extension up to Friday November 6th to get our projects done. And with a bit of focus I pulled it off! 

Finished!

 All I had to do was some highlights and few details which I was able to pull knock out when I found the time. 


The obvious difference those of you who read the last post may spot is the addition of the grass tufts on the base. This was particularly fun for me as my 5 year old son was fascinated with watching my application of these tufts. And yes, my modeling stuff does have locks on them when I am not present. (Thank you foresight!*)


And the fallen Space Marine's helmet did indeed belong to a Dark Angel. Dark Angels, as you probably know, are fun to kill. 

So, this guy is done! Or as done as I want him to be. As a wrap up to this thing, here is a buddy pic with the Bloodbrute , his Khornate counterpart. Hopefully the next time they appear together will be in a battle report stomping their way through an enemy line (oh, let's be honest, they'll probably get nuked on the 1st turn! LOL!). 

Friends will be friends.

Thanks again to everyone who encouraged me during this project and for everyone who participated in Dreadtober! Emperor willing, I'll see you in October 2011! 

*Forsight? More like memory. When I was 4 years old, my Dad had a 1977 Chevy Blazer. He loved that thing. So much so that he bought a scale model kit and was painstakingly painting that kit to look like his actual truck. There were some rednecks that lived up the street that drove an old car that was painted in a lot of different colors, with the main color being primer Grey.  Four year old Neverness thought that was the coolest thing ever. So much so that when my Dad went to take a nap (and foolishly left me unattended) I got his paints opened and started to paint his Blazer model like that redneck car. Considering that my Dad has always been something of a Testers paint purist, the fact that I was able to unscrew those glass jars is impressive when I think back on it. Anyway, I didn't get too far into "improving" my Dad's model when he soon checked in on me. If I recall, I think it's the first time he ever spanked me, and it was the last time I ever messed with his models! 

Friday, October 30, 2020

Dreadtober 2020 Black Legion Hellbrute (Part 4)

 It's getting down to final days of the month and it looks like I am going to miss the deadline by a few days. Not wanting to do a rush job and confound what I think is turning out to be a good paint job so far, I have decided to just do what I can do but concede that I won't make the goal. But darn it, did I get close! After painting those areas I was far enough along that I felt that I could finally attach the front plate; an act which completes the construction of this beastly machine.

Almost done...

Since the previous update, I highlighted the black armored bitz, and painted shinning gold on the trim. Also basecoated the eyeballs using Firy Orange as I am going for an Eye Of Souron vibe with the eyeballs. 

Still not done though...

The only things left to do are to finish those burning eyes, the pistons and metallic bits, the fuel tanks, flamers and that Space Marine helmet (I did manage to start on it's eye lenses however). Hopefully I can get this finished next week and not be too late on my deadline...

Sunday, October 25, 2020

Dreadtober 2020 Black Legion Hellbrute (Part 3.5)

 Due to the technical issues I was having last time I wasn't able to share all of my progress pics. Hopefully I get them to you today. 

So creepy I had to use this pic twice.

This first pic is the Reikland Fleshwash step over the Bugman's Glow basecoat.  

Reikland Fleshwash.

Bugman's Glow was reapplied again, but not too much as to leave the fleshtone wash showing near the recesses. 

Bugman's Glow layer.

Next, Cadian Fleshtone was strategicly applied to those fleshy bits. 

Cadian Fleshtone.


The next step was a highlight of Kislev Flesh.

Kislev Flesh.

Druchii Violet was used at all of the grooves and recesses. According to our man Duncan this will make it appear as demonic flesh, although my version seems brighter than their example, but I like the way mine turned out so...yeah. oh, and the tentacles bursting out from the side of this thing was painted using the steps GW advised in the Fear No Evil book (which I also recently used in my Death Guard Experiment.).

Daemonic Flesh complete and gutty tentacles.

Then came the gluing, where I finally went about joining the main parts together. It was all about the head of the beastie, as it has to be placed prior to assembly and I was only satisfied with the original Hellbrute (AKA Bloodbrute) headand found it to be a challenge the first time. I like the way this guy is turning out so far and I made sure to push him a bit more forward if you will, as it gives him more of an "erupting" look. 

A bonding experience.

Ok, those were the missing bits from the previous post, I should (hopefully) get this guy finished by the end of the month. Hopefully.


Thursday, October 22, 2020

Dreadtober 2020 Black Legion Hellbrute (Part 3)

This is my 2nd attempt to write this post. my first attempt disappeared after fighting Blogger when I was attempting to add the final photos. This new interface is fricking aweful and is very hard to use on a mobile device. Now when I upload a photo all I see is code, and I have to look at a preview to see if everything is aligning correctly. It's very infuriating! But this isn't intended to be a rant about blogger but a continuation of the saga of my painting and construction of this Hellbrute.
The rupturing of my internal rage.

Due to the fact that I can't see what I am posting, I am simply going to post what this thing currently looks like and will add in the step-by-step photos and comments in a future post.
Gluing this beast together.

UPDATE: I figured it out. One those hieroglyphs allows you to toggle between Compose and HTML view. How I hit that is mystery, but at least I figured it out...

It's the one that looks like a pencil.

Look for Part 4 in a few days with all the steps that lead up to the current progress shot posted above. 

Wednesday, October 14, 2020

Dreadtober 2020: Black Legion Hellbrute (Part 2)


The month is rolling by fast, the season is in a colorful state of change here in the mountains of East Tennessee, and tucked away in our shotgun shack progress on this warmachine of Chaos continues. In Part 1 of this series I focused on the modeling and preparation work prior to priming the model. Here you can see it all the parts prior to assembly post priming.

The primed parts.

It was while scrutinizing these parts that I realized that I forgot to attach the auxiliary heavy flamer. I again decided to use a pair of standard Imperial Guard flamers like I did on the Bloodbrute. They look right and it's easier to work them onto the model than all the other choices I have available.

The heavy flamer assembly on the Bloodbrute.

I seem to have a lot of these arms in my bitz bin also, so it's an easy thing to make happen.

Cadian flamers.

I thought about getting a bit more advanced with this assembly and model on some fuel hoses. But I quickly determined that this would be more ambitious of a project than I have time, or patience, for. But I came up with another idea that involved a fuel tank but I nixed that one also because it was just too absurd. But it did inspire another idea...

Flamers attached.


Looking at this model it's clear that there is a techno-organic fusion occurring throughout it. Muscles are evolving throughout the piece replacing machine parts with some of that muscle mass still containing pipes, pistons, wires and cables running throughout it. I thought a pair of tanks attached to the rear left side of this thing looked interesting. I imagine that they connect to hoses that run throughout the body and come out through the arm to terminate at the heavy flamer. It's sick, insane, and woefully appropriate for this thing.

Fuels tanks attached.

Next up, I turned my attention back to the overall paint job. I started with the fleshy bits, particularly the head, legs and abdominal areas.

The fleshy bits.

Then I basecoated the trim using Gamecolor Hammered Copper. I used Tin Bitz on the Multi-melta barrel and the flamer. 

Hammered Copper trim.

And progress shall continue, but this is where it's at right now. I should have more done in about a week. Meanwhile, see what everyone else is up to over on the main Dreadtober site.