Tuesday, May 24, 2011

Space Wolf Gallery (part one of probably many)


Still on the road until the end of the week, so it's time to dump some more photos on you guys! Here is the first part of my Space Wolf gallery. This first entry is a little small due to the how long it's taking me to upload the pics using the hotel Internet connection. Above is a work in progress Whirlwind. Only the launcher itself is finished, which I'm generally happy with. I'll finish this one soon enough along with a small fleet of Rhinos that I need to complete.

This is the first vehicle I have ever painted for the Space Wolves. It is a Rogue Trader era Vindicator, which at the time I painted this (late 2nd edition 40K...I'm thinking '96?) it did not have official rules, but the rules that Epicast provided with this conversion kit. Unlike future paint schemes, I was using another mid-tone between the Shadow Grey and Space Wolves Grey (Elf Grey) which I ultimately decided to drop from palate. Never-the-less, I'm still pleased with it.

Being that this was my first vehicle paint-job for the Wolves, I wanted to add some elements of epic glory. The idea of the scroll work being affixed to vehicles was nothing new when I did this, however having molded parts to represent it was. So I hand painted this, and adapted the 'pseudo-scripture' from a book I have on Norse mythology. Once I had the background painted, I hand lettered this using a rapidiogragh (sp?). I seriously sealed the hell out of this, as rapidiograph ink is not water-proof at all. So far, this has held up very well. Interesting note, having never taken photos of these tanks with such a high quality camera, I'm now finding mistakes that I just overlooked on the physical model, however I was pleased to also see details that I have forgotten about. The kill markings on the inner track assembles, no doubt recording kills that this tank crew must have racked up, were a delight to rediscover. I think I'll repeat this theme on the landraider when I get back to it.


This top view reveals the pin-holes on the hatches where I have converted two sets of stormbolters that I can insert and remove during the game. Also, at this time I was using a Ral Partha bronze metallic paint for edging a trimming on my Space Wolves but not long after this I ditched this style. Also, after painting this, and with the on-set of 3rd edition in '97, you'll start to see a withdrawal of the overwhelming pack marking styles that were all the rage in  mid-'90s Space Wolves chic on my models. Or as a local gamer kid recently remarked: "What is that? It looks like a circus cannon!" Yup, I'm still using this in my games!

More later in the week...

Sunday, May 22, 2011

Orky Love


I was recently asked "when are you going to show us some Orky love?" So, knowing I was going out of town and wanted to post some gallery pics, I took a few pics of some more recently finished ork models.

This is my Ork Warlord, Ror Ruk. This is the 2.0 version however. The original was a very old Ork Chaos Renegade (google it) that never got a paint job. However, the Orks have grown over the years and he was starting  to look quite weedy compared to his peers. So along came this slight conversion complete with, um. ammo squig.


The powerklaw is from the 3rd ed metal Ork Dreadnought. I just hacked off the attacksquig, pinned it, put an old plastic Space Marine comlink over the hole, and green-stuffed the join on the leather bit connecting to the arm and klaw. I'm thrilled with how well this model came out.

But every Ork needs a ride, right? (and make it red so it can go fasta!)


This is a Gorkamorka trukk, one of many that I have, that I finally got around to painting last summer. I do like the new trukks better, however, I'm of the might set that ork vehicles come in all sorts of shapes and sizes. My other trukks have bits from the new style trukks on them. (the boarding planks work well on these smaller trukks.)

On the scrap sheet metal parts welded all over this trukk, I thought it would be cool to have as a bit of contrast a colored part from a Space Marine vehicle, so I chose an Ultramarine icon for this honor. And considering how many Ultramarines my orks slaughtered over the past 20 years, it only seemed fitting... :)


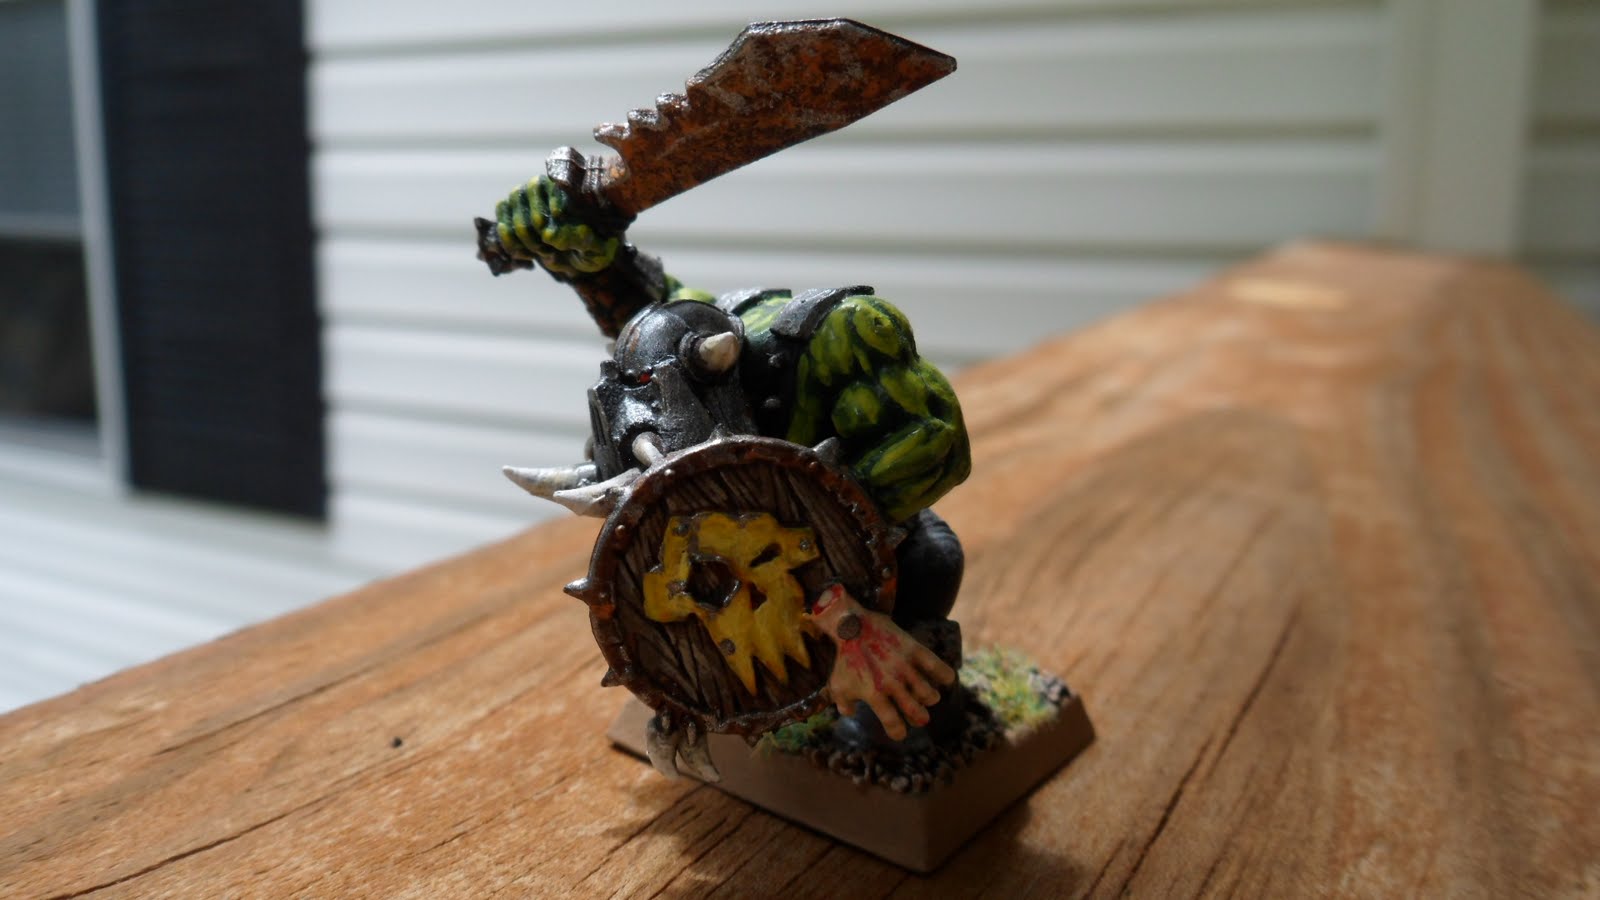
Here's a fantasy ork from the 6th ed Warhammer Fantasy Battle starter set that I'm quite proud of.


The rust on his blade (sword of tetanus) I'm particularly fond of. This was given to me by a friend who was flirting with becoming an Outrider with GW, but ultimately dropped the idea. He did something cleaver by using metal rods that holds the torso to the body allowing it to be separated from the legs and joined to another set of legs on a war-boar:


Quite ingenious, and very handy in the WHFB game as well!


Probably a good spot to talk about the flesh tones that I use for the Orks. The first Ork models that I ever saw painted in White Dwarf look a lot like this, and the guy who convinced me to play Orks (Trev) had a pre-painted fantasy orc that he got from a shop in England. We based our technique off of that model. Over the years i have refined it as so: Base Coat of Dark Angels green, a thin semi-watered down coat of bilious green, followed by a solid highlight of bilious green. Then a I generate a mix of green and yellow ink, mixed to about the same color of anit-freeze. I thin this and use it as a glaze. I will then pick out the highlights with bilious green again, apply a highlight of Applebarrel Kiwi, and lastly a very thin highlight of sunburst yellow. As you can imagine, it takes quite a bit of time. Here's a unit of troops I've been dabbling on for close to 2 years now:


I hope you enjoyed this. I will return with more Orky Love in the future, but it may be awhile as I'm currently focused on finishing up some Space Wolf items, which I can only get to between business trips it seems...

-Joel


Friday, May 20, 2011

My other armies

I'm away on business, and had the foresight to take some gallery pics before heading off. So while the Landraider project is close to completion, there won't be an update on it for another week or more. So, I've decided to show a completed sample of other armies (that aren't Space Wolves or Orks) that I have for 40K that I'm hoping to be able to work on in the near future. In order of origin we'll start with:

1. Chaos Space Marines.
My Chaos Space Marines army started back in my 2nd year at the Kubert School. Two of my room mates and I played a hybrid version of 1st and 2nd edition 40K using only Chaos armies, and we did a campaign using the original Realms of Chaos books. It was incredible fun. My faction started off as a Nurgle Deathguard army, but as the years went on I found myself collecting a mixed army focused on Nurgle and Slannesh. This chap above is my first test model for an Emperor's Children color scheme. I'm not sure how much I like it, but I haven't messed around with these guys since 2004, although the other color-test models linger on my painting table. My primary reason for my lack of interest in Chaos is a result of the decision in the 4th ed Codex to split the Daemons away from the Chaos Space Marines into their own army. It may be a long time before I got back to these guys.


2.Imperial Guard.
This color scheme is a direct copy of my pal Trevor's original Necromunda army (from the back of the original Rogue Trader era plastic box). He was happy with his paint scheme and got me to paint a few units for him, I thoroughly enjoyed painting these guys, and when my brother picked up a 2nd ed Cadian army, I chose to use that same paint scheme and it worked really well.  However this is the only troop model I painted for it (I ended up painting some odd-ball models for it like Primaris Psykers etc.) In recent years I have bought the army from him and I have also bought a Valhallan army as well that I'm also testing this paint scheme on. I think they might mix well. Meanwhile I'm trying this color scheme on current plastics.


3. Legion of the Damned
Although they were only a full-blown army briefly in 2nd edition, I have always been fascinated by these guys since their White Dwarf Magazine appearances in the late '80s. I have a full 10-man squad of these guys comprised mostly of original '80s era metal marines. I entered this squad in the '99 Baltimore Games Day but they were unloved by the judges...


4. Eldar (Saimhann)
The Eldar have been my eternal nemesis since my first Rogue Trader game in late '88, but over time I have developed a fondness for them. My old pal Mark has an Eldar army that he's been collecting for about as long as I've been collecting orks, and has had me painting the odd model of his off an on for years. Saimhann has been his army craftworld of choice and I got really good at painting them. So much so, that I started a small army of my own. These guys are what my base troops look like.


5.Celestial Lions
This is my Codex: Space Marine army of choice based upon the awesome background that GW developed for the 3rd war of Armageddon campaign. I whipped up this guy for a local painting competition (I lost to a vastly Superior painting of Typhus) but I guess the lack of challenge in the paint scheme sort of bored me so I have the rest of the models hanging out on the painting table. This will be a small army that I don't intend to make too big, but allow me to use models and tactics that aren't available to my Space Wolves. Shame that I accidently cut the back-banner out of this photo, I think some of you might have appreciated it....


6. Dark Eldar
I loaded up on this army 10 years ago when Serious Hobbies closed down (they weren't so serious after all apparently) and it's where I first met my pal Charlie whose first words to me were a comment on the mountain of Dark Eldar that I had in my arms ("They die in droves you know..."), However, I never did anything with this army, but with the new Codex and models, I'm very keen to get this army going. This is my first paint scheme attempt that I recently completed on one of the original plastics from the 3rd ed starter box. I like it a lot (although I'll probably not go so over-board with the cast-light glow from the eyes on future models.

Other armies that I have that I haven't got around to building or painting example of yet are the Sisters of Battle, Chaos Daemons, and Tyranids.

I hope you enjoyed this,

-Joel


Wednesday, May 11, 2011

Pods to drop and Lands to Raid (part five)


I've managed to come a long way with this since my last post, staying up later and tinkering away at it. Actually, this stage tends to go fast for me, assuming I actually apply myself. The pic above shows the mid-coat on the hull, but here I actually mixed with 1 part brown ink, 2 parts flesh wash ink, and 2 parts water and ink wash over all the tracks. In the next pic you'll see why I did this, as the Frag Defender explosives that attach to the front of the track section was blending in way too much with the tracks.

I'm still not satisfied with these however. You can see a 'crux' pattern on the Frag Launchers, and I think I will pick them out with a bit more color...

The next batch of photos show the application of the mid-coat along the hull sections:


In between this stage and  the next, I dabbled a bit on the Lander Speeder crew and one of the crewmen for the Land Raider:


Next I applied the same technique as I did for the mid coat to the top coat. I did this by taking GW Space Wolf Gray, watering it down, and liberally 'dabbled' it on top the areas of the mid coat closer to an edge. At the edge I applied a solid line of Space Wolves Gray.


Oh, and I assembled the front twin-linked Assault Cannons as well!


The Space Wolf Gray stage went fairly quick, the next stage will be to add the highlight of Skull White to select edges, and the bolts,then the hull will be done and at which point I'll have the final detailing to do. (Have you noticed all the skulls dotting this damned thing?) Also I want to add either a unit marking or something else colorful on this tank, as I want it to look a bit more interesting than it currently does...


And finally, this is it's current state with the addition of the housing that covers the Assault Cannons.

Let's see what I can get done before I leave town again for business...

Sunday, May 08, 2011

Pods to Drop and Lands to Raid (part four)

It has been a very busy week for me! So what little of my free time that could devote to the Landraider project, was spent trying to figure out how to magnetize the side sponsons. The reasons for doing this is so that I can swap the weapon types for the game, also remove them during play (when they get blown -or ripped- off) and to help get a better look inside of it. In the pic above, you'll see elements of my first attempt to magnetize this. I used really small rare-earth magnets that I drilled and inserted into the 'jam' part of the threshold and door insert. Although these would hold the door panel just fine, when the rest of the sponson (i.e. the guns) was glued on it was just too heavy.

So put a bigger, more powerful magnet on top the jam from under the track-guard (you can see the silvery semi-circle in the pic above), and although this would hold it, it still wasn't stable enough. So, I added another of the bigger magnets on the back of the door itself, and this seems to do the trick rather well.


And here is a snap-shot of both sponsons staying on the sides of the tank. BTW, I had to tear apart and rebuild the first sponson since I last posted due to how stiff the guns moved. It is now no longer an issue!

Ok, since my first blog post (Genesis) I've bought a new cam, and tonight I retook pics of the minis in that post. Here they are:


I intend to show-case more of my miniature collection as this blog continues. Enjoy!
-Joel


Wednesday, May 04, 2011

Pods to Drop and Lands to Raid (part 3 -and speed)

Here we are at the Land Raider's current state. I've been working on it off an on for over a week now, but this week so far I've devoted very little time to it due to work. Over on the right side of the pic is a Landspeeder Typhoon.

I painted up and inserted the headlights into the track guards. These things are annoying to paint right as the metal bars that shield the lamps catch all the paint, yet are themselves so hard to paint. I tried to use some clever to toning techniques with them but I'm afraid they just look wretched. I saw some examples today using solid colors for these that work well, and will try that with the thing I do with lights like this.


The first of the Hurricane Bolter sponsons. I'm finding these frustrated. Having seen the metal one, which the parts move very smoothly, I'm frustrated that these plastic parts are so stiff. So much so that the damned guns popped off when I was playing around with it later on.

And here is the Land Speeder. This is currently painted up to the 'mid-coat' standard. I have a few more layers to apply before it's done. I decided to bring it out and paint it along side the Land Raider so I can get them to the same standard, and get them both done at the same time. This will be one of three Land Speeder Typhoons that I have. This particular land speeder was not built by me, and if you look closely you can see some horrible mistakes. I found this on the top of a trashcan at a (now closed) local gaming store. It was beat to hell and clearly unloved. I adopted it and decided to 'polish the turd' so to speak and restore it to a prominent glory. It has served in most of my Space Wolves armies ever since.

So what do you think of the new camera?

-Joel

BTW, if you know me but don't know Corey, check out his blog:
http://dlwdg.blogspot.com/
It was the inspiration for doing this one!

Sunday, May 01, 2011

Pods to Drop and Lands to Raid (part two)

Ok, so the idea of applying the base coat of paint, and finishing off small details in tough to reach places, is turning out to be a good idea.
This is the assembled hull. This was a bit tricky to put together as I kept discovering that I had left a part off and needed to work it in before the glue sets. (Could GW not list the order in which things should go together in their kit instructions?) It was tricky due to the doors which you have to leave unglued if you want them to be able to open and close. Before putting the sides on, there is a hinge mechanism that needs to be assembled so the two doors open in unison. This was tricky as any misplaced dot of glue could botch it.


With Step 1 complete, it was onto Step 2. Step 2 includes the sliding door, and insert panel and the sides.


The first side is now on. As you can see, in order to secure and assure a gap-free join, I used rubberbands. This is a trick my Dad taught me in my 'golden years of model making' in the mid '80s when we used to build model planes together.


And here is the 2nd side being glued into place.


And here the sides are now fully joined and I have begun the application of the tracks. Note the piece to the left is the top hull, track guards and engine cover. It's all one piece! I painted up the lights that go into the front of the track guards. I haven't put this piece on yet, as for now I begun assembling the side sponsons. No pics yet of this either, as I just got a new camera (yes!) which I'm still learning to use.

More next time!

-Joel