 |
| The Venom is ready to fly! |
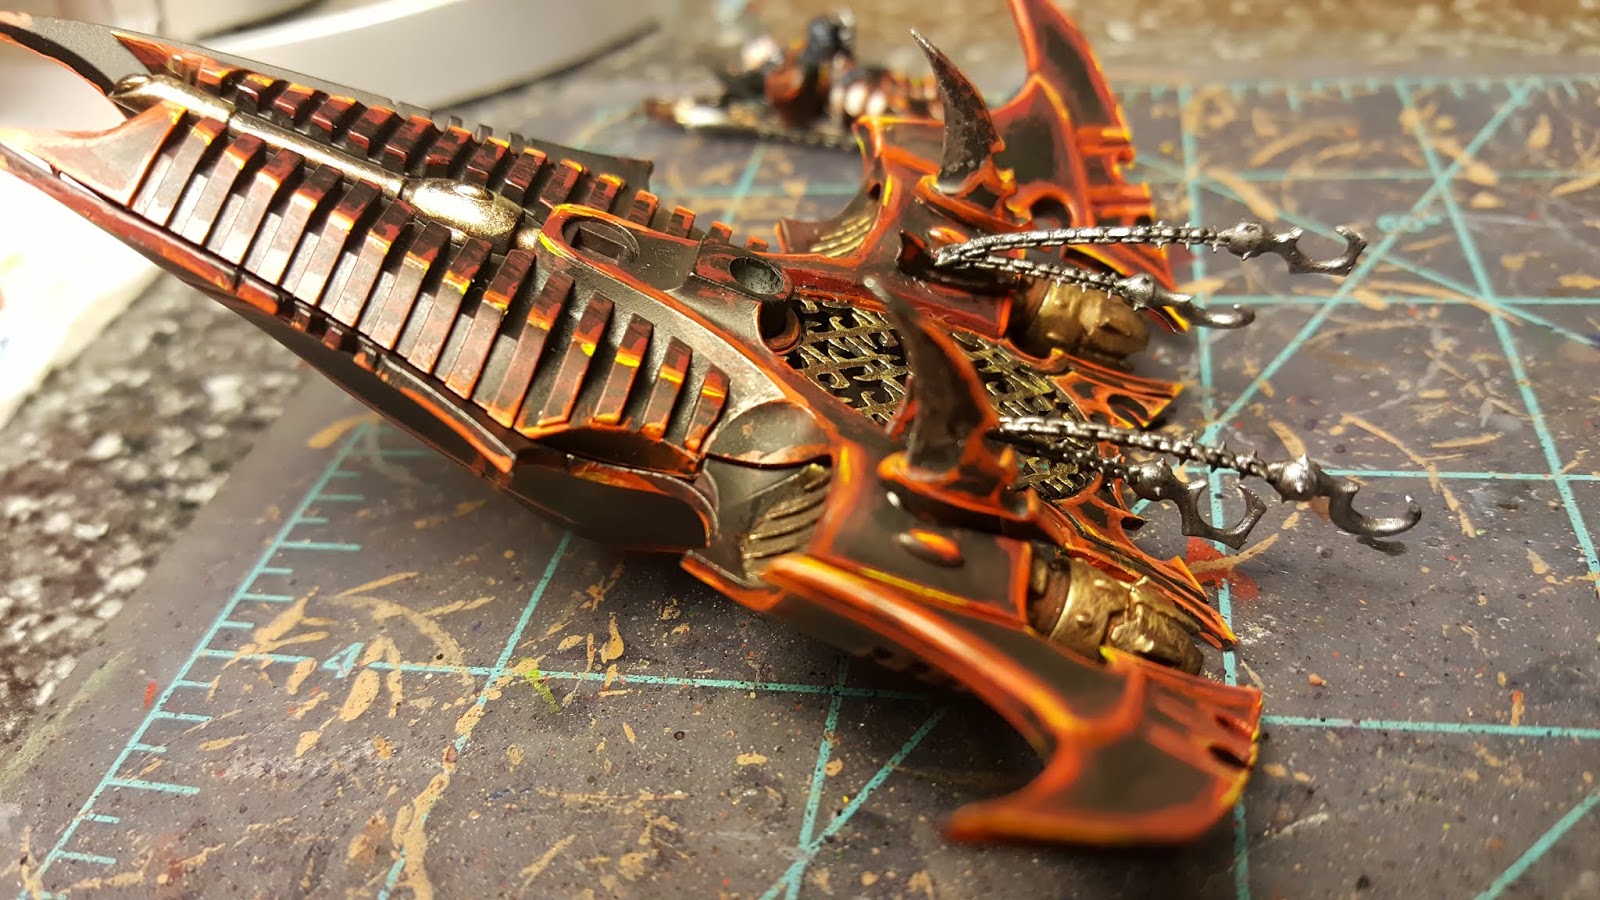
And here we are at the finish, but first let's check out the final completion stages of this model. After way too much time lost in a state of scrutiny, I settled on how I wanted to arrange the Bladevanes and the Chain-Snares.
 |
| Bladevanes attached. |
I also finished the interior HUD glyphs by filling them in using a delicately placed application of thinned Vallejo Game Color Livery Green. I think the results really pop and contrast wonderfully against the reds on this model.
 |
| Finiabed HUDs. |
Back to the bottom, and I decided to attach the Chain-Snares next to the Bladevanes. The in-game benefits are just too good to leave off of the model and they add a great sense of menace and malice.
 |
| Chain-snares attached. |
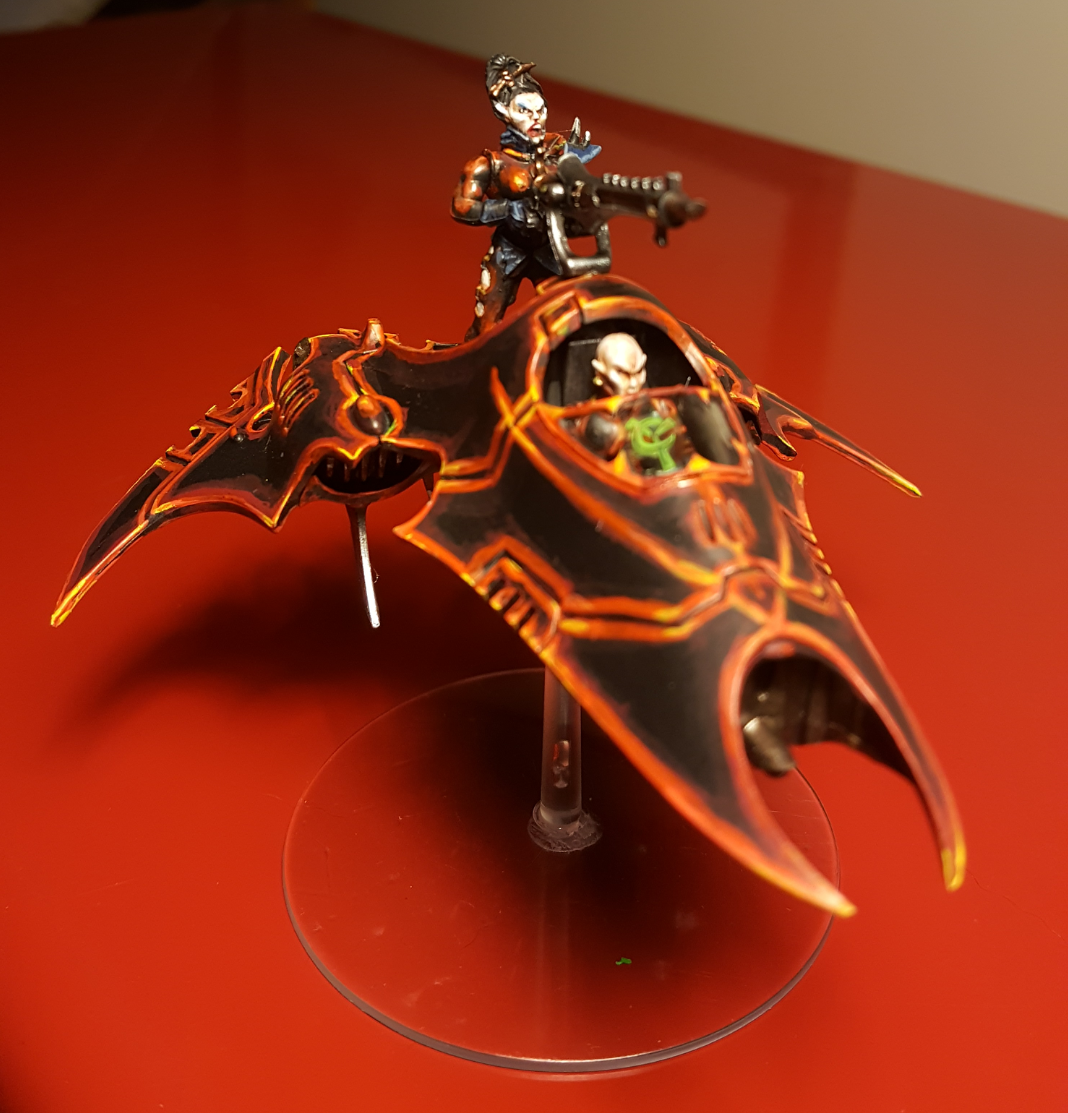
Then it was time to attach the gunner and the pintel mounted Splinter Cannon.
 |
| Gunner and gun glued into place. |
And there, it is essentially done! The only thing left to do was to attach the canopy, which I did using Testor's Clear Parts Cement. I have been holding on to this unopened bottle since the day I bought it, which was on the same day that I got the
Waaagh Plane five years ago.
 |
| Canopy attached. |
I am thrilled with how this came out and I am eager to do more with this army. I have a 2nd Venom which I think I will put the trophy rack on. I like the idea of having a few of these, each with subtle differences from each other.
 |
| View of the rear section. |
The only concern I have with this thing, other than storage which I think won't be that big of a deal, is the flight stand. I thought it would hold the model on it's own but it doesn't do a very good job of this. I am probably going to have modify it somehow with magnets.
 |
| Ready to fly out and catch some slaves. |
I wanted to take some shots outside in the natural light and in the moss, but the weather has not been cooperative, so I hope these pics on the Red Tool Box Of Judgment do it justice.
Thanks again for your support.


4 comments:
Looks FANTASTIC!!! When can you paint mine?
Sure!
Looks great, love the paint scheme! Well done!
Thanks Joe, I look forward to doing more with this army!
Post a Comment