 |
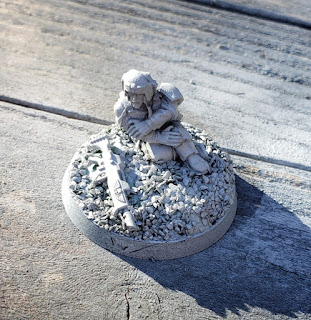
| Wounded Guardsman Objective. |
After a few games of Warhammer 40,000 9th edition it has became apparent that I needed to make some proper Objective Markers. There are some that I started many years ago using the 3rd Edition Space Hulk objectives that I just never finished. Digging them out and polishing them off shouldn't be too hard... I just got to remember where they're at... so in the meanwhile I had an idea to use this old Cadian casualty.
 |
| A gathering of bitz. |
Simple concept, wounded Guardsman with com kit. He has probably radioed out and is holding tight (and holding back the blood) for help to arrive. Pretty simple piece and tells it's own snippet of a story.
 |
| Making a mound from greenstuff. |
After gluing the two bases together I applied some green stuff to smooth out the harsh separation between the two bases. This makes it appear as it this Cadian fellow is on a small incline and is ever so slightly elevated above the battlefield.
Next came the grit then the primer.
 |
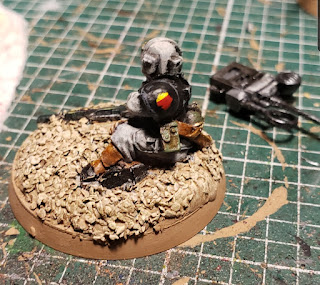
| Ah, those long Autumn* shadows. |
And then the base coats were applied. I followed the exact steps I used to get my
old Cadians 'battle ready' this past summer. And the steps I took on their
middle stages. But I was going for a 'parade ready' look so I bit more work was ahead for me.
 |
| Basecoats. |
Once I was happy with the final scheme it was time to add a decal to the left shoulder pad. First I painted on the divided circle. I matched this with those
Cadians I painted ages ago. Then I applied the classic regimental squad ID decal. I love this so much better than the current decals.
 |
| Under colors for the regimental badge. |
I was happy that the decal was on good I sealed the model with flat varnish. It's a metal miniature after all and chips and dings are not welcome.
 |
| Finished and sealed. |
Grass tufts were added to complete the scene.
 |
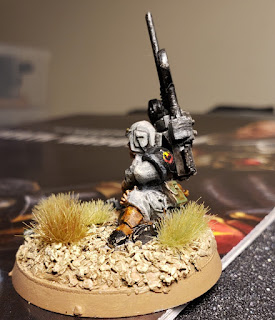
| Backside of the model. |
I was very tempted, like I had the paint-pot open and ready to dip in a brush, to add some Blood For The Blood God to this chap but I decided at the last second that gore at that level just wasn't necessary for this piece. He's hurt enough I think.
 |
| Finished and ready for evac. |
And there we have it, a completed Objective Piece. Now I need to come up with at least 5 more...
*Yeah, I started this in Autumn, dabbled on it in the Winter and finished it in the Spring. Sometimes I just pick and poke at these things.


8 comments:
Love that he’s in the original RT Necromunda regiment colours! Nicely done sir
And I’ve no idea why my phone signed me out? - Dai
It happens to me too. It's weird when I specifically responding to something Cheef calls me out on over on his blog and my sparky response is posted as 'Anonymous'. So yeah, I feel ya...
I love the extra little bit of elevation you gave him. Great job!
Great job. Having trouble with signing in Blogger recently to give comments, glad it’s back working now. Love the Objective Marker, I’ll steal the two base method for some characters that need some height. Ta
Siph, I've been using the two base method for awhile now. Specifically on old (really old!) Terminators.
I like that. Off to look up the rest of your guard.
Wow. Your brother had guard as well ? I'm wondering how many wounds you can put on the table in one troops choice with that ancient codex...
And thinking about the actual company/platoon/squard badges on individual guardsmen; whislt I agree that it's absolutely flufftastic, one strong reason (for me anyway) is that when I pack them away, they are packed with all the sergeats together, all the vox ops together, all the special weapons together by type and then all of the riflemen togeather. So when I take them out of the case, I can do it for the formation (army list) I'm putting on the table, as opposed to being restricted to the single build if they're grouped up by their badges.
Post a Comment